Valensole lavender photography 2026 Guide
Master Valensole lavender photography 2026 with our expert tips on composition, timing, and essential gear for stunning shots.
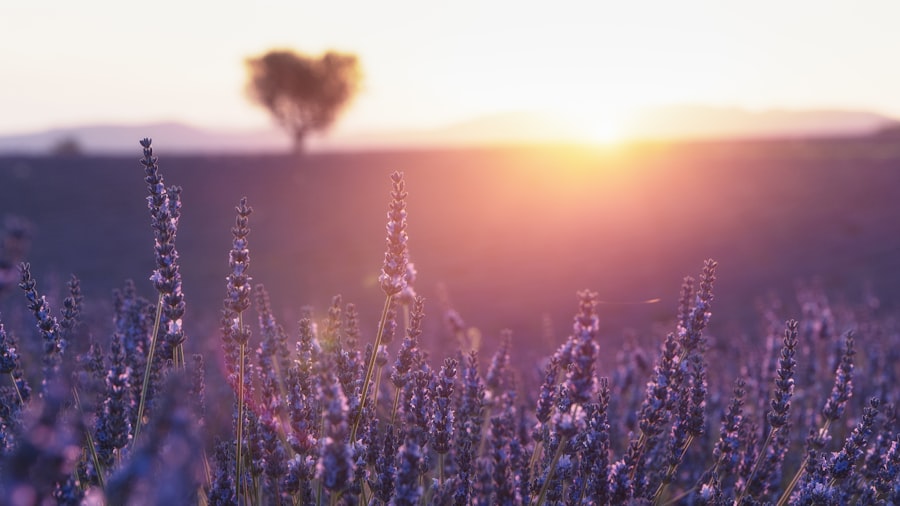
Planning your dream trip to the south of France requires the ultimate Valensole lavender photography 2026 guide to help you capture those endless purple rows like a seasoned professional. I still remember my very first trip to the Plateau de Valensole years ago. I arrived at sunrise, bubbling with excitement, only to walk away with flat, muddy-looking images that looked nothing like the vibrant postcards I had dreamed of. My camera was set to auto, the harsh morning light washed out the rich purples, and my composition was a cluttered mess. But don't worry, because today I am going to coach you through every step of the process so you can avoid my early mistakes and make your 2026 images absolutely breathtaking!
Why Valensole Lavender Photography 2026 is Your Next Big Creative Milestone
There is something magical about standing in front of a blooming lavender field in Provence. The scent of lavender fills the warm summer air, bees hum a gentle lullaby, and the visual symmetry of the rows creates a perfect natural canvas. However, capturing this beauty on a digital sensor requires a mix of technical knowledge and artistic vision.
The secret is understanding how your camera sees light compared to how your eyes see it. In 2026, camera sensors are more powerful than ever, but they still need your guidance to render colors accurately. This guide will teach you how to master your camera settings, compose your shots with intention, and edit your files to bring out that dreamy, romantic glow.
The Essential Gear Checklist for Provence
First, let's look at the gear you need to pack in your camera bag. You do not need the most expensive camera on the market, but having the right tools will make your Valensole lavender photography 2026 experience much smoother and more enjoyable.
Must-Have Gear for the Fields
- A Reliable Camera Body: Whether you shoot with a mirrorless system or a traditional DSLR, ensure you know how to access manual controls. If you are looking to upgrade, check out the latest full-frame sensors on the Sony Official Site or explore the robust color science on the Canon Official Site.
- A Wide-Angle Lens: A 16-35mm or 24-70mm lens is perfect for capturing the vastness of the fields and those leading lines that stretch to the horizon.
- A Fast Prime Lens: A 50mm or 85mm lens with a wide aperture (like f/1.8 or f/1.4) is essential for creating beautiful background blur.
- A Sturdy Tripod: Essential for sharp shots during the low-light conditions of sunrise and sunset.
- A Circular Polarizing Filter: This magic tool cuts down on glare from the shiny lavender leaves, making the purples look incredibly saturated and rich.
The Golden Rule of Lavender Photography: Always shoot in RAW format rather than JPEG. While JPEG files are compressed and pre-processed by your camera, RAW files preserve all the pure data captured by your sensor. This gives you the ultimate control to rescue highlights and shadows later during editing without losing image quality.
Mastering Camera Settings: Jargon Made Simple
Now try this: let us demystify the technical settings that will elevate your Valensole lavender photography 2026 portfolio. Don't let the jargon scare you; it is actually very simple once you break it down.
ISO: This measures your camera sensor's sensitivity to light. A lower number, like ISO 100, means less noise (grain) and the cleanest image quality. Keep this as low as possible, especially when using a tripod.
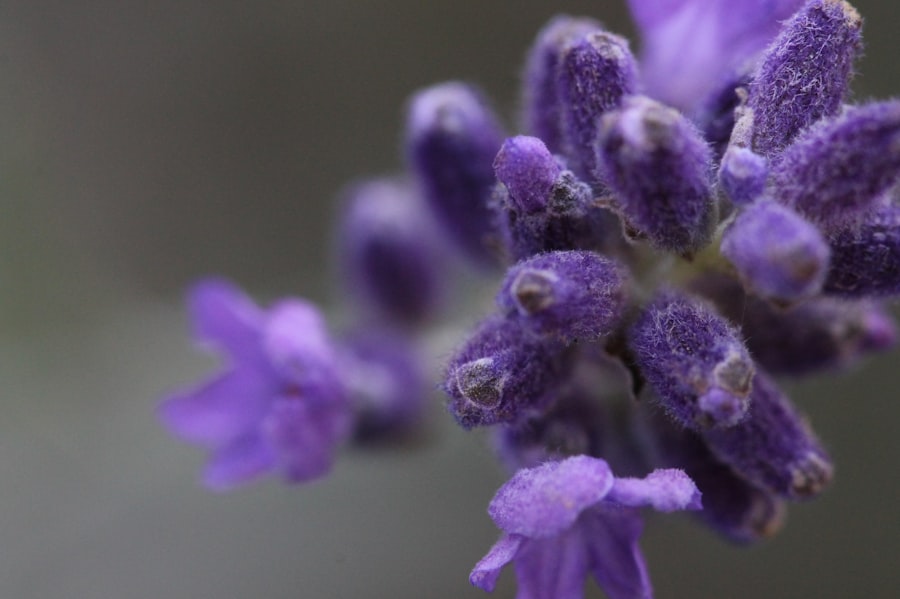
Bokeh: This Japanese term refers to the out-of-focus, blurry parts of your image. To get that creamy, soft background behind a single sprig of lavender, use a wide aperture like f/2.8 or f/1.8. This shallow depth of field isolates your subject beautifully.
Exposure Compensation: When you point your camera at bright skies or dark purple fields, the internal light meter can get confused. Use the exposure compensation dial (the little +/- button) to manually brighten or darken your image to match what your eyes actually see.
Recommended Settings for Golden Hour
- Shooting Mode: Manual (M) or Aperture Priority (A/Av)
- ISO: 100 to 200 for maximum image clarity
- Aperture for Landscapes: f/8 to f/11 (keeps the entire field sharp from front to back)
- Aperture for Detail Shots: f/1.8 to f/2.8 (creates gorgeous bokeh)
- White Balance: "Shade" or "Cloudy" to warm up the golden sunset tones
Step-by-Step Guide to Composing Your Shots
The secret is using the natural geometry of the fields to guide your viewer's eye through the frame. Simply pointing and shooting will result in a chaotic, messy photo. Follow this step-by-step method to create powerful, balanced compositions during your Valensole lavender photography 2026 journey.
Step 1: Find Your Leading Lines
Walk slowly along the edges of the fields and look down the rows. The lavender plants are planted in perfect, curving lines. Align your camera so these rows act as leading lines, starting from the bottom corners of your frame and drawing the viewer's eye toward the horizon.
Step 2: Apply the Rule of Thirds
Imagine your viewfinder is divided into a grid of nine equal rectangles. Place the horizon line on either the top third grid line (if the lavender field is your main subject) or the bottom third grid line (if you have a spectacular, colorful sunset sky). Place interesting elements, like a lonely stone cottage or a single olive tree, at the intersection points of these grid lines.
Step 3: Get Down Low
Don't just shoot from eye level! Crouch down, or even place your camera on the ground between the rows. Shooting from a low angle makes the lavender plants look larger, grander, and more immersive. It fills the foreground of your frame with beautiful purple textures.
Before & After: How I Saved a Failed Photo
Let me share a quick story from my personal archives to show you how a few simple adjustments can completely transform your Valensole lavender photography 2026 results. On my second trip, I found a gorgeous stone cottage surrounded by vibrant purple rows. I snapped a photo at midday, but when I looked at the screen, I was deeply disappointed. The bright overhead sun created harsh, dark shadows under the plants, the sky was a washed-out white, and the lavender looked gray instead of purple.
To fix this, I didn't pack up and go home. Instead, I waited patiently for the golden hour just before sunset. I adjusted my composition by getting closer to the ground, using a single lavender sprig to block the bright, direct sun and create a beautiful lens flare. I lowered my ISO to 100, set my aperture to f/16 to turn the sun into a beautiful starburst, and dialed my Exposure Compensation down by -0.7 to protect the colorful highlights in the sky. The final RAW image was a masterpiece of warm gold and deep violet, which I easily polished later using basic adjustments in Adobe Lightroom Tutorials.
Final Tips for Your 2026 Adventure
First, let's look at timing. The lavender on the Valensole plateau generally blooms from mid-June to mid-July. By late July, the harvesting begins, so timing your trip is crucial for the best Valensole lavender photography 2026 experience. Aim for the last week of June or the first week of July to see the fields at their peak color.
Now try this: when you arrive at a location, take five minutes to just look around without your camera. Observe how the light hits the plants, feel the breeze, and plan your shots. This mindful approach will lead to more thoughtful, creative, and emotionally resonant images. Don't forget to respect the local farmers by staying on the designated paths and never picking or stepping on the lavender. Happy shooting, and I cannot wait to see your stunning 2026 portfolio!
Frequently Asked Questions
When is the best time in 2026 to photograph Valensole lavender fields?
Peak bloom usually occurs from mid-June to mid-July, with the best light during sunrise and sunset golden hours.
Which specific locations in Valensole offer the most photogenic lavender fields?
The plateau de Valensole near the villages of Puimoisson, Sainte-Croix-de-Verdon, and the iconic view over the Abbey of Senanque provide classic foreground and background scenery.
What camera gear is essential for lavender landscape photography?
A camera with a 24-200mm lens covers wide landscapes and compressed perspectives; a tripod is useful for low-light sunrise shots.
Are there any photography rules or regulations for visiting the fields in 2026?
Stay on designated paths or edges to avoid damaging plants; often commercial shoots require permits, but casual photographers may share freely as long as they respect the property.
What time of day provides the best natural lighting for lavender shots without shadows?
Early morning from 6:30 to 8:30 AM offers diffused warm light avoiding harsh midday sun that can bleach the purple hues.

Camille Bernard shares travel photography tips for every kind of traveller, from phone snapshots to full kits. She breaks down light, composition and timing so you come home with photos that actually capture how a place felt.
💬 Comments (0)
No comments yet. Be the first!