Patagonia Mountain Photography 2026 Guide
Master Patagonia mountain photography 2026 with our expert guide to capturing dramatic alpine peaks and unpredictable weather.
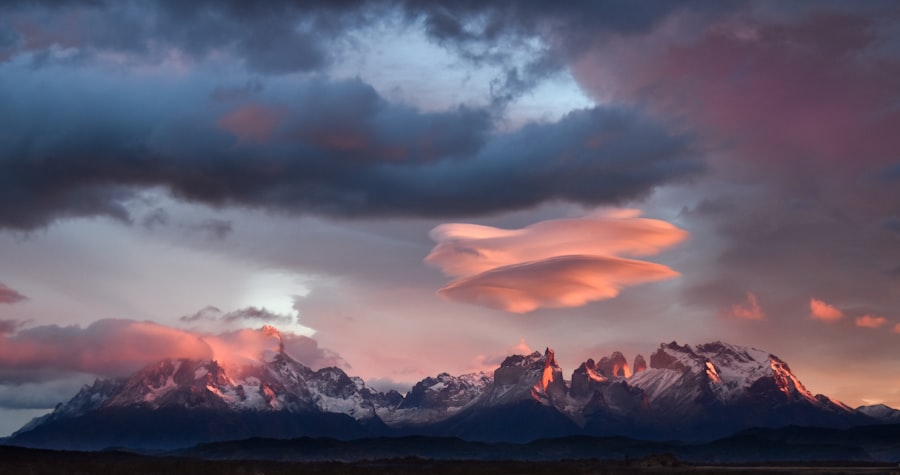
If you are planning the ultimate visual adventure, this Patagonia mountain photography 2026 guide will help you capture the raw, windswept beauty of South Americas most dramatic peaks. I will show you how to transform your travel snapshots into gallery-worthy masterpieces. Whether you are aiming your lens at the jagged needles of Cerro Chalten or the monoliths of Torres del Paine, the wild weather of 2026 demands both technical preparation and creative adaptability. Grab your camera, and let us embark on this journey together.
The Magic of Patagonia Mountain Photography in 2026
There is a unique thrill to standing before these ancient granite towers as the first morning light turns the cold rock into burning charcoal. To succeed with your Patagonia mountain photography 2026 goals, you must understand that these landscapes are alive. The weather changes in seconds, meaning you need to know your camera gear inside and out. I want you to feel confident when the wind is howling at fifty miles per hour and the clouds are parting to reveal a golden peak.
The secret is preparation. In 2026, camera technology gives us unprecedented dynamic range, but the core principles of composition and exposure remain the same. We will focus on capturing the scale of these massive mountains, using foreground elements to lead the eyes of your viewers into the vast Patagonian wilderness.
My Hardest Lesson: The Ghost of Cerro Torre
Let me share a quick story about a massive mistake I made during my early travels. I had hiked four hours in the dark to catch the sunrise at Laguna Torre. When the sun hit the peak of Cerro Torre, I was so excited that I just started clicking away. I did not check my settings. I shot everything in JPEG format, thinking I would save space on my memory card.
When I got back to my cabin, I realized my mistake. The bright snow on the glacier was completely blown out to pure white, and the dark shadows in the forest were pitch black. Because I shot in JPEG, the camera had compressed the image file, throwing away precious visual data. I could not rescue the highlights or the shadows. If I had shot in RAW, which preserves all the uncompressed data from your cameras sensor, I could have easily recovered those details during editing. Now try this: always switch your camera to RAW format before you even step onto the trail. It gives you the ultimate creative control when processing your files in programs like Adobe Lightroom.
The Golden Rule of Mountain Photography: Always expose for the highlights. It is much easier to recover dark shadows in your editing software than it is to fix blown-out, overexposed whites in snow, clouds, and ice.
Essential Gear and Recommended Camera Settings
To master Patagonia mountain photography 2026, you need to configure your gear to handle extreme contrast and fast-moving clouds. Let us look at the exact settings you should dial into your camera to get the best results in the field.
Must-Have Gear for the Patagonian Trail
- A Sturdy Carbon Fiber Tripod: The winds in Patagonia are legendary. A flimsy tripod will shake, causing blurry photos.
- Circular Polarizer (CPL) Filter: This magic piece of glass cuts glare on alpine lakes and makes the white clouds pop against the deep blue sky.
- Lenses: Bring a wide-angle lens (like a 16-35mm) for grand landscapes, and a telephoto lens (like a 70-200mm) to isolate mountain peaks. You can check out the latest high-performance lens options on the official Canon or Sony camera specs pages.
- Microfiber Cloths: Keep these in an easy-to-reach pocket. Glacial spray and rain will spot your lens constantly.
Recommended Camera Settings for Sharp Landscapes
- Image Format: RAW (never JPEG for landscape work).
- ISO: 100 or your cameras base ISO to ensure the cleanest image with zero digital noise.
- Aperture: f/8 to f/11. This is the sweet spot for most lenses, keeping both your foreground rocks and distant peaks sharp.
- Focus Mode: Single-point autofocus, aimed about one-third of the way into your scene.
Step-by-Step Guide to Capturing Your First Masterpiece
Now, let us walk through the actual process of setting up and taking a stunning shot. Follow these steps when you find your perfect view to ensure your Patagonia mountain photography 2026 portfolio stands out from the crowd.
Step 1: Find Your Anchor Point
First, let us look at the composition. Do not just point your camera at the mountain and shoot. Look for an anchor point in the foreground. This could be a bright red bush, a rushing stream, or a piece of deadwood. Use the Rule of Thirds by imagining a grid over your viewfinder. Place your foreground anchor on one of the bottom intersections, and place the mountain peak on one of the top intersections.
Step 2: Manage the Light with Exposure Compensation
The bright snow on Patagonian peaks can trick your cameras light meter, making your photos look dark and gray. Locate your Exposure Compensation button (the small button with the plus and minus signs). If the snow looks too dark, turn the dial toward the plus side (+0.3 or +0.7) to tell your camera to make the image brighter. Keep an eye on your histogram to make sure you do not push the whites off the right side of the graph.
Step 3: Play with Depth of Field
While we usually want everything sharp from front to back, sometimes you want to create a dreamy look. If you find a beautiful wildflower in the foreground, open your aperture to f/2.8 or f/4. This creates a shallow depth of field, resulting in a beautiful, soft background blur known as Bokeh. Your flower will stand out sharply while the massive mountains fade into a soft, romantic background.
Before and After: The Power of Dynamic Editing
Let us paint a mental picture of what is possible when you apply these Patagonia mountain photography 2026 techniques. Imagine your "Before" photo: a straight-out-of-camera shot of Mount Fitz Roy. The sky looks a bit washed out, the shadows of the forest are very dark, and the overall image looks flat and uninspiring because you shot with safe, neutral settings.
Now, look at the "After" photo. Because you shot in RAW, you import the file into your editor. You boost the shadows to reveal the rich textures of the green beech trees. You lower the highlights to bring back the golden morning glow on the granite peaks. Finally, you add a touch of contrast, and suddenly, the image matches the dramatic majesty of the moment you stood there in person. If you want to learn more about balancing these elements, check out the comprehensive guides on DPReview.
Conquering the Patagonian Elements in 2026
Don't forget to protect your gear while chasing the perfect shot. The wind can carry fine glacial dust that can scratch your lens elements, and sudden rainstorms can ruin sensitive electronics. Always keep your camera in a weather-sealed bag when you are walking between spots.
As you plan your Patagonia mountain photography 2026 adventure, remember that patience is your most valuable asset. The clouds might cover the peaks for hours, but when they finally break, the light will be spectacular. Keep practicing your settings, experiment with the Rule of Thirds, and be ready to capture the wild spirit of the south. You have got this, and I cannot wait to see the incredible images you bring home!
Frequently Asked Questions
What is the best time of year for Patagonia mountain photography in 2026?
The optimal window is from late September to early April, with March and April offering the most stable weather and vibrant autumn colors. Avoid the peak winter months (June-August) when many trails are inaccessible.
What camera gear is essential for capturing Patagonia's peaks in 2026?
A weather-sealed camera body, a wide-angle zoom (16-35mm), a telephoto lens (70-200mm) for compression shots, and a sturdy tripod are must-haves. Also pack extra batteries and filters, as cold winds drain power quickly.
Which locations in Patagonia are must-visit for mountain photography in 2026?
Torres del Paine's towers, Grey Glacier, and Cuernos del Paine are iconic, while Fitz Roy and Cerro Torre in Los Glaciares National Park offer dramatic sunrise shots. For fewer crowds, explore the lesser-known Cerro Castillo area.
How do I handle Patagonia's unpredictable weather for photography?
Always shoot in RAW and use exposure bracketing, as light can change in seconds. Keep your gear in a waterproof bag and use a lens cloth to wipe off sudden rain or snow, and be ready to wait out storms for dramatic breaks.
Are there any new photography regulations or permits for Patagonia in 2026?
Yes, some national parks now require advance permits for drone use and certain sunrise spots, so check official park websites before your trip. Commercial photography may also need a separate license, but casual shooting is generally free.

Matthias Weber digs into the craft of travel photography, from camera settings to editing. He explains the technical side in plain language so you can spend less time fiddling with dials and more time shooting.
💬 Comments (0)
No comments yet. Be the first!