Redwood Nature Photography 2026 Guide
Master Redwood nature photography 2026 with our expert guide on capturing scale, misty forest light, and macro details.
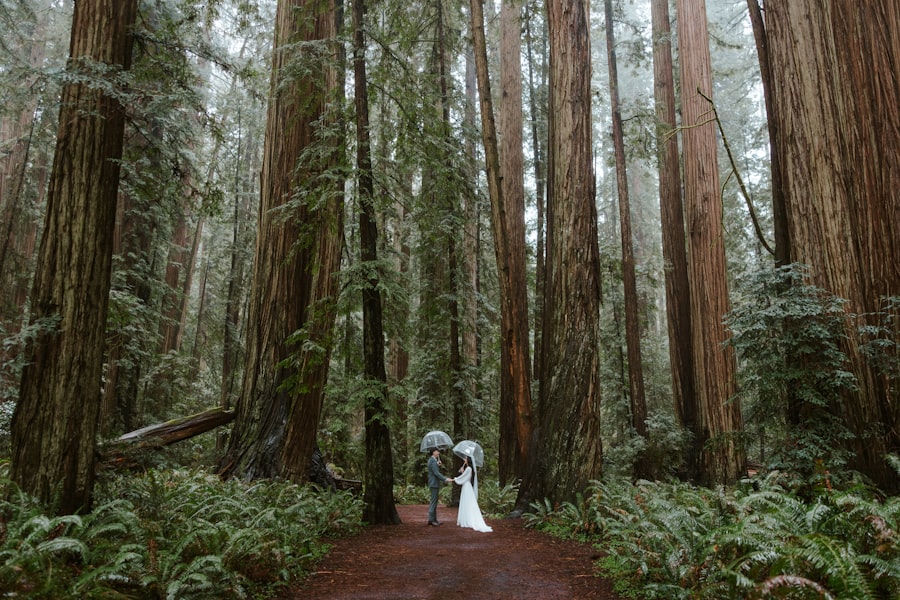
Mastering Redwood nature photography 2026 is one of the most rewarding challenges you can undertake as an outdoor photographer this year. There is nothing quite like standing beneath a canopy of thousand-year-old giants, watching the morning fog weave through massive trunks. But if you have ever tried to capture this magic on camera, you know how easily those towering trees can end up looking like dark, muddy sticks or overexposed, washed-out messes. In this 2026 guide, I will show you how to master the tricky forest light and walk away with breathtaking, professional-grade images.
The Magic and Challenge of the Redwood Forest
First, let's look at why these ancient forests are so notoriously difficult to photograph. The main challenge is contrast. Your camera sensor cannot see the world the way your eyes do. While you can easily see the bright sky through the leaves and the dark ferns on the forest floor at the same time, your camera struggles to balance these extremes. This is called dynamic range.
When I first started shooting in the Pacific Northwest, I made a classic mistake. I went out on a beautiful, bright, sunny afternoon. I pointed my camera up at a massive redwood tree, framed a perfect composition using the Rule of Thirds (placing the main trunk along the left vertical third of the frame), and pressed the shutter. The result was awful. The sky was a blinding white blob, and the beautiful bark of the redwood was completely black. I had no idea how to balance the light.
The secret is learning how to work with the forest's natural elements rather than fighting them. By shifting my shooting schedule to overcast, foggy mornings and mastering my camera settings, I transformed my flat, disappointing snapshots into moody, atmospheric masterpieces. Let's make sure you can do the same on your next trip.
The Golden Rule of Redwood Nature Photography 2026: Never shoot in direct midday sun. Seek out heavy overcast skies, early morning mist, or late afternoon fog to naturally soften the light and bring out the deep, rich colors of the forest.
Essential Camera Gear for the Giants
You do not need the most expensive camera on the market to capture stunning images, but having the right tools will make your job much easier. When preparing your camera bag for a day under the canopy, here is what you should pack.
Must-Have Gear List
- A Sturdy Tripod: Because the forest floor is very dark, you will need to use slow shutter speeds. A solid tripod is non-negotiable to prevent camera shake.
- A Wide-Angle Lens: A lens in the 16mm to 24mm range will help you capture the immense scale of the trees from the ground up.
- A Circular Polarizer: This filter screws onto the front of your lens. It cuts down on the glare from wet leaves and makes the green ferns look incredibly vibrant.
- A Rain Cover: Redwood forests are damp, wet environments. Protect your gear from dripping condensation and light drizzle.
If you are looking to upgrade your camera body or lens before your trip, I highly recommend checking out the latest weather-sealed options on the official Canon or Sony website to ensure your gear can handle the damp forest environment.
Mastering Your Camera Settings
To get the most out of your Redwood nature photography 2026 sessions, you must step away from Auto mode. Do not worry, I will walk you through the settings step by step. We will focus on key concepts like ISO (your camera's sensitivity to light), Exposure Compensation, and choosing the right file format.
First, always shoot in RAW rather than JPEG. A JPEG file is compressed by your camera, throwing away valuable color and light data. A RAW file, on the other hand, saves all the data captured by your sensor. This gives you maximum control when you edit your photos later using tools like Adobe Lightroom, allowing you to easily rescue dark shadows and bright highlights.
Recommended Settings for Forest Photography
- Image Format: RAW (to preserve maximum details in shadows and highlights).
- ISO: 100 to 400 (keep this number low to avoid digital noise and grain in your dark forest shadows).
- Aperture: f/8 to f/11 (this is the sweet spot for maximum sharpness throughout the entire landscape).
- Focus Mode: Single-point manual focus or single-shot autofocus, locked on a prominent tree trunk.
Now try this: if you find that the bright sky peeking through the canopy is still blowing out your images, use your Exposure Compensation dial. Turn it down to -0.7 or -1.0. This tells your camera to intentionally underexpose the image. It is much easier to bring back detail from dark shadows in a RAW file than it is to fix a sky that is completely blown out to pure white.
Step-by-Step Guide to Capturing Redwood Magic
Now that you have your gear ready and your settings dialed in, let's walk through the actual process of taking a stunning photo in the field. This step-by-step method will help you build your confidence and improve your shot success rate.
Your Step-by-Step Field Guide
- Find Your Anchor: Walk off the main path and look for a strong foreground element, like a fallen mossy log or a cluster of bright green sword ferns. This gives your viewer a place to start their visual journey.
- Set Up Your Tripod: Position your tripod low to the ground. Shooting from a low angle looking up makes the giant redwoods look even more imposing and majestic.
- Compose Using the Rule of Thirds: Imagine your screen is divided into a nine-box grid. Place the most prominent redwood trunk along one of the vertical lines, and keep the horizon line along the bottom third of the frame.
- Manage Your Depth of Field: If you want to capture a soft, blurry background behind a single fern or wildflower, use a wide aperture like f/2.8 to create a beautiful, creamy Bokeh effect. If you want the whole forest sharp, stick to f/11.
- Use a Shutter Release: Even the gentle press of your finger on the shutter button can cause tiny vibrations that blur your photo. Use a two-second timer delay or a remote shutter release to ensure your image is pin-sharp.
Before and After: Fixing a Flat Forest Photo
To help you visualize how these techniques come together, let's look at a common scenario. Imagine you are standing on a trail. You take a quick handheld photo at ISO 3200, f/4, in JPEG format. The resulting image looks grainy, the greens look muddy, and the highlights are totally blown out. It looks flat, lifeless, and disappointing.
Now, let's fix it using the Redwood nature photography 2026 techniques we just discussed. You mount your camera on a sturdy tripod. You switch your format to RAW, drop your ISO to 100 to eliminate all grain, and set your aperture to f/11 for edge-to-edge sharpness. You notice the sky is too bright, so you adjust your Exposure Compensation to -1.0 to protect the highlights. You wait for a gentle mist to roll in, softening the harsh shadows. When you press the shutter using a two-second delay, the magic happens. The final image has deep, rich green ferns, sharp bark textures, and a mysterious, moody atmosphere. That is the power of slowing down and using the right techniques.
Take Your 2026 Photography to the Next Level
As you plan your next outdoor adventure, keep practicing these foundational skills. The key to mastering Redwood nature photography 2026 is patience. Spend time observing how the light changes throughout the morning, experiment with low composition angles, and do not be afraid of a little rain or fog. The most dramatic forest photos are always captured when the weather is less than perfect.
For more detailed technical reviews of the latest camera sensors and lenses that perform well in low-light forest environments, head over to DPReview to compare gear before you head out. Grab your tripod, set your camera to RAW, and go capture the quiet, majestic beauty of the redwoods this year. Your portfolio will thank you!
Frequently Asked Questions
What is the best time of year for redwood nature photography in 2026?
The best time is late spring to early summer (May-June) when fog creates dramatic light and the forest floor is lush with ferns and wildflowers. Autumn also offers warm, golden light with fewer crowds.
What camera settings are ideal for photographing redwoods?
Use a wide-angle lens, a small aperture (f/11-f/16) for deep depth of field, and a low ISO (100-400) to minimize noise in shaded areas. A tripod is essential for sharp images in low light.
How can I capture the immense scale of the redwoods?
Include a human subject or recognizable object (like a backpack or car) in the frame to show perspective. Shooting from a low angle looking up also emphasizes their towering height.
Are there any special weather conditions I should watch for in 2026?
Expect this El Niño year to bring more rain and thicker coastal fog—perfect for atmospheric shots but requiring waterproof gear and lens protection.
What are the top locations for redwood photography in 2026?
Prairie Creek Redwoods State Park and the Tall Trees Grove in Redwood National Park offer some of the oldest, tallest trees with low foot traffic. For fewer crowds, try Jedediah Smith Redwoods State Park.

Matthias Weber digs into the craft of travel photography, from camera settings to editing. He explains the technical side in plain language so you can spend less time fiddling with dials and more time shooting.
💬 Comments (0)
No comments yet. Be the first!