Petra historic photography 2026 Guide
Master Petra historic photography 2026 with our expert guide to capturing the Treasury and Monastery in perfect light.
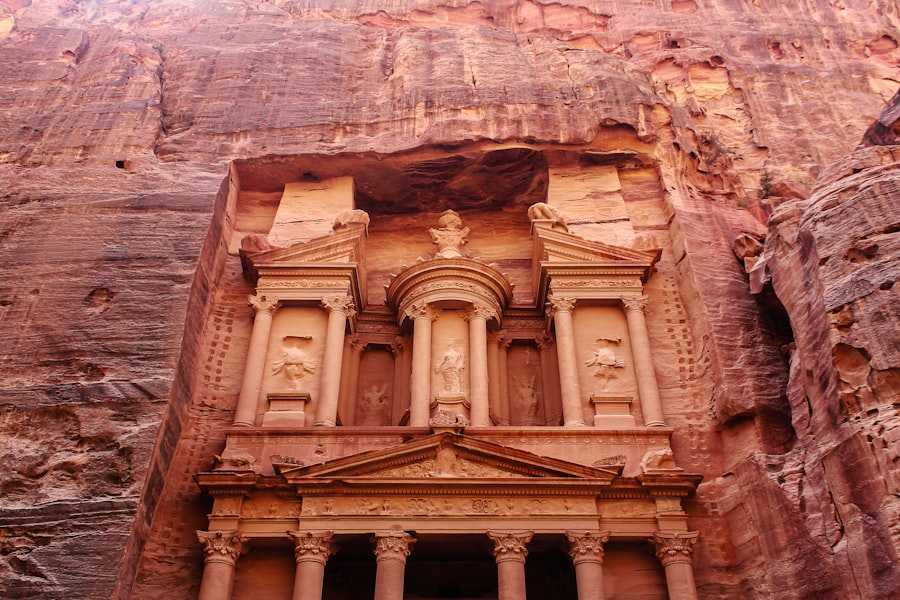
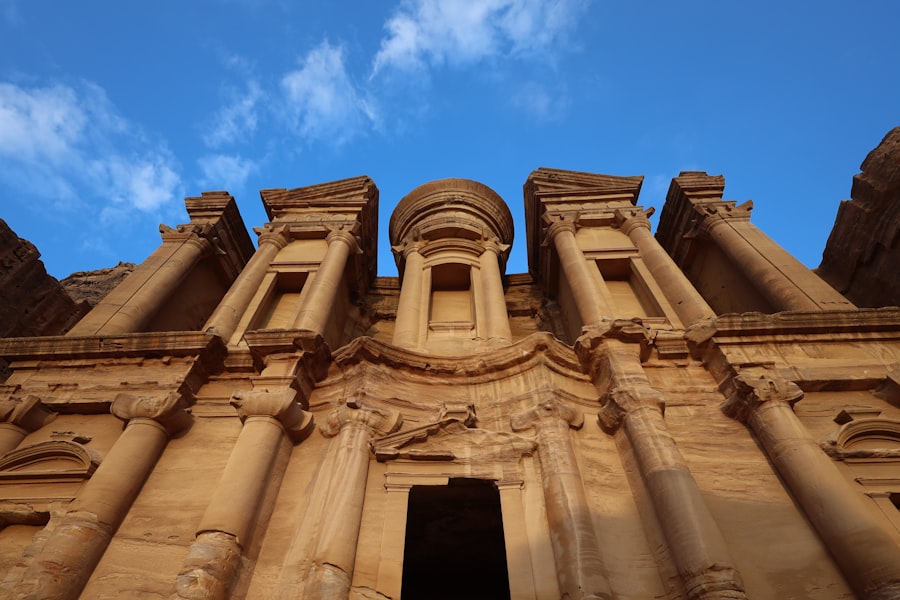
Mastering your Petra historic photography 2026 journey requires a blend of preparation, patience, and technical skill to capture Jordan's ancient rose-red city in its best light. As your photography coach, I am thrilled to guide you through this magical landscape. Whether you are aiming to capture the towering facade of the Treasury or the wind-swept heights of the Monastery, I will show you how to transform your travel snapshots into professional-grade historical portraits.
Why Petra Historic Photography 2026 Demands a New Approach
Capturing Petra is not as simple as pointing your camera and pressing the shutter. The deep sandstone canyons, known as the Siq, create extreme lighting contrasts that can easily trick your camera's light meter. In 2026, with advanced high-dynamic-range sensors becoming the standard, we have more power than ever to capture these details, but the fundamentals of composition and exposure remain your most important tools.
The secret is learning how to balance the brilliant Jordanian sun with the deep, cool shadows of the canyons. If you do not adjust your settings manually, your camera will likely overexpose the glowing rocks or underexpose the intricate carvings. Through this guide, we will unlock the exact techniques you need to make your images stand out on any platform.
The Gear and Camera Settings You Need for Petra
Before we step foot onto the dusty trails, let us talk about preparation. You do not need the most expensive camera on the market, but you do need to know how to use your gear effectively. I highly recommend visiting sites like the DPReview community to understand your camera sensor's dynamic range limits before you travel.
Recommended Gear for Petra Historic Photography 2026
- A Wide-Angle Lens: A 16-35mm lens is perfect for capturing the sheer scale of the Treasury from the narrow Siq.
- A Telephoto Lens: A 70-200mm lens helps you zoom in on distant cliff-side tombs and high carvings.
- Circular Polarizer Filter: This reduces glare on the sandstone and makes the blue desert sky pop.
- Sturdy, Lightweight Tripod: Essential for sharp shots during the early blue hour or the Petra by Night experience.
- Lens Cleaning Kit: The desert dust in Jordan is relentless; you will need to clean your glass frequently.
Must-Have Camera Settings
- File Format: Always shoot in RAW vs JPEG. RAW files preserve all the data your sensor captures, allowing you to recover shadows and highlights later in software like Adobe Lightroom.
- ISO: Keep your ISO as low as possible (ISO 100 or 200) to avoid digital noise, especially when shooting static historical monuments.
- Aperture: Use f/8 to f/11 for landscape shots to ensure sharpness from the foreground to the background. Use a wider aperture like f/2.8 to create a beautiful blurry background, known as Bokeh, for portraits of local bedouins.
- Exposure Compensation: Keep your finger near this dial. When the bright sky meets dark rocks, dial it down to -0.7 or -1.0 to prevent blowing out the highlights.
The Petra Golden Rule: Always expose for the highlights. It is much easier to recover dark shadows in your editing software than it is to fix a blown-out, pure white sky or sandstone wall.
Step-by-Step Guide to Shooting the Treasury
First, let us look at the most iconic shot: the Treasury (Al-Khazneh) emerging from the split in the Siq. This is where your Petra historic photography 2026 skills will truly be put to the test.
Step 1: Arrive Before the Sun
The gates open early. You want to be one of the first people walking through the Siq. Not only will you avoid the crowds of tourists, but the soft, indirect morning light bouncing off the canyon walls creates a warm, ethereal glow that harsh midday light destroys.
Step 2: Frame with the Rule of Thirds
Now try this: instead of placing the Treasury right in the middle of your viewfinder, use the Rule of Thirds. Place the towering canyon walls on the left and right vertical grid lines, leaving the Treasury framed perfectly in the center third. This creates a powerful sense of discovery, mimicking the actual experience of walking through the gorge.
Step 3: Manage Your Exposure
As you look through the Siq, the Treasury will be brightly lit while the canyon walls around you will be very dark. If you shoot in auto mode, your camera will make the Treasury look like a white, glowing blob. Switch to manual mode, set your ISO to 100, and adjust your shutter speed until the details on the Treasury facade are perfectly visible. Don't worry if the canyon walls look very dark; your RAW vs JPEG choice pays off here, as you can gently lift those shadows later.
Before & After: How I Saved a Ruined Treasury Shot
Let me share a quick story from my early days of travel photography. I remember standing in front of the Treasury, incredibly excited. I pointed my camera, left it on Auto JPEG mode, and clicked.
When I looked at the screen, I was devastated. The beautiful rose-red carvings were completely washed out, looking like pale yellow plaster. The sky above was a blinding white sheet, and all the intricate details of the upper urn were lost. The photo felt flat and lifeless.
The secret to fixing this was changing my entire approach. I switched my camera to record in RAW format, turned my mode dial to Manual, and lowered my ISO. I used Exposure Compensation to deliberately underexpose the image by one full stop. When I opened the RAW file in my editing software later, the colors were rich, the sky retained its soft blue hue, and I was able to bring out the golden textures of the stone. Your photos will look just as professional if you make these simple adjustments.
Advanced Composition and Creative Techniques
Once you have captured the classic shots, it is time to push your creative boundaries. The year 2026 is all about storytelling through your lens, and your Petra historic photography 2026 portfolio should reflect that.
First, look for leading lines. The ancient water channels carved into the sides of the Siq walls make perfect visual pathways that guide your viewer's eye straight toward your main subject. Use them to create depth and movement.
Next, don't forget to look for scale. The monuments of Petra are absolutely massive, but without a point of reference, viewers back home might not realize their true size. Try waiting for a lone traveler or a camel to pass in front of a tomb. By placing a human element near the bottom of your frame, you instantly highlight the grand scale of the ancient Nabataean architecture.
Finally, utilize creative framing. Look through cave openings, archways, or even the leaves of a wild fig tree to frame the distant tombs. This technique adds layers to your image, making the viewer feel like an active explorer uncovering a hidden world.
Processing Your Historical Masterpieces
Your shoot does not end when you pack away your camera. Post-processing is where the magic of your Petra historic photography 2026 journey is finalized. If you are new to editing, look up some beginner guides on the Adobe Lightroom Tutorials page to get familiar with the basic sliders.
When editing sandstone, be very careful with the saturation slider. It is incredibly easy to over-saturate the reds and oranges, making your photo look unnatural and cartoonish. Instead, try increasing the "Vibrance" slightly, which boosts the quieter colors without overpowering the image. Use the "Clarity" and "Dehaze" tools sparingly to bring out the rugged texture of the ancient carved stone, giving your final image a timeless, historic feel.
With these techniques, your Petra historic photography 2026 adventure will yield breathtaking, professional images that do true justice to this wonder of the ancient world. Keep practicing, watch your light, and enjoy every moment behind the lens!
Frequently Asked Questions
What is the best time of day for photographing Petra's Treasury?
Early morning (before 9 AM) and late afternoon (after 4 PM) offer soft, warm light that highlights the Treasury's intricate carvings.
Are tripods allowed inside Petra for photography in 2026?
Yes, tripods are permitted, but you may need a permit for commercial or long-term setups; check with the Jordan Tourism Board.
What camera settings work best for Petra's narrow Siq canyon?
Use a wide-angle lens with a small aperture (f/8 to f/11) to capture sharp details from the entrance to the sunlit end.
Can I use a drone for aerial photography at Petra in 2026?
No, drones are strictly prohibited without special permission from Jordan's government to protect the site's integrity.
How do I avoid crowds in my Petra photos?
Visit during the low season (summer months) or arrive at opening time (6 AM) to capture fewer tourists.

Camille Bernard shares travel photography tips for every kind of traveller, from phone snapshots to full kits. She breaks down light, composition and timing so you come home with photos that actually capture how a place felt.
💬 Comments (0)
No comments yet. Be the first!