Milford Sound Waterfall Photography 2026 Guide
Master Milford Sound waterfall photography 2026 with our expert guide to capturing moody, long-exposure New Zealand cascades.
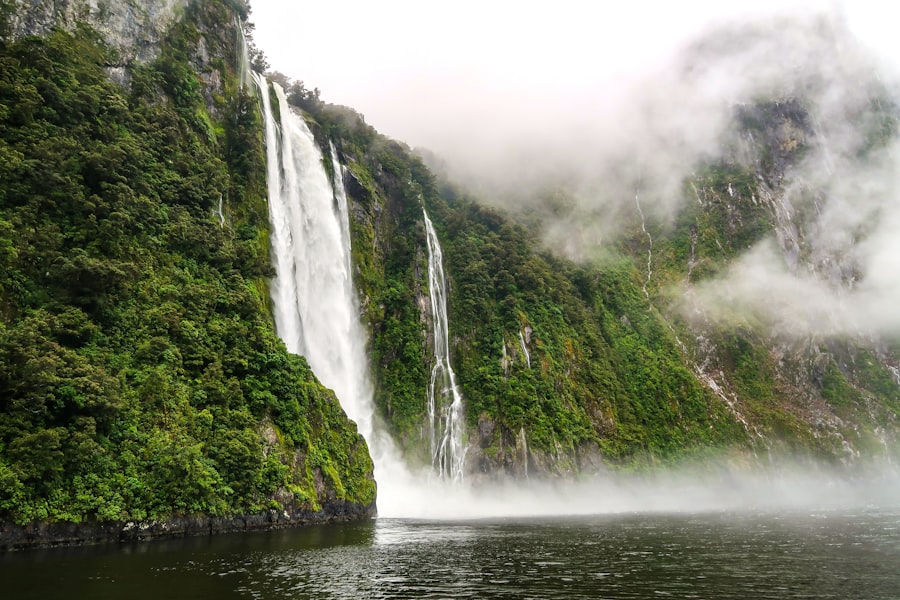
Mastering Milford Sound waterfall photography 2026 is your ticket to capturing the raw, untamed soul of New Zealand's Fiordland National Park. I will never forget my first trip to this majestic corner of the world. I stood before the towering Stirling Falls, my camera gear getting drenched, and I confidently pressed the shutter button. When I looked at the LCD screen, my heart sank. The image was a blurry, overexposed mess of white mist with no detail in the dark cliffside. My highlights were completely blown out, and the dramatic mood of the fiord was lost. But do not worry, because I learned from those mistakes, and in this guide, I will show you how to capture breathtaking, professional images of these cascading giants on your very first try.
Understanding the Light and Mist of Milford Sound
The secret is to embrace the moody, wet climate of the fiord rather than waiting for a sunny day. In fact, overcast and rainy days are your absolute best friends for Milford Sound waterfall photography 2026. Heavy cloud cover acts as a giant softbox in the sky, diffusing the harsh sunlight and preventing ugly, high-contrast shadows on the wet rock faces. When it rains, hundreds of temporary waterfalls appear along the sheer cliffs, creating a once-in-a-lifetime shooting environment.
However, shooting in these conditions presents a unique challenge: managing the dynamic range. Dynamic range is the difference between the brightest highlights (the rushing white water) and the darkest shadows (the wet, black volcanic rock). If you are not careful, your camera will try to average the exposure, leading to either pitch-black rocks or pure white, detail-free water. This is where your camera settings and a few technical tricks come into play to save your shot.
Essential Gear for Fiordland Waterfall Photography
Before we head out into the mist, let us look at the gear you need to pack. You do not need the most expensive camera on the market, but having the right tools will make your experience much smoother and protect your equipment from the elements.
Must-Have Gear List
- A Weather-Sealed Camera Body: Fiordland is one of the wettest places on Earth. A robust, sealed camera is essential.
- A Circular Polarizing Filter (CPL): This is non-negotiable. A CPL cuts down the glare on wet rocks and leaves, making colors look richer and more saturated.
- A Sturdy Tripod: To capture silky water movement, you will need to use longer shutter speeds, which requires a rock-solid base.
- Microfiber Cloths (Lots of them): You will be constantly wiping spray and mist off your lens element. Keep a dry cloth in an inside pocket.
- A Lens Hood: This physical barrier helps keep wind-blown mist off your glass while you compose your shot.
If you are looking to upgrade your setup before your trip, check out the latest weather-sealed bodies on the Sony Official Site or browse the professional lens lineups on the Canon Official Site to find gear that can withstand the heavy New Zealand rain.

Step-by-Step Guide to Camera Settings
Now try this step-by-step approach to dial in the perfect settings for your Milford Sound waterfall photography 2026 adventure. We will break down the jargon so you can shoot with confidence.
Step 1: Shoot in RAW, Not JPEG
First, let us look at your file format. Always set your camera to shoot in RAW instead of JPEG. A JPEG file is compressed by your camera, discarding valuable highlight and shadow data. A RAW file preserves all the uncompressed data captured by your sensor. This gives you maximum recovery power when editing in software like Lightroom to bring back details in the dark fiord cliffs and bright white water.
Step 2: Master Your ISO and Aperture
Keep your ISO as low as possible, ideally at ISO 100. ISO controls your camera sensor's sensitivity to light. A higher ISO allows you to shoot in darker conditions, but it introduces digital noise (graininess) into your shadows. For maximum image quality and sharpness, keep it low. Next, set your aperture to around f/8 or f/11. This sweet spot ensures a deep depth of field, keeping both the foreground rocks and the distant peaks perfectly sharp.
Step 3: Control the Shutter Speed
Your shutter speed determines how the water looks. If you want to freeze the powerful, crashing power of Bowen Falls, use a fast shutter speed like 1/1000th of a second. If you want that dreamy, silky, ethereal look, you need a slow shutter speed between 1/2 second and 2 seconds. Use your tripod to prevent camera shake during these longer exposures.
Photography Golden Rule: When shooting bright waterfalls against dark rocks, always check your histogram. Do not trust the LCD screen. If the graph is spilling off the far right edge, your highlights are blown out. Use your Exposure Compensation dial to lower the exposure by -0.7 or -1.0 EV to preserve those delicate water textures.
Composition Techniques for Dramatic Shots
To make your Milford Sound waterfall photography 2026 stand out, you must think beyond simple snapshots. The secret to a compelling landscape photo is creating a sense of scale and depth that transports the viewer right into the fiord.
First, use the Rule of Thirds. Imagine your frame is divided into a nine-box grid. Instead of placing the waterfall dead center, try placing it along the left or right vertical grid lines. Place the horizon along the bottom third to emphasize the massive peaks above, or along the top third to highlight a dramatic rocky foreground.
Now try this: look for leading lines. In Milford Sound, this could be a curving shoreline, a fallen wet log, or the path of a rushing stream in the foreground. These lines guide the viewer's eye naturally through the image straight to the main waterfall. If you want a dreamy background, you can experiment with a wider aperture like f/2.8 to create a soft, blurry background, known as bokeh. However, for classic landscapes, a deep, sharp focus throughout the frame is usually preferred.
Before & After: Fixing a Failed Shot
Let us look at a real-world scenario. In my early attempts at Milford Sound waterfall photography 2026, my "Before" image of Stirling Falls was shot on auto-mode, yielding a JPEG at ISO 800, f/4, and 1/60th of a second. The result? The water looked messy and frozen but not sharp, the background rocks were a grainy grey, and the sky was a blinding white blob.
To fix this for my "After" shot, I mounted my camera on a tripod, switched to RAW, and set my camera to Manual mode. I dropped the ISO to 100 for maximum clean detail, set the aperture to f/11 for edge-to-edge sharpness, and attached a polarising filter to remove the distracting glare from the wet leaves in the foreground. I dialed the shutter speed to 1 second to turn the chaotic torrent into a silky white veil, and used Exposure Compensation to darken the scene slightly. The final image was night and day: rich, dark, moody cliffs framing a perfectly detailed, silky waterfall with zero digital noise.
Recommended Settings Cheat Sheet
- File Format: RAW (for maximum editing flexibility)
- Shooting Mode: Manual (M) or Aperture Priority (A/Av)
- ISO: 100 (for clean, noise-free images)
- Aperture: f/8 to f/11 (for maximum sharpness and depth of field)
- Shutter Speed: 1/2s to 2s for silky water; 1/1000s+ to freeze action
- White Balance: Daylight or Cloudy (to preserve the cool, moody tones of the fiord)
Don't forget to practice these settings at home on a local stream before you make the journey to Fiordland. For more in-depth tutorials on managing exposure in tricky lighting conditions, you can read the comprehensive guides on DPReview.
Final Tips for Your 2026 Adventure
As you plan your journey, remember that patience is your greatest asset. The weather in the fiord changes in minutes. A heavy downpour can transition into misty, clearing storm clouds that create the most dramatic lighting you will ever witness. Keep your camera protected, keep your lenses dry, and keep experimenting with your shutter speeds. By mastering these manual controls, your Milford Sound waterfall photography 2026 portfolio will be filled with powerful, professional images that capture the true, wild spirit of New Zealand.
Frequently Asked Questions
What makes Milford Sound's waterfalls so special for photography in 2026?
Milford Sound's sheer cliffs and unique rainfall patterns create hundreds of temporary waterfalls, offering dynamic compositions that change with weather and season.
What is the best time of year to photograph waterfalls in Milford Sound?
Late autumn and winter (May-August) see the most rainfall, producing powerful falls, while spring brings snowmelt and lush greenery—both great for varied shots.
What camera settings work best for capturing waterfall motion in Milford Sound?
Use a narrow aperture (f/11-f/16), a low ISO (100-200), and a shutter speed of 1/4 to 1 second to blur water while keeping rocks sharp.
Are there specific viewpoints or boat tours for waterfall photography?
Yes, cruising to spots like Stirling Falls and Bowen Falls gives close-up angles, while shoreline viewpoints near Deep Water Basin offer first-light reflections.
How can I protect my camera from rain and spray while photographing Milford Sound waterfalls?
Bring a waterproof cover or rubber rain hood, use a UV filter on your lens, and wipe droplets frequently with a moisture-absorbing cloth.

Camille Bernard shares travel photography tips for every kind of traveller, from phone snapshots to full kits. She breaks down light, composition and timing so you come home with photos that actually capture how a place felt.
💬 Comments (0)
No comments yet. Be the first!