
Light Painting Travel Photography Tips 2026
Explore light painting travel photography tips 2026 to create stunning, long-exposure images on your next trip using simple tools.
Light painting travel photography tips 2026 will transform your nighttime shots from flat to fantastic. Whether you're exploring ancient ruins or modern cityscapes, mastering this technique lets you create images that feel alive with color and motion. I've been teaching photographers for years, and I'll show you how to use simple tools to turn darkness into your canvas.
Why Light Painting is a Game-Changer for Travel Photography
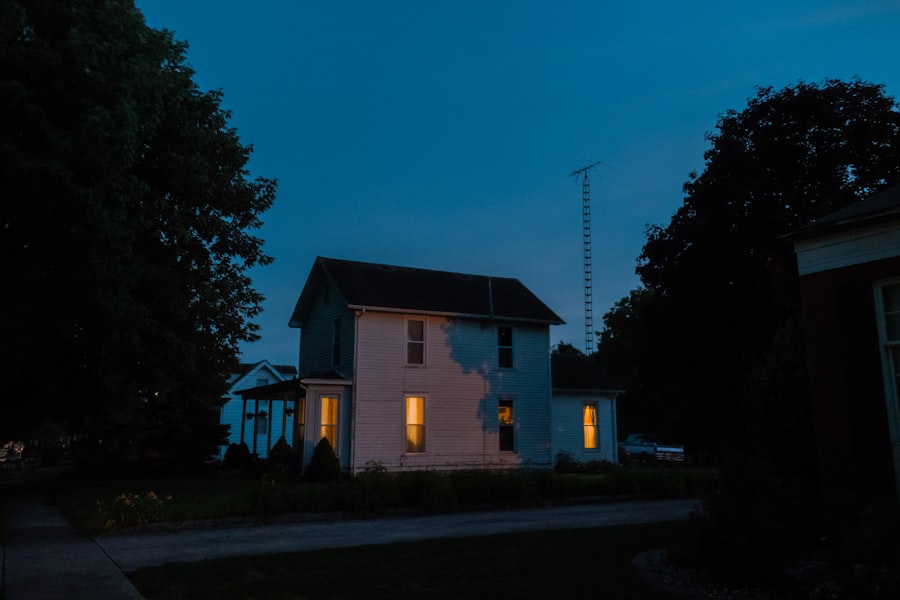
When I first tried light painting in 2026, I was standing at the edge of a lava field in Iceland. My camera was mounted on a shaky tripod, and I had a cheap LED wand. The result? A blurry mess of overexposed streaks. But after adjusting my ISO and using a remote shutter, everything clicked. Your photos will look dramatically better once you understand how to balance ambient light with your painted light.
The secret is that light painting lets you control exactly where the light falls. Unlike flash which blasts everything, you can selectively illuminate details or create sweeping trails. For travel photography, this means you can highlight a desert cactus, trace the outline of a pagoda, or write your name across the stars. And the best part? You don't need expensive gear.
Essential Gear for Light Painting Travel Photography Tips 2026
Before you head out, let's talk equipment. You don't need a pro rig, but having the right tools makes a huge difference. Here's my must-have gear list for implementing light painting travel photography tips 2026 effectively:
- A sturdy tripod – Your exposure will last 10–30 seconds, so stability is non-negotiable.
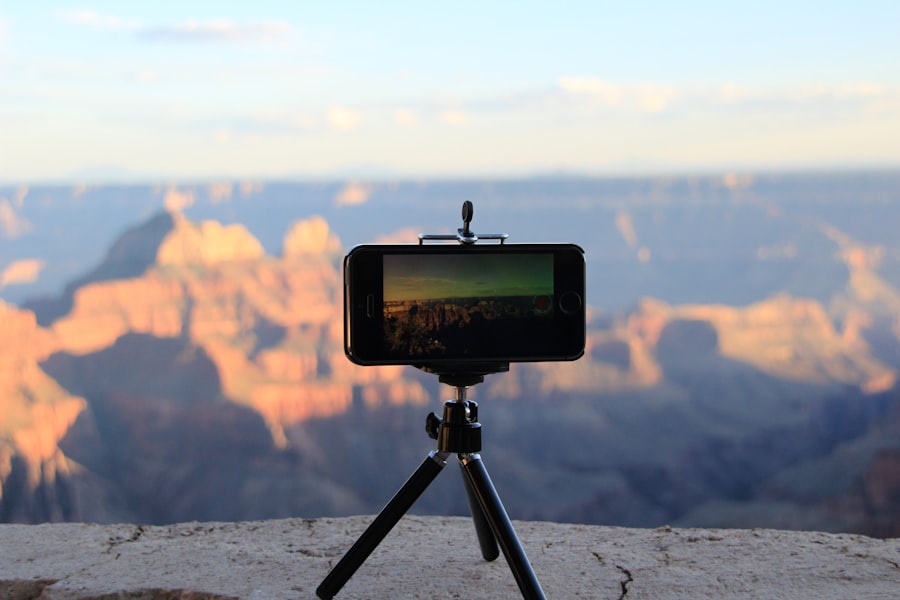
- A camera with manual controls – Any DSLR or mirrorless camera works. I use a Sony A7S III for its excellent low-light performance. Check official Sony specs here.
- A remote shutter release – Or use your camera's 2-second timer to avoid shake.
- Light sources – LED wands, flashlights, glow sticks, or even phone screens. Experiment with colored gels.
- A dark location – Far from city lights for best results.
But gear alone won't get you the shot. You need to understand how your camera sees light. Let's dive into the specific settings for 2026.
Understanding Your Camera Settings for Light Painting
First, let's look at the exposure triangle: ISO, aperture, and shutter speed. For light painting, you want a low ISO (100–400) to keep noise minimal. Your aperture should be mid-range – f/8 to f/11 – for deep depth of field. Shutter speed? Set your camera to Bulb mode or use a long manual exposure of 15–30 seconds. This gives you time to paint.
Shoot in RAW format, not JPEG. RAW captures all the data your sensor sees, so you can adjust white balance and exposure later. JPEG compresses and discards information, which can ruin those subtle light trails. If you're new to RAW, check out Adobe's guide to RAW files – it's a game-changer.
Cheat Sheet: The Golden Rule of Light Painting – Always lock your focus before painting. Autofocus fails in the dark. Switch to manual focus, shine a light on your subject, focus, then turn the light off. Your image will be sharp every time.
Step-by-Step Guide to Your First Light Painting Shot
Now try this step-by-step approach. I've used this method for dozens of travel shots in 2026, and it never fails. Let's walk through it together.
Step 1: Set Up Your Composition
Frame your scene using the Rule of Thirds. Place your main subject at one of the intersection points. For example, if you're photographing a stone arch, put it a third from the left. Leave space for your light trails to sweep across the empty area.
Step 2: Adjust Camera Settings
Set your camera to Manual mode. Dial in ISO 200, aperture f/10, and shutter speed to Bulb. Use a remote shutter to start and stop the exposure. Don't forget to check your histogram – you want the ambient light to sit near the left third of the graph, not clipping into pure black.
- Recommended Settings for Light Painting Travel Photography Tips 2026:
- ISO: 100–400 (lower is better)
- Aperture: f/8 – f/13
- Shutter: 15–30 seconds (or Bulb for longer)
- White Balance: Daylight (tweak in post)
- File Format: RAW
These recommended settings are core to implementing light painting travel photography tips 2026 successfully. They give you a solid starting point every time.
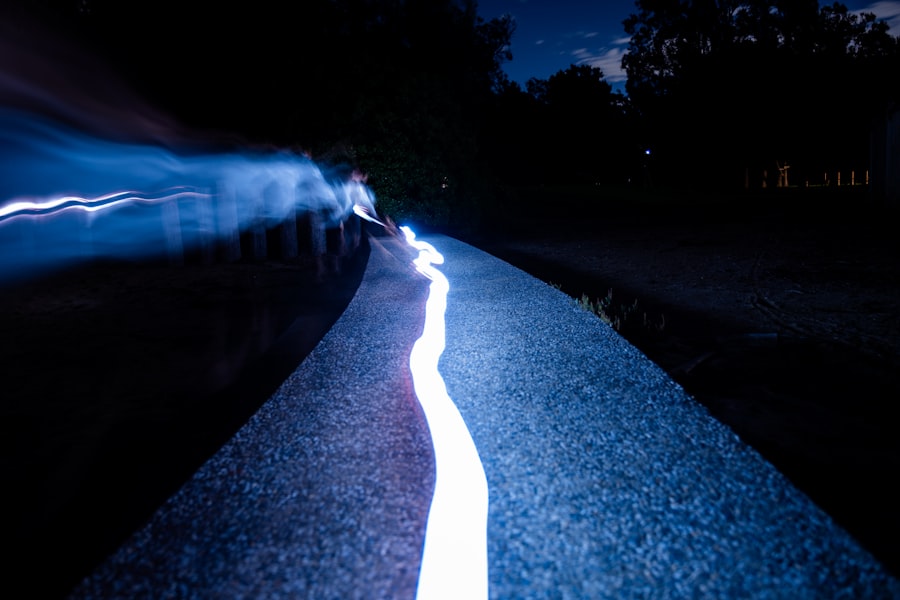
Step 3: Paint Your Light
Start the exposure. Walk behind your subject and wave your light source along the edges or across the frame. Move slowly and steadily – fast movements create thin lines. For a soft glow, hold the light still for a second before moving. Remember, you're drawing with light, so every motion becomes a brushstroke.
Step 4: Review and Adjust
Check your LCD screen. Is the light too bright? Use exposure compensation (or adjust aperture) to darken it. Too dim? Increase ISO slightly or paint slower. The secret is experimentation – take multiple shots and compare.
Troubleshooting Common Mistakes in Light Painting
I once spent an hour in a Moroccan medina trying to light paint a lantern. I thought I had the perfect shot – but when I looked at the camera, the background was completely black. I had forgotten to include some ambient light. To fix it, I reopened the aperture from f/16 to f/8, which let in more moonlight. The result was a beautiful bokeh of distant city lights behind my painted lantern. This experience taught me a key light painting travel photography tips 2026 lesson: always check your ambient exposure first.
Another common mistake is overpainting. If you wave the light wildly, you'll get a chaotic mess. Instead, plan your strokes. Draw one continuous line, then move to the next shape. Think of it like calligraphy – deliberate and elegant.
Also, watch out for light spill. If your light source illuminates the ground or your own feet, it ruins the illusion. Wear dark clothing and point the light only at your subject.
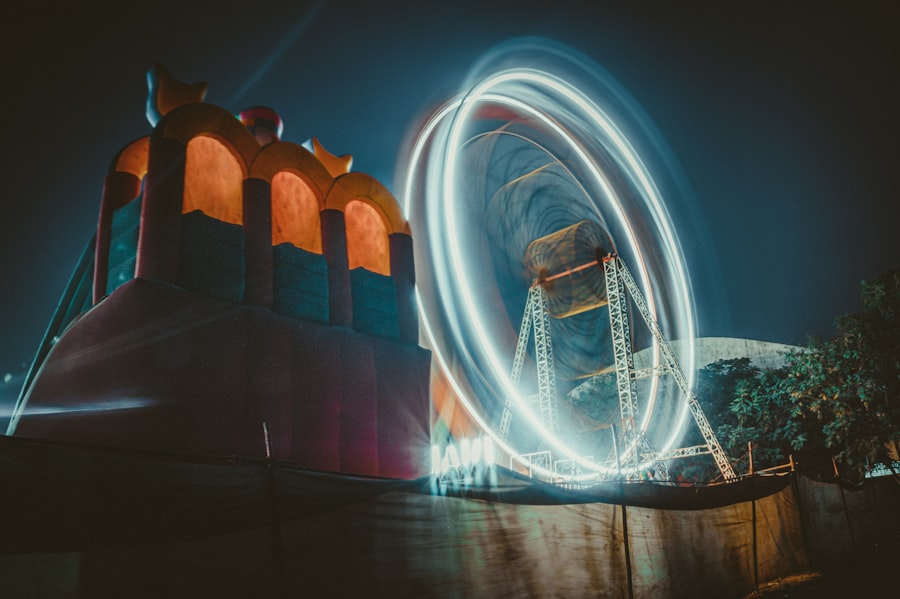
Advanced Techniques for 2026 and Beyond
Once you've mastered the basics, you can try these advanced light painting travel photography tips 2026 methods. First, use colored gels on your flashlight to create rainbow trails. Second, combine multiple exposures in post-processing – take one exposure for the background, another for the light paint, then blend them in Photoshop. This gives you precise control over each element. For a deeper dive into multi-exposure blending, DPReview's night photography tutorials offer great insights.
Creating Bokeh Light Effects
Bokeh refers to the aesthetic quality of out-of-focus areas. To create bokeh in light painting, set your lens to its widest aperture (like f/2.8) and focus on something close. Then paint lights in the distance. The out-of-focus lights will turn into soft, glowing orbs – perfect for dreamy travel portraits.
Another tip for 2026: use a smartphone app to control your camera wirelessly. Many modern cameras allow WiFi control, so you can trigger exposures from a distance and see the results on your phone. This lets you stand far from the camera and paint without running back and forth.
Remember, light painting travel photography tips 2026 are not just about technique – they're about storytelling. Each light streak can represent a path, a journey, or a memory. When I shot the Northern Lights in Norway last year, I used a green LED to mimic the aurora's curves. The final image had both natural and man-made light dancing together.
Final Thoughts on Light Painting Travel Photography Tips 2026
Don't be afraid to fail. My first attempt was a disaster – overexposed, out of focus, and my light trail looked like a scribble. But I learned. Now, every time I travel, I pack a few lights and a tripod. I challenge you to try it tonight. Set up your camera in your backyard, use a flashlight, and paint something simple. Your first shot might not be perfect, but your tenth will be stunning.
The year 2026 is the perfect time to dive into light painting because camera sensors are better than ever at handling low light. So grab your gear, find a dark spot, and start creating. Your travel photos will never be the same.
Frequently Asked Questions
What is the best camera gear for light painting travel photography in 2026?
A fast wide-angle lens, a durable tripod, and a DSLR or mirrorless camera with long exposure capabilities are essential.
How do I manage light painting in crowded tourist spots?
Shoot during off-peak hours or use neutral density filters to extend exposure and blend people out.
What portable light sources work best for travel?
Compact RGB LED wands and mini pixel lights are lightweight and versatile for painting.
What are the top light painting techniques for travel photographers?
Combine frozen motion with kinetic light painting, or use point-light sources to trace geometric shapes over landscapes.
How do I keep gear safe and legal for light painting abroad?
Carry a small travel tripod and ensure LED lights are under bag-size limits; tripod permits balance local regulations.
Matthias Weber digs into the craft of travel photography, from camera settings to editing. He explains the technical side in plain language so you can spend less time fiddling with dials and more time shooting.
💬 Comments (0)
No comments yet. Be the first!