5 Travel Self Portrait Tips 2026
Discover travel self portrait tips to capture pro self-portraits on vacation. Learn lighting, composition, and posing.
Travel self portrait tips can transform your solo adventures into stunning visual stories that capture your unique perspective in 2026. I have coached dozens of photographers on the road, and I know the frustration of a blurred shot or a missed moment. But here is the good news: with a few proven techniques, your self-portraits will look like they were taken by a professional companion. In this guide, I will walk you through five practical steps that combine camera mastery, creative composition, and authentic storytelling. Whether you are using a high-end mirrorless camera or a travel zoom, these travel self portrait tips will help you bring home frames that feel alive and personal.
1. Master the Art of Self-Timing and Remote Triggers
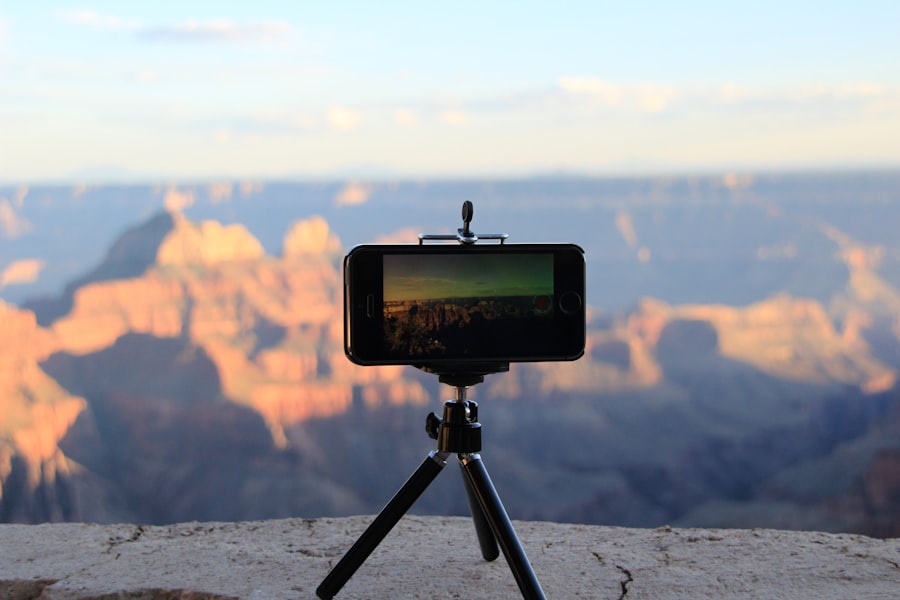
The core challenge of any self-portrait is being both the photographer and the subject. My first disaster happened in a misty forest in Norway. I set my camera on a rock, used the 10-second timer, and sprinted into the frame. I looked like a blurry ghost. The secret is not just timing; it is controlling the moment of capture. In 2026, you have several options. First, use a wireless remote trigger — even a cheap Bluetooth shutter release works perfectly. Second, if you do not have one, enable the camera's built-in intervalometer or self-timer with multiple shots (burst mode). Now try this: set your camera to take a burst of 5 shots after a 2-second delay. This gives you a window to adjust your posture without guessing.
Step-by-Step Setup for a Perfect Self-Portrait
- Attach your camera to a sturdy tripod. Compose the scene using the live view screen.
- Focus on a spot where you will stand — use a backpack or a stick as a placeholder.
- Switch to manual focus (AF-S or MF) so the camera does not hunt for focus when you step in.
- Set the timer to 2 seconds and the burst count to 5 or more.
- Step into position, press the shutter (or remote), and relax into a natural pose.
I once spent an hour trying to get a single good shot at a French chateau. I kept using a 10-second timer and rushing. When I switched to a 2-second delay with burst, I captured a relaxed smile on the third frame. The burst method is one of my favorite travel self portrait tips because it takes the pressure off perfection.
2. Master Light and Exposure with the Camera's Brain
Light is everything in photography. But when you are both photographer and subject, you cannot adjust settings on the fly. You need to lock in your exposure before you step away from the camera. That is where exposure compensation becomes your best friend. If the scene is bright (snow, sand, sky), the camera tends to underexpose, making your face look dark. Dial in +0.7 or +1.0 exposure compensation to brighten your skin tones. For dark scenes, go negative. The same principle applies to ISO. In 2026, cameras handle high ISO beautifully, but keep it as low as possible (ISO 100–400) for clean shadows. If you are shooting in low light, do not be afraid to push ISO to 1600 or 3200 — modern sensors from Sony and Canon handle noise well. Check official specs from Sony Alpha 7 IV for reference on dynamic range.
Must-Have Gear for Self-Portraits in 2026
- A lightweight tripod with a ball head — carbon fiber is ideal for travel.
- A wireless remote shutter (Bluetooth or infrared) — the Sony RMT-P1BT works great.
- A camera with a flip-out screen — essential for framing yourself.
- A fast prime lens (e.g., 35mm f/1.8 or 50mm f/1.4) for beautiful bokeh — the creamy background blur that separates you from the scene.
- A small reflector or even a white shirt to fill shadows on your face.
Now, let me tell you about a failed photo in the deserts of Arizona. I set my camera on a rock, used matrix metering, and stepped into the golden hour light. The result: my face was blown out, and the sky was deep blue — a classic mistake. I forgot to check the histogram. I fixed it by dialing in -0.7 exposure compensation to preserve the highlights, then lifted the shadows in post. These travel self portrait tips about exposure will save you from the same heartbreak.
3. Choose Your Background and Compose with Purpose
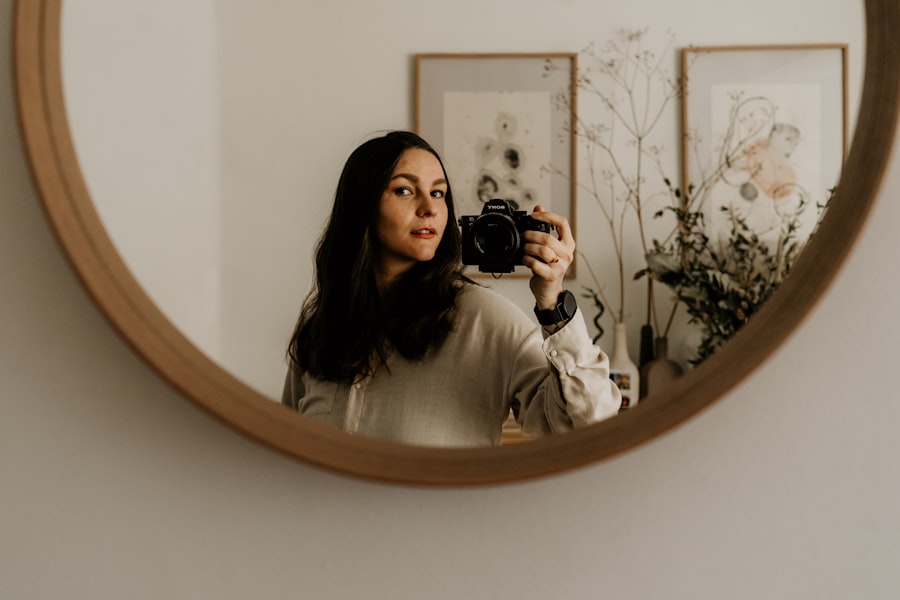
A great self-portrait tells a story about where you are. Do not just stand in front of a landmark; integrate yourself into the scene. Use the rule of thirds: imagine two horizontal and two vertical lines dividing your frame. Place your face at one of the intersecting points — this creates a natural visual flow. For a strong composition, also consider leading lines (a road, a railing, a river) that guide the eye toward you. The secret is to scout your location first. Walk around, look through the viewfinder, and decide where you will stand. I always take a test shot of the empty scene, then step in. This helps me see if the background distracts — for example, a tree growing out of my head. If it does, I move a few feet left or right.
Now try this: lower your tripod to waist height and shoot upward to make yourself look powerful. Or kneel down and shoot downward for a more intimate, grounded feel. Your camera's flip screen is your best tool here. One of my most effective travel self portrait tips is to include a foreground element — a rock, a flower, a wall — to add depth. This creates a layered image that feels three-dimensional. For a deep dive on composition, check DPReview's composition guide.
Golden Rule of Self-Portraiture: "Your camera does not care if you are in the frame. But the light, the background, and the story must be intentional. Always shoot one frame of the empty scene first. Then step in and own your space."
4. Perfect Your Posing and Storytelling
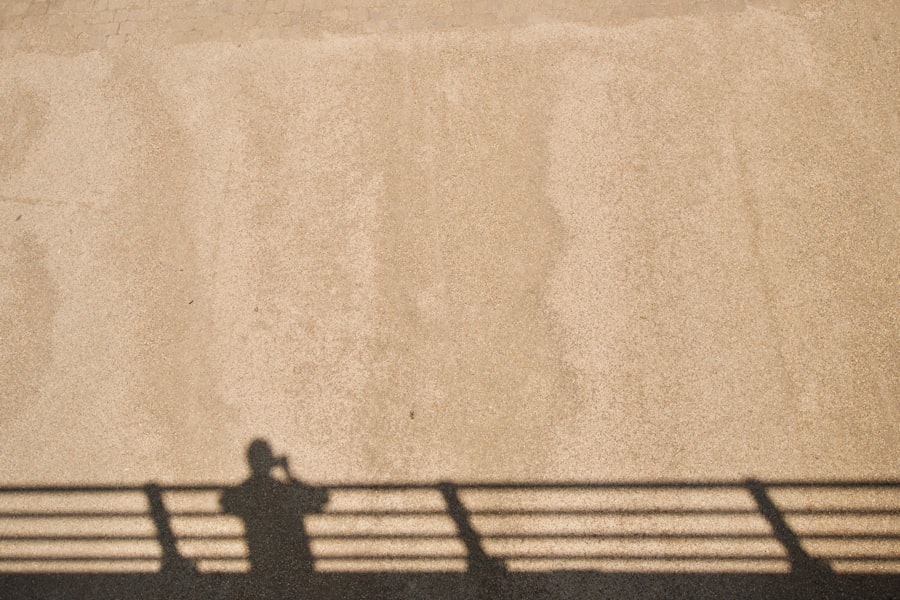
Posing for yourself feels awkward at first. I remember a morning in Thailand where I tried to look contemplative by a temple. Every shot showed me with a stiff arm and a forced half-smile. The breakthrough came when I stopped posing and started moving. Do not stand still and count. Instead, walk toward the camera, look away, or interact with something in the environment — hold a map, touch a leaf, adjust your hat. These micro-moments look natural because they are natural. If you want a direct gaze, look into the lens, not the screen. That eye contact connects with the viewer.
Here is a quick checklist for natural posing:
- Shift your weight to one foot — creates a relaxed S-curve in your body.
- Angle your shoulders away from the camera, then turn your face back toward it.
- Keep your hands out of pockets — hold something or let them hang loosely.
- Breathe deeply and exhale before the shutter — this relaxes your face.
Another essential: shoot in RAW vs JPEG. I always shoot RAW + JPEG. RAW gives you a digital negative that you can adjust later — perfect for recovering shadow detail or correcting white balance. JPEG is fine for quick sharing, but if you overexpose a JPEG, that data is gone. Adobe's tutorial on RAW vs JPEG explains why RAW is safer for travel self portrait tips like this one. When you are alone and cannot re-shoot, that extra flexibility matters.
5. Edit Like a Pro Without Losing Authenticity
Editing should enhance, not erase. After you return from your trip, open your best self-portraits in Lightroom or Capture One. Start with the basics: adjust exposure, contrast, and white balance. Use the histogram to ensure no highlights are clipped (blown out to pure white). Then, apply a subtle vignette to draw attention to your face. Do not oversharpen — skin looks unnatural with too much clarity. My favorite travel self portrait tips for editing involve the radial filter: create a circle over your face, pull up exposure by +0.3, and drop the dehaze slightly for a soft, dreamy look.
Before you finish, check your colors. The human eye is drawn to warm skin tones. If your skin looks too blue or green, adjust the tint slider toward magenta. And remember: less is more. A great self-portrait from 2026 should look like a moment, not a manipulated image. I once over-edited a photo from Machu Picchu until my skin looked plastic. I went back to the original RAW, did a clean edit with only 10% of my previous adjustments, and it became one of my most liked images. That is the power of restraint.
To wrap up, these five travel self portrait tips will help you come home with images that are not just technically sound, but emotionally resonant. Practice each tip on your next outing — even in your backyard. Tripod, timer, intentional composition, natural posing, and light editing. In 2026, the best travel photos are the ones that show you were truly there, not just snapped a picture. Now go out and make your own story.
Frequently Asked Questions
What is a travel self portrait?
A travel self portrait is a photo where you capture yourself in a travel setting using a tripod or creative techniques.
Do I need special equipment to take travel self portraits?
No, just a smartphone or camera with a timer and a stable surface or small tripod works.
How can I avoid looking awkward in solo travel photos?
Candid poses like walking or looking away feel natural—practice and take many shots.
How do I get good lighting in self portraits?
Use golden hour light or soft shade, not harsh midday sun, for flattering results.
Can I take self portraits without a tripod?
Yes, prop your camera on rocks, walls, or use a timer and hide your hand.

Camille Bernard shares travel photography tips for every kind of traveller, from phone snapshots to full kits. She breaks down light, composition and timing so you come home with photos that actually capture how a place felt.
💬 Comments (0)
No comments yet. Be the first!