Sydney Harbour cityscape photography 2026 Guide
Master Sydney Harbour cityscape photography 2026 with our expert guide to capturing iconic landmarks at golden hour.
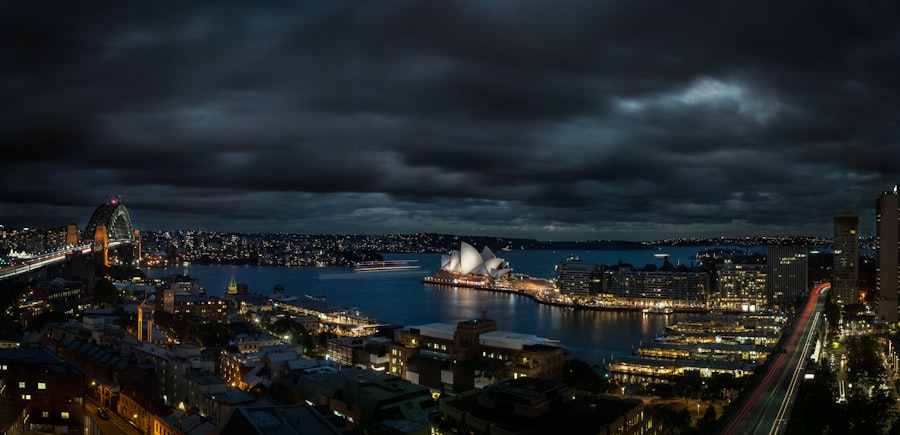
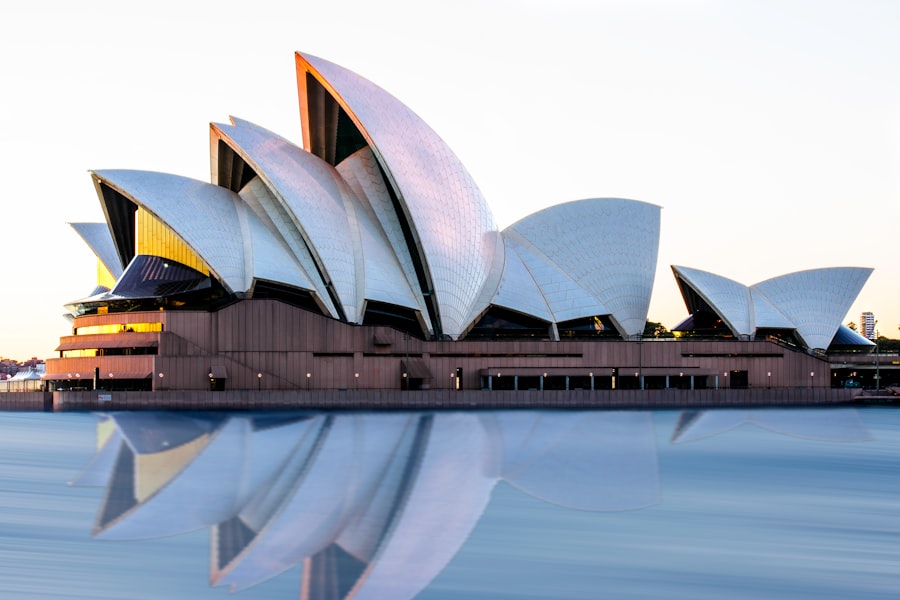
Mastering Sydney Harbour cityscape photography 2026 is one of the most rewarding achievements you can unlock as a travel photographer this year. There is something absolutely magical about watching the sails of the Sydney Opera House and the grand arch of the Harbour Bridge light up as the sun dips below the horizon. As your photography coach, I want to help you capture that magic perfectly on your next trip. Whether you are using a brand-new mirrorless camera or a trusty DSLR, I will show you how to turn ordinary snapshots into gallery-worthy art prints. Your photos will look incredibly sharp, vibrant, and professional once we apply these timeless techniques to the modern 2026 landscape.
First, let us look at the Gear You Need for Sydney Harbour
You do not need to spend a fortune on gear, but having the right tools makes a massive difference when shooting in tricky coastal light. The secret is stability and light management. Because we will be shooting during the blue hour and at night, a sturdy tripod is non-negotiable to prevent camera shake. Let us look at what you should pack in your camera bag before heading out to the harbor.
Must-have Gear for Cityscapes
- A Sturdy Tripod: Essential for keeping your camera perfectly still during long exposures.
- A Wide-Angle Zoom Lens: A 16-35mm or 24-70mm lens is perfect for capturing the sweeping scale of the harbor.
- Neutral Density (ND) Filters: These act like sunglasses for your lens, allowing you to use slow shutter speeds even before the sun goes down.
- A Microfiber Cloth: The harbor breeze often carries salt spray, which can quickly smudge your glass.
- A Remote Shutter Release: This prevents the physical act of pressing the shutter button from shaking your camera.
When choosing your camera body, look for models with excellent dynamic range. If you are shopping for new gear, check out the official camera specifications on the Sony or Canon websites to compare low-light sensor performance. Now try this: if you do not have a remote shutter release, simply set your camera's built-in self-timer to a two-second delay. It works like a charm!
The Secrets of Exposure and Technical Settings
Let us demystify the technical side of photography. I know that terms like ISO, Bokeh, and Exposure Compensation can feel overwhelming at first, but they are just simple tools to help you control light. To get the best results with your Sydney Harbour cityscape photography 2026, you must understand how these settings interact.
First, let us talk about RAW vs JPEG. Always set your camera to shoot in RAW format. A JPEG is a compressed file where the camera decides how the image should look, throwing away valuable shadow and highlight data. A RAW file saves all the uncompressed data captured by your sensor. This gives you the ultimate flexibility when you edit your images later in software like Adobe Lightroom. For a deeper dive into this file format debate, you can read the comprehensive guides on DPReview.
The Golden Rule of Cityscape Photography: Keep your ISO as low as possible (typically ISO 100) to avoid digital noise, and use a narrow aperture between f/8 and f/11 to ensure your entire landscape is tack-sharp from the foreground to the horizon.
Recommended Settings for Golden and Blue Hour
- Shooting Mode: Manual (M) or Aperture Priority (A/Av).
- ISO: 100 to maintain maximum image quality and minimize grain.
- Aperture: f/8 to f/11 for the sharpest depth of field.
- White Balance: Daylight for golden hour, or Kelvin (around 4000K) to enhance the cool tones of blue hour.
- Focus: Single-point autofocus aimed at a high-contrast edge of the Opera House or Harbour Bridge, then switched to manual focus to lock it in.
If your highlights are blowing out because of the bright city lights, do not forget to use your Exposure Compensation dial. Dialing it down to -0.7 or -1.0 will protect your highlights, allowing you to recover the darker shadow areas later in post-processing.
A Tale of a Failed Photo and How I Fixed It
We have all been there. Years ago, I stood at Mrs Macquaries Point, waiting for the perfect sunset. I was so excited that I just set my camera to auto, cranked the ISO up to 3200 so I could shoot handheld, and started clicking away. When I got back to my hotel room and opened the images on my laptop, I was devastated. The sky was filled with ugly, grainy digital noise. The beautiful sails of the Opera House were blurry because my hands shook slightly during the shot. Worst of all, the bright streetlights on the Harbour Bridge were completely blown out into giant, white blobs.
How did I fix this on my next shoot? I went back the very next night with a plan. First, I locked my camera onto a heavy tripod. I lowered my ISO to 100 to eliminate the noise. I switched my camera to manual mode and set my aperture to f/11, which turned the bright streetlights into beautiful, sharp starbursts instead of blurry blobs. Finally, I used a slow shutter speed of 15 seconds to smooth out the choppy water of the harbor into a silky, reflective mirror. The difference was night and day. That is the exact approach you need to take for stunning Sydney Harbour cityscape photography 2026.
Step-by-Step Guide to Shooting Sydney Harbour
Now, let us walk through the exact steps you need to take on the day of your shoot. By planning ahead and following this workflow, you will avoid rookie mistakes and capture breathtaking images.
Step 1: Choose Your Vantage Point Early
Do not show up five minutes before sunset. In 2026, the best spots like Kirribilli, Mrs Macquaries Point, and the Cahill Expressway get crowded early. Arrive at least one hour before sunset to scout the area and find a unique composition. Look for interesting foreground elements like rocks, fences, or harbor water to guide the viewer's eye into the frame.
Step 2: Apply the Rule of Thirds
Compose your shot using the Rule of Thirds. Imagine your viewfinder is divided into a nine-box grid. Place the horizon along the bottom third line if the sky is dramatic, or along the top third line if the water reflections are more interesting. Position the Sydney Opera House at one of the grid intersections to create a balanced, dynamic composition rather than putting it dead center.
Step 3: Dial in Your Baseline Settings
Set your camera to RAW format. Mount your camera securely to your tripod and turn off image stabilization (both on your lens and in your camera body), as keeping it on while on a tripod can actually introduce artificial vibrations. Set your aperture to f/9 and your ISO to 100.
Step 4: Capture the Changing Light
As the sun sets, the ambient light will drop rapidly. Keep an eye on your shutter speed. Your exposures will naturally get longer, moving from 1/30th of a second during golden hour to 10 or 20 seconds during the blue hour. Use your remote shutter release to avoid touching the camera. Watch how the city lights begin to reflect on the water, creating beautiful leading lines.
Advanced Tips: Creative Effects and Composition
Once you have mastered the basics of Sydney Harbour cityscape photography 2026, it is time to get creative. Try playing with Bokeh. If you position yourself close to some hanging tree leaves on the harbor walkway and use a wide aperture like f/2.8, you can turn the distant city lights into beautiful, soft, blurry circles of light in the background. This contrast between sharp foreground elements and soft background light creates incredible depth.
Another fantastic technique is capturing light trails. The ferries moving across the harbor and the cars driving over the Harbour Bridge are perfect subjects. A shutter speed of 30 seconds or longer will turn these moving lights into vibrant, glowing ribbons of color that inject energy and motion into your static cityscape. Keep experimenting, keep adjusting your settings, and most importantly, enjoy the process of capturing one of the world's most beautiful harbors. With these tips, your Sydney Harbour cityscape photography 2026 portfolio is going to look absolutely spectacular!
Frequently Asked Questions
What is the best time of day for Sydney Harbour cityscape photography in 2026?
The golden hours shortly after sunrise and before sunset offer the most dramatic lighting, with sunset particularly highlighting the Harbour Bridge and Opera House. Blue hour just after sunset also yields stunning city lights reflections.
Which are the top locations for photographing Sydney Harbour in 2026?
Mrs Macquarie's Chair provides an iconic view of the Opera House and Bridge, while the Sydney Harbour Bridge Pylon Lookout offers elevated perspectives. Circular Quay and Darling Harbour are excellent for wide-angle shots.
What camera equipment is recommended for cityscape photography in Sydney Harbour?
A DSLR or mirrorless camera with a wide-angle lens (16-35mm) is ideal, and a tripod is essential for long exposure shots at night. A polarizing filter helps reduce glare on water.
Are there any permits required for photography at Sydney Harbour in 2026?
Personal photography is generally allowed in public spaces, but commercial or tripod-heavy shoots may require a permit from local councils. Always check specific venue rules for paid vantage points.
How can I capture the Vivid Sydney light festival in my 2026 Harbour photos?
Vivid Sydney typically runs from late May to early June, and you can photograph light installations on the Opera House and Circular Quay with a tripod for long exposures. Arrive early for clear compositions.

Matthias Weber digs into the craft of travel photography, from camera settings to editing. He explains the technical side in plain language so you can spend less time fiddling with dials and more time shooting.
💬 Comments (0)
No comments yet. Be the first!