Chicago urban photography 2026 Guide
Our Chicago urban photography 2026 guide teaches you to shoot iconic architecture, gritty alleys, and skyscrapers.
Mastering Chicago urban photography 2026 is all about capturing the dramatic tension between historic brickwork, towering glass skyscrapers, and the unpredictable weather of the Windy City.
Whether you are standing in the shadow of the DuSable Bridge or capturing the CTA L-trains curving through the Loop, Chicago offers an endless playground for visual storytellers. I remember my first trip to the city years ago. I stood on the Michigan Avenue bridge at blue hour, trying to capture the glowing yellow headlights of the traffic. My camera was set to auto, and the resulting image was a blurry, orange mess with no detail in the beautiful limestone architecture. I almost gave up! But once I understood how to balance my camera settings, those chaotic city lights transformed into clean, cinematic light trails. I want to help you skip that frustrating trial-and-error phase so your images look spectacular from day one.
In this guide, I will coach you through the exact gear, settings, and compositions you need to elevate your Chicago urban photography 2026 portfolio. Let us get your camera dialed in!
The Essential Gear for Chicago Streets
Before you head out into the Loop, you need the right tools. While you can take great photos with a smartphone, a mirrorless camera or DSLR gives you the creative control needed to tackle Chicago's extreme contrasts of light and shadow. If you are looking to upgrade your setup this year, check out the latest mirrorless options like the Sony Alpha series or the Canon EOS R lineup, which offer incredible low-light performance.
The secret is choosing a lens that matches your artistic vision. A wide-angle lens (16-35mm) is perfect for standing at the bottom of the canyon-like streets and looking straight up at the skyscrapers. On the other hand, a classic 35mm or 50mm prime lens is fantastic for street portraiture and capturing the local characters of neighborhoods like Wicker Park or Pilsen.
Must-Have Gear List
- A sturdy, lightweight tripod: Essential for capturing smooth water on the Chicago River or light trails under the L-tracks.
- A circular polarizer filter: This helps cut down the reflections on glass skyscrapers and makes the blue sky pop against the buildings.
- Comfortable walking shoes: You will easily log 15,000 steps chasing the light from Millenium Park to the Riverwalk.
- A weather-sealed camera bag: Chicago weather changes fast, and you must protect your gear from sudden lake-effect rain or snow.
Mastering Camera Settings for Urban Environments
To take your Chicago urban photography 2026 projects to the next level, you must move away from Auto mode. Do not be intimidated by the jargon! Let us break down the core settings you need to control.
First, let us look at ISO, which measures your camera sensor's sensitivity to light. During a bright day on the Chicago Riverwalk, keep your ISO low (around 100 or 200) to ensure your images are crisp and free of digital noise. As the sun sets behind the Willis Tower, you will need to raise your ISO to 1600 or 3200 to keep your shutter speed fast enough to capture sharp hand-held shots.
Next is Bokeh, a Japanese term that refers to the soft, out-of-focus background blur created by a wide aperture (like f/1.8 or f/2.8). You can use bokeh to isolate a street musician against a dreamy backdrop of blurred city lights. If you want to learn more about the physics of depth of field, you can read the comprehensive guides on DPReview.
The Golden Rule of Chicago Street Photography: Always shoot in RAW format rather than JPEG. RAW files preserve all the data captured by your camera sensor, giving you the power to rescue dark shadows under the L-tracks and tone down bright highlights on reflective glass buildings during editing.
Recommended Camera Settings Cheat Sheet
- File Format: RAW (for maximum editing flexibility in programs like Adobe Lightroom).
- Shooting Mode: Aperture Priority (A or Av) for daytime; Manual (M) for night light trails.
- Aperture: f/8 to f/11 for sharp landscapes; f/1.8 to f/2.8 for portraits with beautiful bokeh.
- ISO: 100 on sunny days; 800-3200 for evening street scenes.
- Exposure Compensation: Dial this to -0.7 or -1.0 when shooting glass buildings to prevent the bright reflections from blowing out.
Step-by-Step Guide to Shooting the Iconic L-Train
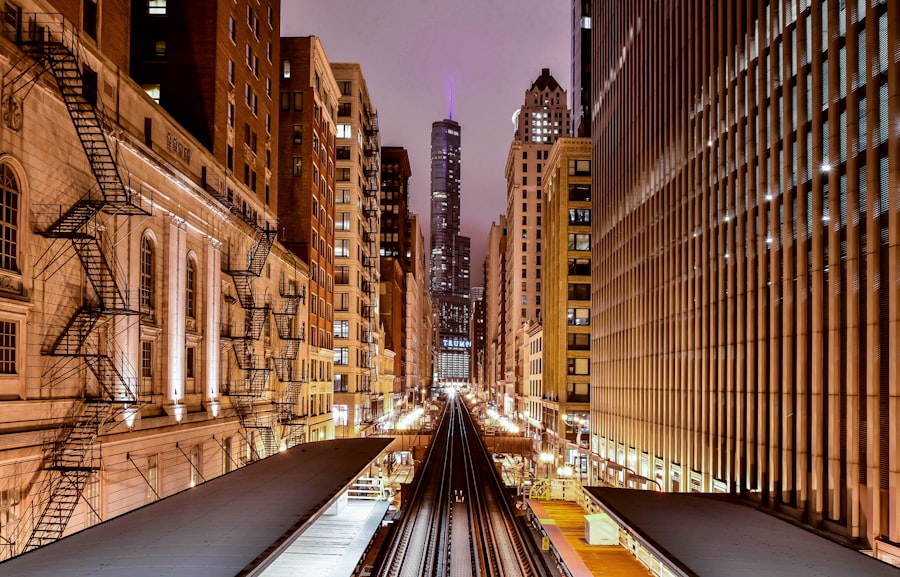
Now try this classic Chicago shot. The CTA elevated trains (the L) are the beating heart of the city, and capturing them is a rite of passage for anyone practicing Chicago urban photography 2026.
Step 1: Find your location
Head to the intersection of Wells Street and Lake Street in the Loop. This spot offers a fantastic view of the tracks curving between historic buildings.
Step 2: Compose using the Rule of Thirds
Imagine your viewfinder is divided by two horizontal and two vertical lines, creating a grid of nine equal squares. Position the train tracks along the bottom horizontal line, and place the approaching train at one of the four intersections where the lines cross. This creates a balanced, dynamic composition that naturally guides the viewer's eye through the frame.
Step 3: Choose your creative effect
You have two choices here. If you want to freeze the train in mid-air with absolute sharpness, set your shutter speed to at least 1/500th of a second. If you want to show speed and motion, place your camera on a tripod, drop your shutter speed to 1/15th of a second, and let the train blur through the frame while the surrounding buildings stay perfectly sharp.
Step 4: Adjust your Exposure Compensation
Because the tracks can create dark shadows below while the sky above is bright, your camera might get confused. Use your Exposure Compensation dial to slightly darken the image, protecting the bright highlights in the sky and maintaining a moody, cinematic atmosphere.
Before & After: Fixing the Sunset Silhouette
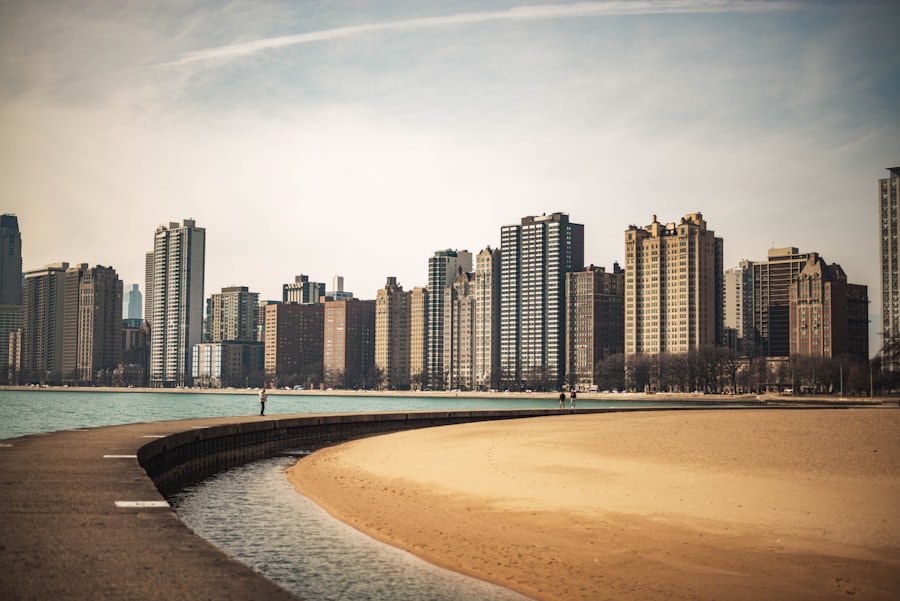
Let us look at a common scenario you will face during your Chicago urban photography 2026 adventures. You are standing at North Avenue Beach, looking back at the skyline as the sun sets behind the John Hancock building (now 875 North Michigan Avenue).
The Before: You take the shot on auto mode. Because the bright sunset sky is overpowering, your camera tries to compensate. The sky turns a dull grey, the skyline is a muddy dark brown instead of a sharp black silhouette, and the beautiful orange reflections on Lake Michigan are completely lost.
The After: You switch your camera to Manual mode and change your file format to RAW. You set your ISO to 100 for maximum clarity, close your aperture to f/8 to keep the entire skyline sharp, and use manual exposure to expose specifically for the bright sky. When you click the shutter, the skyline becomes a dramatic, crisp black silhouette against a blazing orange and purple sky. Back at your computer, you open the RAW file in your editing software to gently boost the shadows in the water, revealing gorgeous, glowing orange ripples that lead the viewer's eye right into the heart of the city.
Embrace the Chicago Elements
The secret to truly unique Chicago urban photography 2026 is leaning into the elements. Do not stay inside just because it is raining or snowing! A rainy night turns the streets of Chicago into a giant mirror, reflecting the neon signs of the Chicago Theatre and the headlights of yellow cabs. Snowstorms drape the bridges in a quiet, minimalist blanket that simplifies busy compositions.
Now, grab your gear, head out into the streets, and start capturing the incredible energy of Chicago. Remember to experiment with different heights, watch how the light plays off the glass and steel, and most importantly, have fun creating your own visual stories!
Frequently Asked Questions
What makes Chicago a unique destination for urban photography in 2026?
Chicago's mix of modern architecture, historic landmarks, and vibrant street life offers endless photographic contrasts, from the Loop's skyscrapers to murals in Pilsen. In 2026, new public art installations and green spaces add fresh perspectives.
What are the best times of day to capture Chicago's skyline?
Golden hour right after sunrise or before sunset provides warm light on the skyline, while the blue hour after sunset gives dramatic urban glow. Night shots from Lake Shore Drive or the riverwalk showcase the city's lights.
Are there any new or noteworthy photography spots in Chicago for 2026?
Yes, the recently renovated St. Regis Tower observation deck and the Altitude Chicago skydeck offer new elevated viewpoints. Also, the new Foundry Loop pedestrian bridge provides a unique perspective on the river.
What urban photography trends should I consider for the 2026 Chicago guide?
Trends include shooting with smart phone apps for HDR night modes, experimenting with drone shots (where permitted), and focusing on vibrant street art collaborations. Also, embracing black-and-white for architectural contrast.
What photographic gear is essential for an urban day in Chicago?
A wide-angle lens for architecture, a prime lens for street shots, and a reliable tripod for low-light. Don't forget filters to handle reflective glass and changing water conditions near the lake.

Matthias Weber digs into the craft of travel photography, from camera settings to editing. He explains the technical side in plain language so you can spend less time fiddling with dials and more time shooting.
💬 Comments (0)
No comments yet. Be the first!