Bruges canal photography 2026 tips
Master Bruges canal photography 2026. Learn to capture medieval architecture, perfect water reflections, and beautiful low light.
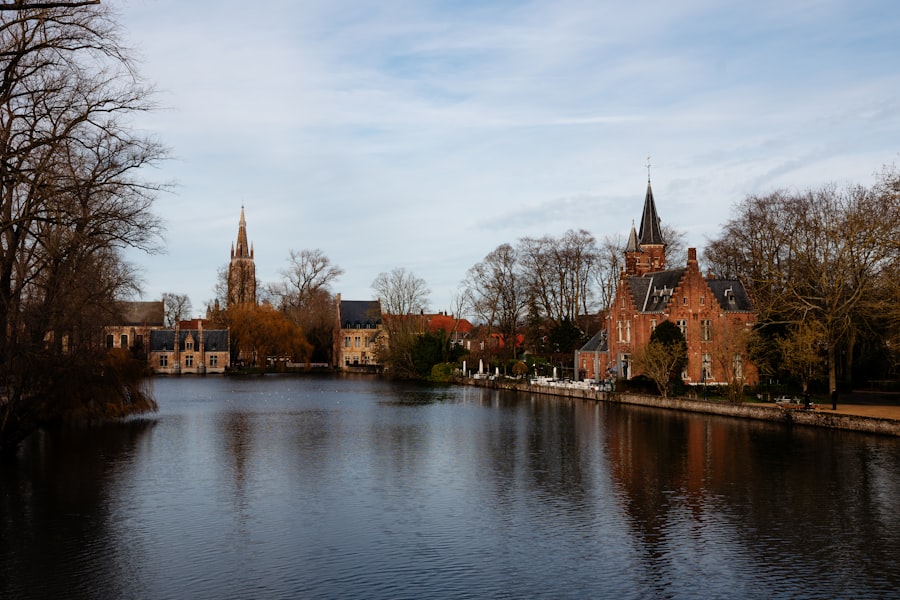
Bruges canal photography 2026 is the ultimate dream for any travel photographer looking to capture the romance of medieval Europe. With its winding waterways, weeping willows kissing the water, and historic brick facades, this Belgian gem is a visual playground. But capturing the magic of these canals is not as simple as pointing your camera and clicking. To help you elevate your images from simple tourist snapshots to breathtaking wall art, I have put together this comprehensive guide for your 2026 journey.
I will show you how to master the tricky lighting, manage the crowded bridges, and configure your camera settings so you can return home with a portfolio you are proud of. Whether you are using a professional mirrorless camera or a smartphone, these tips will transform your travel images.
Why Bruges Canal Photography is Unique in 2026
Bruges has always been beautiful, but capturing its essence requires understanding its unique environment. The canals act as giant mirrors, reflecting the medieval architecture and the sky above. In 2026, with the rise of creative long exposure techniques and advanced mobile sensors, we have more power than ever to capture high dynamic range scenes on the go.
The secret is learning how to read the light on the water. Because the canals are nestled between tall, narrow buildings, you will often face intense contrasts. One side of the canal might be bathed in bright sunlight while the other is cast in deep, dark shadows. To handle this, you must master your camera settings and learn how to control your exposure.
Now try this next time you face a high-contrast canal scene: look for the details in the shadows rather than just focusing on the bright spots. Let us dive into the technical details to make sure your camera behaves exactly how you want it to.
Mastering the Technical Settings: Jargon Made Simple
Before we step onto the cobblestone streets, let us demystify the photography jargon. Your camera is a tool, and once you understand how to control it, your creative potential becomes limitless.
- ISO: This determines how sensitive your camera sensor is to light. A low ISO (like 100) gives you clean, sharp images. A high ISO (like 3200) helps you shoot in the dark, but introduces digital noise or grain.
- Bokeh: This is the soft, out-of-focus background blur that makes your subject pop. You achieve beautiful bokeh by using a wide aperture (like f/1.8 or f/2.8).
- Rule of Thirds: Imagine your frame divided into a 3x3 grid. Instead of placing the canal right in the center, place the canal bank or a historic tower along one of those grid lines to create a more dynamic composition.
- Exposure Compensation: This is a button or dial marked with a plus and minus sign. It allows you to quickly tell your camera to make the image brighter (+) or darker (-) than what its automatic meter recommends.
- RAW vs JPEG: Always shoot in RAW format if you plan to edit your photos later. JPEGs are processed and compressed by your camera, meaning you lose valuable highlight and shadow data. A RAW file saves all the raw data captured by your sensor, giving you maximum flexibility in software like Adobe Lightroom.
The Golden Rule of Canal Photography: Always prioritize protecting your highlights. It is much easier to recover details from dark shadows in post-processing than it is to fix blown-out, pure white skies or bright water reflections.
My Favorite Failed Photo (And How I Fixed It)
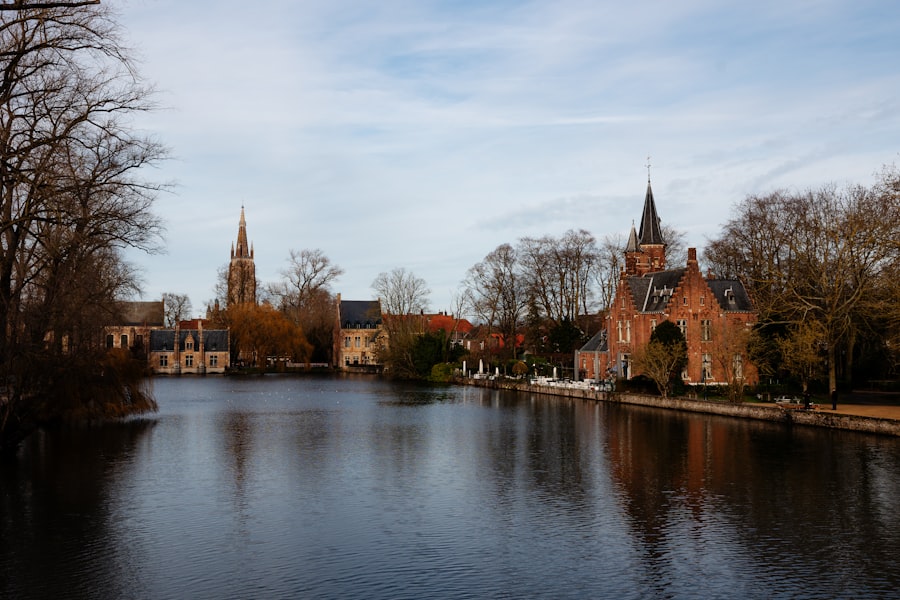
Let me share a quick story about a massive mistake I made during my first trip to the famous Bonifacius Bridge. I arrived at sunset, set up my tripod, and waited for the perfect moment. When the sky turned a beautiful pink, I clicked the shutter. When I looked at the back of my camera screen, the photo looked decent. But when I got back to my hotel and opened the file on my laptop, I was devastated.
The beautiful stone bridge was completely dark, almost a solid black silhouette, while the sky was a washed-out, overexposed white block of nothingness. I had relied entirely on my camera's automatic exposure mode, which got confused by the bright sky and dark canal waters. I had lost all the beautiful details of the ancient brickwork.
To fix this on my next shoot, I switched my camera to manual mode and changed my file format to RAW. I lowered my ISO to 100 to keep the image clean, chose an aperture of f/8 for maximum sharpness across the entire frame, and used Exposure Compensation to slightly underexpose the shot. This kept the colorful sky from blowing out. Back home, I easily lifted the dark shadows in my editing software to reveal the gorgeous stone textures of the bridge. That simple shift completely transformed my approach to Bruges canal photography 2026.
Your Step-by-Step Guide to the Perfect Canal Shot
First, let us look at a practical, step-by-step workflow you can use at any canal location in Bruges to ensure you get a sharp, well-composed, and beautifully exposed image.
Step 1: Find Your Leading Lines
Walk along the canal bank until you find a perspective where the stone wall or the water itself forms a line leading from one of the bottom corners of your frame toward the main subject, such as a distant bridge or church spire. This guides the viewer's eyes naturally through your photograph.
Step 2: Steady Your Camera
If you are shooting during the golden hour or blue hour, the light will be low. To prevent blurry photos caused by camera shake, mount your camera on a sturdy travel tripod. If you do not have one, press your camera firmly against a flat bridge railing or stone wall to keep it steady.
Step 3: Dial In Your Settings
Switch your camera to Aperture Priority mode or Manual mode. Set your ISO to its lowest native value (usually 100) to ensure the highest image quality. Select an aperture between f/5.6 and f/11 to make sure both the foreground water ripples and the background architecture are tack-sharp.
Step 4: Take the Shot and Check the Histogram
Take your photo, but do not just rely on the LCD screen to see if it looks good. Turn on your camera's histogram display. The histogram is a little graph showing the distribution of tones. If the graph is pushed all the way to the right side, your highlights are blown out. If it is pushed to the far left, your shadows are too dark. Adjust your exposure compensation dial until the graph is nicely balanced in the middle.
Now, let us look at the exact gear and settings you should pack for your 2026 creative adventure.
Recommended Gear and Settings for 2026
To get the absolute most out of your Bruges canal photography 2026 experience, having the right gear and knowing how to configure it is essential. You do not need the most expensive camera on the market, but a few key accessories will make a massive difference.
- A Circular Polarizing Filter (CPL): This is a magical piece of glass that screws onto the front of your lens. It allows you to control reflections on the canal water. You can rotate it to either reveal the cobblestones beneath the shallow water or enhance the mirror-like reflections of the buildings.
- A Wide-Angle Lens: A focal length of 16mm to 24mm on a full-frame sensor (or 10mm to 18mm on a crop sensor) is ideal for capturing the narrow canal bends and towering facades in a single frame. You can research native lens options on official manufacturer sites like Sony or Canon.
- A Neutral Density (ND) Filter: This works like sunglasses for your lens, blocking out light so you can use very slow shutter speeds even during the daytime. This is how you get that silky-smooth, dreamlike water effect in your canal photos.
- The 2-Second Self-Timer: Don't forget to enable your camera's internal 2-second delay timer when shooting on a tripod. When you press the shutter button, your finger creates a tiny vibration. The delay ensures the camera stops shaking before it actually takes the picture.
Creative Composition Tips for Bruges Canal Photography 2026
Now that you have the technical foundation, let us focus on the creative side of Bruges canal photography 2026. Composition is what separates a standard postcard shot from a piece of fine art.
Look for Natural Frames
As you wander the canals, look for overhanging tree branches, stone archways, or bridge railings. By positioning these elements around the edges of your frame, you create a "frame within a frame" effect. This adds a wonderful sense of depth and scale, making the viewer feel as though they are peeking through a secret window into medieval Bruges.
Capture the Magic of Reflection Symmetry
The canals of Bruges are often incredibly calm, especially in the early mornings before the tour boats start running. Take advantage of this by creating perfectly symmetrical compositions. Place the horizon line directly in the middle of your frame so that the real buildings on top are perfectly mirrored by the reflections in the water below. This breaks the traditional Rule of Thirds, but the visual balance it creates is absolutely stunning.
Incorporate the Famous Swan Wildlife
The white swans of Bruges are iconic symbols of the city. Incorporating them into your Bruges canal photography 2026 compositions adds a touch of life and motion to your static architectural shots. To capture them clearly without motion blur, make sure your shutter speed is set to at least 1/250th of a second. If you want a dreamy background with a soft bokeh effect behind the swan, use a wide aperture like f/2.8.
Putting It All Together
Photographing the canals of Bruges in 2026 is all about patience, observation, and mastering your camera's capabilities. By shooting in RAW, keeping your ISO low, protecting your highlights, and experimenting with creative compositions like reflections and natural frames, you will capture images that truly do justice to this magical destination.
The next time you stand on a stone bridge overlooking a quiet canal, take a deep breath, adjust your settings using the steps we discussed, and let your creativity flow. Your Bruges canal photography 2026 journey is going to be an unforgettable visual adventure. Happy shooting!
Frequently Asked Questions
What is the best time of day for Bruges canal photography in 2026?
Early morning around sunrise offers soft light and fewer tourists, perfect for reflections on the canals. Golden hour just before sunset also creates warm hues on the medieval buildings.
Are there any new photography spots opening in Bruges for 2026?
Yes, the newly restored Augustijnen Canal area includes a viewing platform that debuted in late 2025. It provides a unique elevated perspective over the water.
What essential gear should I bring for canal photography in Bruges?
A wide-angle lens is crucial for capturing the narrow canal scenes and architecture. Also, bring a sturdy tripod for long exposures on bridges and dark waters.
How can I avoid crowds when shooting Bruges canals in 2026?
Plan weekday shoots during off-peak months like February or November, and explore less famous canals south of the city center. Early breakfast tours also give you a head start.
Are drone photography rules stricter in Bruges for 2026?
Yes, drone use is now banned over all canal zones and bridges in the city center. Instead, use a GoPro or smartphone gimbal on a scouting boat for low-angle water shots.

Matthias Weber digs into the craft of travel photography, from camera settings to editing. He explains the technical side in plain language so you can spend less time fiddling with dials and more time shooting.
💬 Comments (0)
No comments yet. Be the first!