Sunstar Photography Tips for Travelers 2026
Discover sunstar photography techniques to add magical rays of light to your travel images. Tips for aperture, lens, and timing.
Sunstar Photography Tips for Travelers 2026
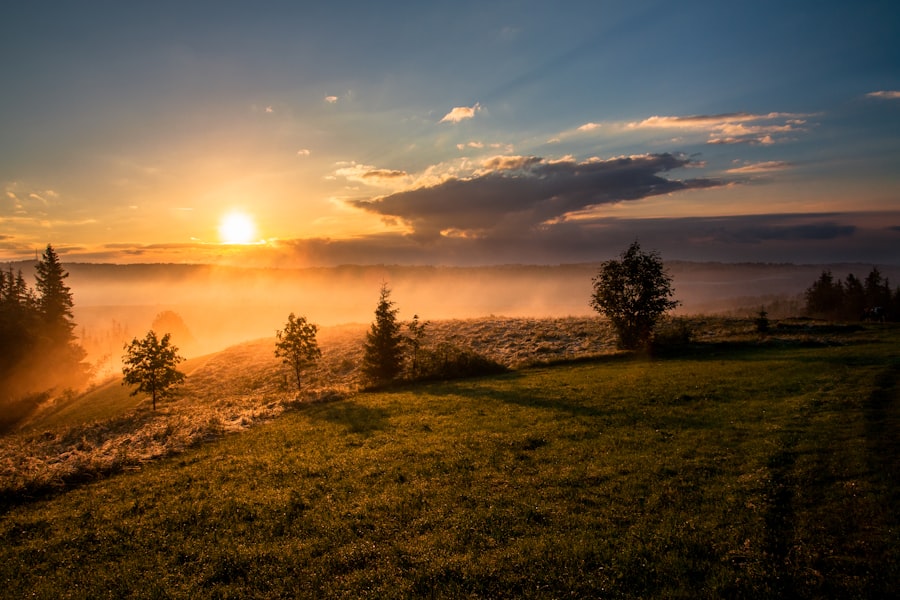
Sunstar photography is one of the most visually striking ways to elevate your travel images, and I'll show you how to capture those radiant beams of light that seem to burst from the sun. In 2026, with modern cameras and a few simple techniques, you can create jaw-dropping photos that make your audience feel the warmth and magic of a sunrise or sunset. Let's dive into the essentials of sunstar photography so you can shoot with confidence on your next adventure.
I remember my first attempt at sunstar photography in the Scottish Highlands. I was thrilled to see the sun peeking through a ruined castle archway, but when I reviewed the shot, the sun was just a white blob with no rays. The image felt flat and unexciting. What went wrong? I had used too wide an aperture and set the focus to infinity without checking. After learning the right settings, I returned the next evening, adjusted my aperture to f/16, and suddenly the sun exploded into a beautiful 14-point star. The before-and-after difference was night and day. That's the power of understanding the craft.
What Makes Sunstar Photography So Special?
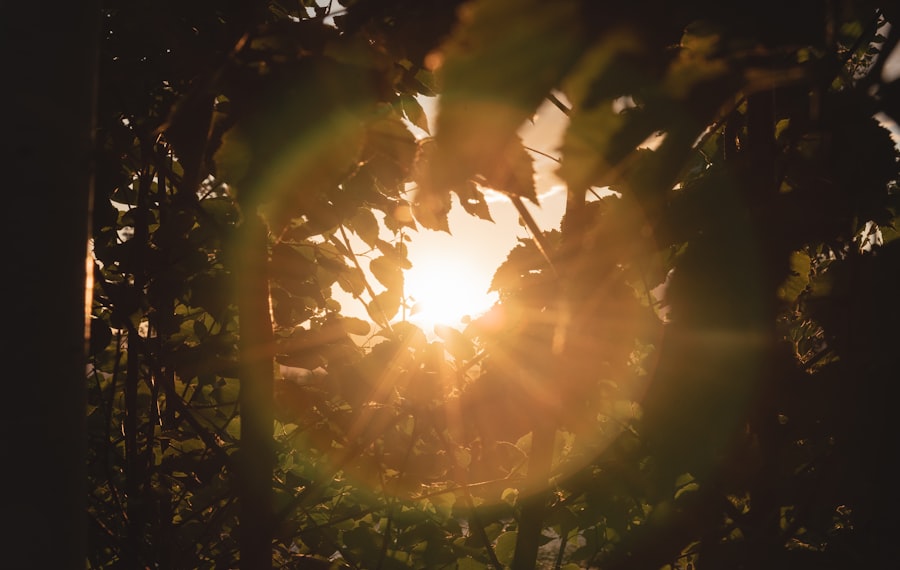
Sunstar photography transforms an ordinary landscape into something dramatic. It's the technique where the sun appears as a sharp, starburst shape with defined rays, often crossing the frame beautifully. The secret is controlling diffraction through a small aperture (high f-number). When light passes through the narrow opening of your lens diaphragm, it bends around the edges, creating those distinct points. Your photos will look more professional and dynamic, especially when you combine sunstars with other compositional elements like silhouettes or leading lines.
The Magic of Diffraction
Diffraction might sound like a physics term, but it's your best friend in sunstar photography. As you stop down your lens (for example, to f/11, f/16, or even f/22), the light rays spread and form star patterns. The more blades your aperture has, the more rays you get—usually an even number of points if the blades are straight, or double if they're curved. Don't be afraid of small apertures; even if they soften sharpness slightly, the sunstar effect is worth it.
Lens Choice Matters
Not all lenses produce beautiful sunstars. Prime lenses with high-quality coatings tend to yield cleaner stars. Zoom lenses can work too, but you might get more flare or uneven rays. For sunstar photography, I recommend trying a wide-angle lens (16-24mm full-frame equivalent) to include foreground interest. Check DPReview for lens reviews that test sunstar performance—it's a reliable resource for comparing models.
Recommended Camera Settings for Sunstar Photography
- Aperture: f/11 to f/16 (start at f/16, then try f/22 if you want more visible rays, though image sharpness may drop)
- ISO: Keep as low as possible—ISO 100 or 200 to reduce noise, since small apertures let in less light
- Shutter Speed: Use manual or aperture-priority mode. Start around 1/60 to 1/125 sec at sunrise/sunset, but adjust based on metering
- Exposure Compensation: Dial in -0.7 to -1.3 EV to avoid blowing out the sun's highlights. Your camera's highlight warning will guide you
- Focus: Manual focus is often best. Set focus to about one-third into the scene (hyperfocal distance) for maximum depth of field. Live view or focus peaking helps
- File Format: Shoot RAW, not JPEG. RAW captures more data for recovering highlights and shadows, essential when the sun is so bright. You can learn more about RAW processing from Adobe's RAW tutorial.
Step-by-Step: How to Capture a Perfect Sunstar
- Find the Right Location and Time: Look for a spot where the sun will be partially blocked by an object—a tree trunk, a mountain peak, a temple spire, or even a person. The best time is within 30 minutes of sunrise or sunset when the sun is low and softer. Use apps like PhotoPills or Sun Surveyor to predict the sun's position.
- Compose Using the Rule of Thirds: Place the sun off-center for a more dynamic image. For sunstar photography, a classic composition puts the sun near one of the intersecting points of a 3x3 grid. Use leading lines (a road, a river, a pier) that point toward the burst.
- Set Your Aperture to f/16: Start there. If the sunstar isn't pronounced enough, step down to f/22. Remember, narrower aperture = more defined rays but possibly softer overall image due to diffraction (though in 2026, most lenses handle it well).
- Focus Carefully: Switch to manual focus. Find a distant object (like a mountain or building) and focus on it using live view zoomed in. Alternatively, set your lens to the hyperfocal distance for your focal length and aperture. For a 24mm lens at f/16, hyperfocal is about 2 meters—so everything from 1 meter to infinity will be sharp.
- Meter for the Sky (Not the Sun): Point your camera slightly upward to meter off the bright sky around the sun, then lock exposure (or use exposure compensation) so the highlights aren't blown. A good rule: the sky should be a rich warm color, not pure white.
- Shoot and Check: Take a test shot. Zoom in on the sun—do you see distinct rays? If the sun is too bright, decrease exposure further. If the rays look fuzzy, stop down more. Repeat until you're satisfied.
- Bracket Your Exposures: For the best sunstar photography results, take three shots: one at your metered exposure, one overexposed by 1 stop, and one underexposed by 1 stop. Merge them later in HDR software or select the best exposure. This ensures you capture detail in the sunstar itself without losing the foreground.
Must-Have Gear for Sunstar Photography
- Wide-angle lens (16-24mm) or a prime with great sunstar performance—look for lenses with curved aperture blades (they produce more rays)
- Sturdy tripod—essential for sharpness at small apertures and low ISO, especially in low light at dawn/dusk
- Remote shutter release or 2-second timer—prevents camera shake when pressing the button
- Lens hood—reduces flare and ghosting, which can ruin the clean edges of a sunstar
- Polarizing filter (optional)—can enhance colors and reduce glare, but may weaken the sunstar effect if used with very small apertures. Test it on your scene.
Cheat Sheet: Golden Rule for Sunstar Photography – "Small aperture, low ISO, manual focus, underexpose slightly, and always check your sunstar in the viewfinder." If you follow that, you'll consistently get those brilliant starbursts.
Common Mistakes and How to Avoid Them
One mistake travelers make is using auto mode. In auto, the camera will try to open the aperture to let in more light, which prevents sunstar formation. Always shoot in manual or aperture-priority. Another pitfall is ignoring the background. A beautiful sunstar needs a compelling foreground—a silhouette, a texture, or a reflection. Otherwise, the image is just a bright dot in the sky. Now try this: next time you're at sunset, find a person standing at the edge of a cliff or a boat floating on calm water. Position the sun behind their head or a mast. That's a classic sunstar photography composition that works every time.
Personal Story: The Failed Australian Outback Shot
In 2026, I was photographing Uluru at sunrise. I was so excited that I forgot to check my settings. The sun appeared from behind the rock, and I snapped away at f/5.6. The result? A bright, undiffracted mess. I didn't get a single sunstar. Frustrated, I waited the next morning, this time using a tripod and dialing in f/16 and ISO 100. I also used the 2-second timer to eliminate shake. The difference was incredible—the sun burst into 14 rays that spread across the red desert sky. The trick was being patient and methodical. Don't forget to check your histogram, too. If the sun's highlight peak is touching the right edge, you're overexposed. Pull back your exposure compensation by a third of a stop.
Editing Your Sunstar Photos in 2026
Even with perfect shooting, a bit of post-processing can enhance your sunstar photography. In Lightroom or Photoshop, use the following adjustments:
- Clarity and Dehaze—add moderate clarity to define the rays and dehaze to cut through atmospheric glow
- Highlights and Shadows—reduce highlights to recover detail in the sun's core, lift shadows slightly if the foreground is too dark
- Vibrance and Saturation—boost vibrance for warm tones, but avoid oversaturating the sunstar itself
- Lens Corrections—enable profile corrections to fix distortion and chromatic aberration that can appear around the sun
One last tip: exposure blending. If you shot multiple exposures, merge them manually using layers. Use the lighter exposure for the foreground and the darker one for the sky. This gives you a natural-looking final image where both the sunstar and the landscape are well-exposed.
Final Thoughts on Sunstar Photography
Sunstar photography is a skill that grows with practice. Every location and every lens behaves a little differently. Start with the settings I shared, experiment with different apertures, and review your work on a larger screen. The more you shoot, the more you'll develop an intuition for what works. Your photos will look more creative and professional, and you'll have images that stand out on social media or in prints. Remember, the key is to keep shooting, learning from your mistakes, and chasing that perfect burst of light. Now go out there and capture your own stunning sunstar photography in 2026!
Frequently Asked Questions
What is a sunstar, and why is it desirable in travel photography?
A sunstar is a starburst effect created when light diffracts around a narrow aperture, adding dramatic flair to landscape or travel photos.
What camera settings are best for achieving a crisp sunstar?
Use a narrow aperture like f/16 or f/22, a low ISO, and consider a fast shutter speed to avoid overexposure.
How do I compose a photo to include a sunstar without ruining the shot?
Partly block the sun with an object like a tree or building edge, so only a segment appears, creating controlled flare.
Which lenses perform best for sunstar photography?
Wide-angle or prime lenses with an odd number of aperture blades (e.g., 7 or 9) produce cleaner star points.
How can 2026 travel photographers avoid common mistakes like overexposure?
Use exposure bracketing or spot meter on a bright area, then recompose to keep the sunstar while preserving shadow detail.
💬 Comments (0)
No comments yet. Be the first!