San Francisco Fog Photography 2026 Guide
Our complete San Francisco Fog Photography 2026 guide reveals how to set your exposure and find the best viewpoints.
If you want to capture the absolute magic of the Bay Area, mastering San Francisco Fog Photography 2026 is your ultimate ticket to stunning, ethereal images. I still remember my first attempt at shooting Karl the Fog from Hawk Hill. I packed my camera, drove up in the freezing dark, and eagerly pressed the shutter, only to end up with a blurry, gray, underexposed mess. It looked like a smudge on a dirty window! But don't worry, because today, I am going to coach you through the exact steps, gear setups, and creative secrets so you can avoid my early mistakes and capture breathtaking fog images on your very first try.
The Magic of Karl the Fog: Understanding Your Subject
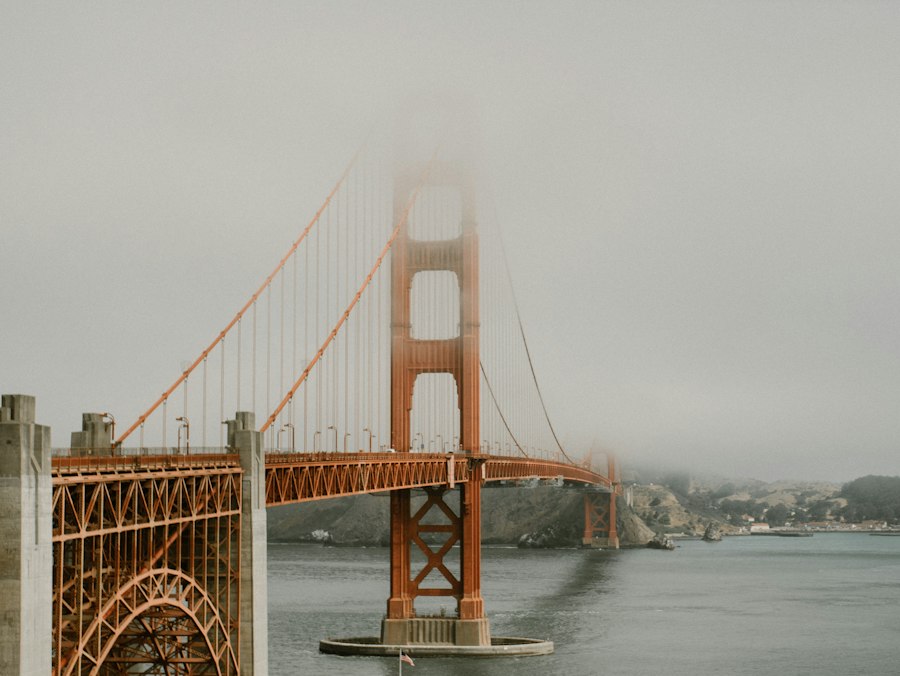
Before we press the shutter button, we need to understand how fog behaves in the Bay Area. In 2026, microclimates are still the defining feature of San Francisco. The Pacific Ocean sends cold air rushing through the Golden Gate, meeting the warm air of the Central Valley. This creates that thick, low-lying advection fog that wraps around the Golden Gate Bridge like a soft blanket.
To capture this successfully, you need to know where the fog will be. It typically rolls in during the late afternoon and lingers until mid-morning. If you want those dreamlike shots where the towers of the Golden Gate Bridge pierce through a sea of white, you need to get above the fog line. Your best vantage points will be high-elevation spots like the Marin Headlands, Twin Peaks, or Mount Tamalpais.
Essential Gear for San Francisco Fog Photography 2026
You do not need the most expensive camera on the market to get incredible results, but you do need the right tools to handle the damp, low-light conditions of the bay. Here is my recommended gear checklist to pack in your camera bag:
- A Sturdy Tripod: Fog photography often happens during sunrise, sunset, or blue hour. You will be using slow shutter speeds, and a heavy, stable tripod is non-negotiable to prevent camera shake.
- Weather-Sealed Camera Body and Lens: Fog is literally airborne moisture. Protect your investment. Modern systems like the Sony Alpha series offer incredible weather sealing to keep moisture out.
- A Telephoto Zoom Lens: While a wide-angle lens is great for expansive landscapes, a 70-200mm or 100-400mm lens allows you to compress the scene, making the fog look thicker and more dramatic against the bridge or city skyline.
- Lens Wipes and blower: Keep these in your pocket! Condensation will build up on your front glass element every few minutes.
- A Circular Polarizer: This handy filter helps cut through glare and can add contrast to the misty air, giving your images more definition.
Your Step-by-Step Guide to Camera Settings
Now try this: let us dive into the technical side. Shooting in the fog can easily trick your camera's internal computer. Because fog is highly reflective, your camera will look at the bright white mist and think, "Wow, this is way too bright!" It will automatically try to darken the image, leaving you with dingy, gray photos. Here is how we fix that.
Step 1: Shoot in RAW vs JPEG
First, let us look at your file format. Always set your camera to shoot in RAW rather than JPEG. A JPEG file compresses your image and throws away valuable data. A RAW file preserves all the details in the highlights and shadows. This is crucial for fog because it gives you the dynamic range needed to recover details in the bright mist and dark bridge towers during post-processing. You can learn more about managing these files in the Adobe Lightroom tutorials.
Step 2: Master Your Exposure Compensation
The secret is using a tool called Exposure Compensation. Because your camera wants to turn the white fog into gray, you need to manually tell it to let in more light. Switch your camera to Aperture Priority mode and dial your Exposure Compensation to +0.7 or +1.0. This forces the camera to brighten the image, keeping your whites clean and luminous.
Step 3: Dial in Your Aperture and ISO
For landscape shots where you want everything sharp from front to back, set your Aperture between f/8 and f/11. To keep your images as clean as possible, set your ISO to its base level, usually ISO 100. A low ISO ensures there is no digital noise or grain in your smooth, misty gradients. If you want to create beautiful Bokeh, which is that soft, out-of-focus background blur, you can open your aperture to f/2.8 or f/4 while focusing on a close-up subject like a wildflower or a rustic fence post in the foreground.
The Golden Rule of Fog Photography: Trust your histogram, not your LCD screen. The bright fog can make your screen look brighter than the actual photo is. Always check your histogram to ensure your data is pushed to the right without clipping your highlights.
Composition and Creative Techniques
When composing your shot, do not just aim your camera at a wall of white. Fog can quickly become monotonous if there is no point of interest. This is where classical composition guidelines come to the rescue.
Use the Rule of Thirds to place the towers of the Golden Gate Bridge or the Transamerica Pyramid along the gridlines. This creates a balanced, visually pleasing path for the viewer's eye to follow. Look for leading lines, such as a winding road in the Marin Headlands or a shoreline, to guide the viewer through the mist.
Another fantastic technique for your San Francisco Fog Photography 2026 journey is capturing movement. By using a neutral density (ND) filter, you can slow your shutter speed down to 10, 20, or even 30 seconds. This turns the moving fog into a silky, cloud-like river flowing over the hills, creating an incredibly peaceful, dreamlike atmosphere.
Before and After: A Real-World Lesson
Let me share a quick story. During a shoot at Marshall's Beach, I wanted to capture the waves crashing with the fog-shrouded bridge in the background. My first shot was a disaster. I shot in JPEG, left my camera on Auto, and did not use a tripod. The photo was dark, the fog looked dirty-gray, the bridge was blurry due to hand-shake, and the highlights in the water were completely blown out.
To fix this, I set up my tripod to eliminate camera shake. I switched to RAW format and turned my mode dial to Manual. I set my aperture to f/11 for maximum sharpness, lowered my ISO to 100, and used Exposure Compensation to overexpose the scene slightly by +1.0 stop. The difference was night and day! The final image had beautiful, glowing white fog, tack-sharp details on the wet rocks, and the rich orange color of the bridge popped beautifully against the cool mist. That is the power of applying the right techniques for San Francisco Fog Photography 2026.
Where to Go: Top Spots for San Francisco Fog Photography 2026
To help you plan your next adventure, here are the absolute best locations in the city to practice your new skills:
- Battery Spencer: Located directly above the northern side of the Golden Gate Bridge, this spot offers that classic, high-angle view where the bridge seems to float on top of the clouds.
- Hawk Hill: Just a bit higher than Battery Spencer, this is the ultimate spot for watching the fog roll through the bay channel.
- Grandview Park (Turtle Hill): Located in the Sunset District, this high viewpoint gives you a 360-degree view of the city grid being swallowed by the ocean mist.
Go Out and Capture the Mist!
Now that you have the knowledge, the settings, and the gear guide, you are fully prepared to master San Francisco Fog Photography 2026. Don't forget to pack warm layers, because the weather can change in an instant, and those chilly winds are no joke. Be patient, experiment with your exposure, and enjoy the creative process of chasing the fog. Your photos will look absolutely spectacular, and I cannot wait to see what you create!
Frequently Asked Questions
What are the best months to photograph San Francisco fog in 2026?
The fog is most consistent from May through September, with July and August being peak months. For 2026, plan your trip around late summer for the highest chance of dramatic fog.
What time of day is best for shooting the Golden Gate Bridge in fog?
Early morning just after sunrise offers the best light and thickest fog, while late afternoon can also work if the marine layer rolls back in. Aim to arrive at least 30 minutes before sunrise to set up.
Which San Francisco locations provide the best fog photography vantage points?
Classic spots include Battery Spencer, Marshall's Beach, Baker Beach, Twin Peaks, and Hawk Hill in the Marin Headlands. Each offers a different perspective of the fog rolling over the Golden Gate Bridge and city skyline.
What camera settings do you recommend for capturing fog in San Francisco?
Use a low ISO (100-400), narrow aperture (f/8-f/16), and a tripod to allow for longer exposures that smooth out the fog. Slightly overexpose to keep the fog white and use exposure compensation as needed.
How can I predict fog in San Francisco for my 2026 photography trip?
Check the National Weather Service marine layer forecast, Fog Today on Twitter, and webcams like those at the Golden Gate Bridge. Fog is more likely when inland temperatures are hot and coastal winds are light.

Matthias Weber digs into the craft of travel photography, from camera settings to editing. He explains the technical side in plain language so you can spend less time fiddling with dials and more time shooting.
💬 Comments (0)
No comments yet. Be the first!