Great Ocean Road Coastal Photography 2026
Learn how to capture stunning seascapes with our Great Ocean Road Coastal Photography 2026 guide for travelers.
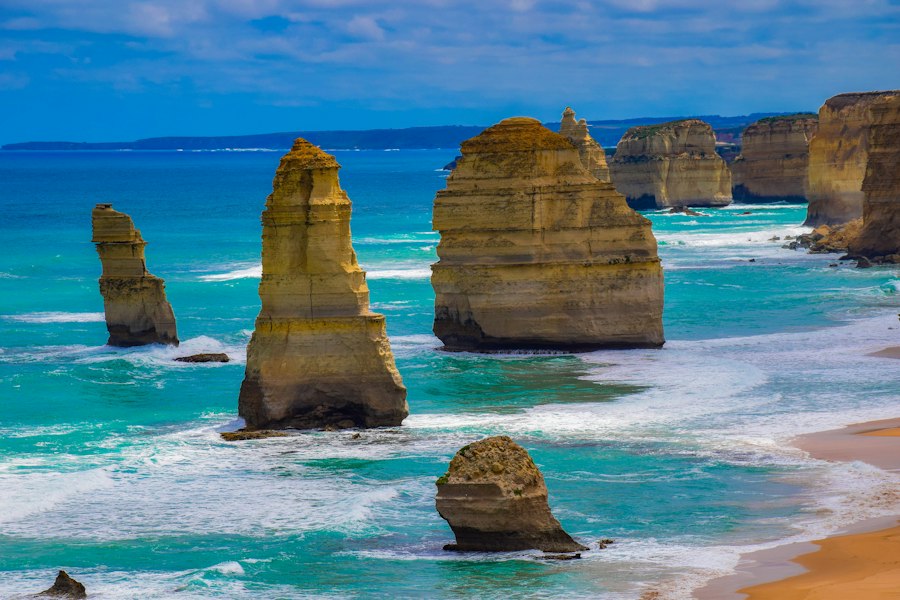
Mastering the art of Great Ocean Road Coastal Photography 2026 is your ticket to capturing some of the most dramatic, awe-inspiring coastal landscapes on the planet.
I still remember my first trip to the Victoria coast years ago. I stood before the towering limestone stacks of the Twelve Apostles, my camera ready, waiting for the perfect sunset. When the light finally broke through the clouds, painting the sky in deep magentas and fiery oranges, I pressed the shutter. But when I looked at my LCD screen, the image was a total disaster. The sky was a blinding, washed-out white, and the sea stacks were just pitch-black blobs. I had completely failed to balance the high-contrast light. I almost packed up my gear in frustration. But instead of giving up, I adjusted my settings, dialed in my exposure, and tried again. That failed moment taught me exactly how to read the light, and today, I am going to share those hard-won secrets with you.
Whether you are a beginner picking up a camera for the first time or a seasoned shooter looking to refine your landscape portfolio, this guide will elevate your skills. Let us dive into how you can create gallery-worthy images along this iconic Australian coastline.
Essential Camera Settings and Gear for Coastal Landscapes
First, let us look at the fundamental tools and settings you need to master. Coastal photography is a game of managing extreme contrasts, moving water, and shifting light. To get the best results, we need to understand a few core photography terms and how they interact.
To start, always shoot in RAW rather than JPEG. A JPEG file is compressed by your camera, discarding valuable color and detail data to save space. A RAW file, on the other hand, preserves every single bit of data your camera sensor captures. This gives you maximum flexibility when editing in software like Adobe Lightroom, allowing you to easily rescue dark shadows or bright highlights that would otherwise be lost forever.
Next, let us talk about ISO. This setting controls your camera sensor's sensitivity to light. A low ISO, like ISO 100, produces the cleanest, sharpest images. As you raise the ISO to 1600 or 3200, your camera can see in the dark, but your images will suffer from digital "noise" (which looks like ugly, colored grain). For daytime and sunset coastal shots, keep your ISO as low as possible.
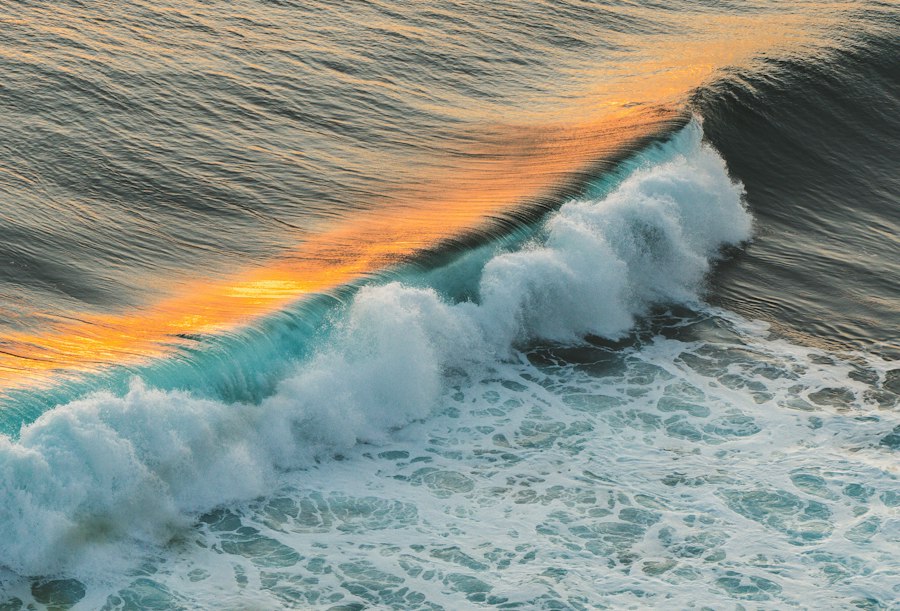
Now try this: use a tripod to unlock the world of long exposures. By keeping your camera perfectly still, you can use slow shutter speeds to turn crashing, chaotic waves into a silky, ethereal mist. This contrast between the sharp, solid limestone cliffs and the soft, dreamy water is the hallmark of professional Great Ocean Road Coastal Photography 2026.
Must-Have Gear Checklist
- A Sturdy Tripod: The coastal wind along the Southern Ocean can be brutal. You need a heavy, solid tripod to prevent camera shake.
- Neutral Density (ND) Filters: Think of these as sunglasses for your lens. They block out light, allowing you to use slow shutter speeds even in the middle of the day.
- A Wide-Angle Lens: A lens in the 16-35mm range is perfect for capturing the vastness of the cliffs and the sweeping shoreline. Check out the latest high-resolution lenses on the Sony Alpha Specs Page to see how modern optics handle these wide vistas.
- A Microfiber Cloth: Salt spray will get on your lens constantly. Keep a dry cloth in your pocket to wipe it clean before every single shot.
The Golden Rule Cheat Sheet: When shooting directly into the rising or setting sun, your camera's automatic meter will often make a mistake. Use your Exposure Compensation dial (the button with the +/- icon) to manually darken or brighten your image by 1 or 2 stops until the highlights are no longer clipping.
How to Compositionally Master the Coastline
A great photograph is more than just a sharp image; it is a story told through composition. When you stand on the edge of the Great Ocean Road, the sheer scale of the landscape can feel overwhelming. The secret is to simplify what you see and guide your viewer's eye through the frame.
The first tool in your compositional toolkit is the Rule of Thirds. Imagine your viewfinder is divided into a grid by two horizontal lines and two vertical lines, creating nine equal rectangles. Instead of putting the horizon right in the dead center of your frame, place it along the top horizontal line if the foreground water is interesting, or along the bottom horizontal line if the sky is filled with dramatic clouds. Place your main subject, like an isolated sea stack, on one of the four intersection points to create a balanced, dynamic composition.
You can also play with Bokeh, which is the aesthetic quality of the blur in the out-of-focus parts of an image. While landscape photographers usually want everything sharp from front to back (using a narrow aperture like f/11), you can create beautiful abstract coastal shots by using a wide aperture like f/2.8. Focus on a single shell on the wet sand and let the ocean waves in the background melt into a soft, creamy blur.
The Before and After Scenario
Let us look at a quick comparison to see how these techniques transform a shot:
- Before: You stand at the lookout, hold your camera at eye level, and snap a quick JPEG on automatic settings. The horizon splits the photo in half, the water is choppy and distracting, the sky is a flat white, and the rocks are a dark, featureless silhouette.
- After: You mount your camera on a tripod low to the ground, use the Rule of Thirds to place the horizon on the top third, and screw on an ND filter. You shoot in RAW, set your ISO to 100, and use a 2-second shutter speed. The choppy waves turn into a smooth, mystical fog wrapping around the base of the sharp, highly-detailed sea stacks, while the RAW file allows you to bring out the warm, golden light of the cliffs in post-processing.
Step-by-Step Guide to Shooting the Twelve Apostles
The Twelve Apostles represent the crown jewel of your Great Ocean Road Coastal Photography 2026 journey. Follow this step-by-step blueprint to ensure you walk away with an image you will want to print and hang on your wall.
Step 1: Arrive Early and Scout Your Location
Do not show up ten minutes before sunset. Arrive at least an hour early. Walk the boardwalks, look for unique angles, and see where the sun will set. Download a tracking app to see exactly where the light will hit the rock faces.
Step 2: Set Up Your Tripod and Level Your Camera
Set your tripod up firmly, making sure the legs are locked against the strong coastal wind. Use the electronic level inside your camera's viewfinder to guarantee your horizon is perfectly straight. A tilted ocean horizon will instantly ruin a great shot.
Step 3: Dial in Your Base Settings
Switch your camera to Manual mode. Set your ISO to 100 for maximum image quality. Set your aperture to f/8 or f/11, which is the "sweet spot" for most lenses, ensuring that both the foreground textures and the distant cliffs are razor-sharp.
Step 4: Control the Shutter Speed
If you want to capture the power of the ocean, use a fast shutter speed like 1/500th of a second to freeze the dramatic spray of waves crashing against the rocks. If you want to create a calm, artistic mood, attach your ND filter and drop your shutter speed to 5 or 10 seconds to blur the water completely.
Step 5: Review and Adjust Your Exposure
Take a test shot. Do not just look at the image on your LCD screen, as it can lie to you in bright sunlight. Look at your histogram, which is the little graph showing the distribution of light. If the graph is pushed all the way to the right side, your highlights are blown out; use your Exposure Compensation to darken the image slightly.
Advanced Techniques for Dramatic 2026 Coastal Imagery
As we push forward into a new era of image creation, high-resolution sensors and advanced dynamic range mean we can capture more detail than ever before. To truly elevate your Great Ocean Road Coastal Photography 2026 portfolio, you must learn to master high-contrast lighting situations.
The secret is to shoot during the "Golden Hour" (the hour after sunrise and the hour before sunset) and the "Blue Hour" (the thirty minutes of twilight just after sunset). During these times, the light is soft, warm, and highly directional, casting long, dramatic shadows that accentuate the textures of the ancient cliffs.
Now try this: look for reflective wet sand as the tide goes out. The wet beach acts as a giant mirror, reflecting the vibrant colors of the sky. By getting your camera extremely low to the ground, you can create a perfectly symmetrical composition that doubles the impact of a beautiful sunset. This is where your wide-angle lens and low ISO settings will truly shine, capturing every grain of sand and every ripple of light with breathtaking clarity.
Recommended Camera Settings Cheat Sheet
- Mode: Manual (M)
- File Format: RAW
- ISO: 100 (for maximum detail and zero noise)
- Aperture: f/8 to f/11 (for deep depth of field)
- White Balance: Daylight or Cloudy (to preserve the warm, natural tones)
- Focus Mode: Manual Focus (use live view to zoom in and ensure the cliffs are perfectly sharp)
Capturing the Untamed Beauty of Victoria
The Great Ocean Road is a living, breathing landscape that is constantly changing. No two visits are ever the same. The weather can shift from bright sunshine to dramatic, stormy rain clouds in a matter of minutes. Embrace these changes! Some of the most spectacular Great Ocean Road Coastal Photography 2026 images are captured during stormy weather, when dark, moody clouds hang low over a churning, violent sea.
Don't forget to protect your gear. Keep your camera covered when you are not shooting, and always wipe down your tripod legs with fresh water after standing in salt spray or wet sand. Your camera gear is an investment, and taking care of it ensures you can keep capturing these incredible vistas for years to come.
Now that you have the knowledge and the settings, it is time to grab your gear, head out to the coast, and start shooting. The perfect light is waiting for you along the rugged edge of the continent. You have got this!
Frequently Asked Questions
What is the best time of day to photograph the Twelve Apostles?
Golden hour just after sunrise or before sunset offers soft light and fewer crowds. Midday light is harsh and creates deep shadows on the cliffs.
Which camera gear is essential for a Great Ocean Road photography trip?
Bring a wide-angle lens for landscapes, a sturdy tripod for long exposures, and ND filters for silky water effects. A telephoto lens also helps isolate distant rock stacks.
Are drones allowed for coastal photography along the Great Ocean Road?
Yes, but many sections fall within national parks and protected areas where drone use is restricted or banned. Always check local regulations and fly only in permitted zones.
How can I capture the Milky Way over the coastline?
Plan your shoot during a new moon and use a fast wide-angle lens with a high ISO setting. Scout locations like Loch Ard Gorge for dark skies and interesting foregrounds.
When is the best season for coastal photography on the Great Ocean Road in 2026?
Autumn and spring provide mild weather, dramatic clouds, and fewer tourists. Winter can deliver moody storms, but expect rain and shorter daylight hours.

Matthias Weber digs into the craft of travel photography, from camera settings to editing. He explains the technical side in plain language so you can spend less time fiddling with dials and more time shooting.
💬 Comments (0)
No comments yet. Be the first!