Meteora Landscape Photography 2026
Our complete guide to Meteora Landscape Photography 2026 helps you capture Greece's dramatic monasteries.
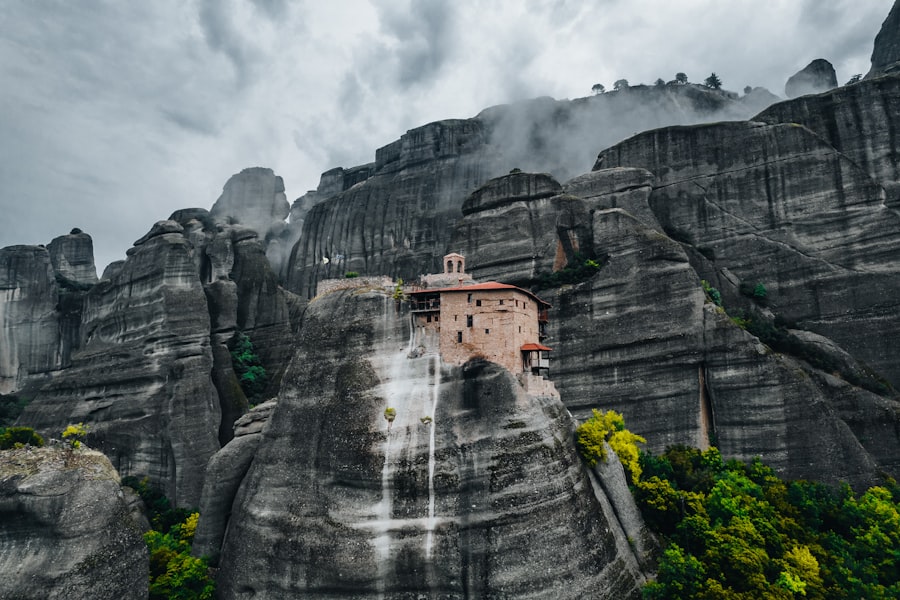
If you want to capture breathtaking images of giant stone pillars crowned by ancient monasteries, this guide to Meteora Landscape Photography 2026 is exactly what you need to elevate your visual storytelling. I still remember my very first trip to this UNESCO World Heritage site in central Greece. I stood on a cliffside at sunset, completely overwhelmed by the sheer scale of the landscape, and completely messed up my shots because I did not understand how to balance the extreme contrast between the dark rocks and the bright sky. Today, I am going to coach you through the exact techniques, gear choices, and camera settings so you can avoid my early mistakes and create portfolio-worthy masterpieces.
The Magic of Meteora: Why 2026 is Your Year
Meteora is a dreamland for photographers, where nature and human history collide in spectacular fashion. The word Meteora literally translates to suspended in the air, and when the morning mist rolls through the valley, that is exactly how these monasteries look. Approaching Meteora Landscape Photography 2026 requires a mix of patience, technical skill, and a deep understanding of light.
In 2026, camera technology has advanced to give us incredible dynamic range, but the core principles of photography remain the same. Whether you are using a brand new mirrorless camera or a trusty DSLR, the secret is knowing how to make your gear work for you under challenging lighting conditions. The towering sandstone cliffs can create deep shadows, while the sky above can easily become overexposed and blown out.
Understanding Your Camera Settings
Before we head out to the cliffs, let us demystify some of the photography jargon you need to master. Do not worry, I will keep it simple and practical so you can apply these tips immediately in the field.
RAW vs JPEG: The Ultimate Choice
First, let us look at your file format. Always shoot in RAW rather than JPEG. A JPEG is a finished image compressed by your camera, which throws away valuable color and light data. A RAW file, on the other hand, preserves all the data captured by your camera sensor. Think of a RAW file as your raw ingredients and a JPEG as a pre-packaged meal. Shooting RAW gives you the ultimate control when editing your Meteora Landscape Photography 2026 images in post-processing, allowing you to recover details in the dark shadows of the cliffs and the bright highlights of the clouds.
ISO and Bokeh Explained
Next is ISO, which measures your camera sensor's sensitivity to light. A lower ISO, like ISO 100, produces the cleanest images with no digital noise or grain. As the sun goes down, you might be tempted to raise your ISO to make the image brighter, but always try to keep it as low as possible by using a sturdy tripod. Another term you will hear often is Bokeh, which refers to the out-of-focus, blurry background in an image. While beautiful for portraits, in landscape photography we generally want the opposite: sharp, crisp details from the foreground rocks all the way to the distant monasteries.
Rule of Thirds and Exposure Compensation
The Rule of Thirds is a classic composition guideline where you divide your frame into a grid of nine equal rectangles. Placing a monastery on one of the intersecting grid lines, rather than dead center, instantly makes your photo more dynamic and balanced. Finally, let us talk about Exposure Compensation. This is a handy button on your camera (marked with a plus and minus sign) that allows you to manually override your camera's automatic exposure decisions. If the bright morning mist is tricking your camera into making the image too dark, you can use positive exposure compensation to brighten it back up.
The Golden Rule of Meteora: Always prioritize your highlights. It is much easier to recover shadow details from the dark sandstone cliffs in post-processing than it is to fix a sky that has been completely blown out to pure white.
My Epic Failure: A Before and After Story
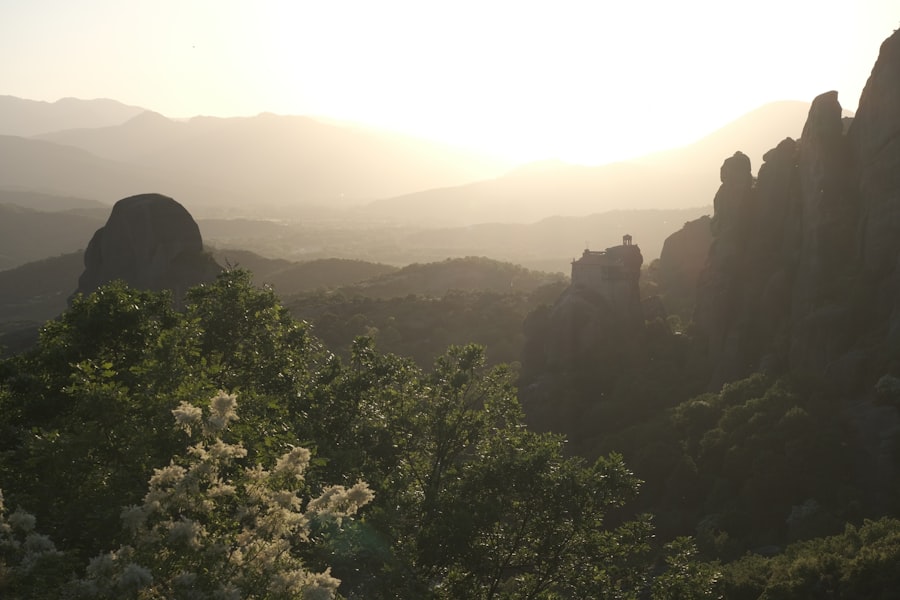
Let me share a quick story about how I learned this the hard way. A few years ago, I was standing at the famous sunset viewpoint overlooking the Roussanou Monastery. The sky was burning with incredible shades of pink and orange. I was so excited that I just pointed my camera and shot on fully automatic mode in JPEG.
The result? A complete disaster. Because the camera tried to average out the light, the sky was a washed-out white mess, and the gorgeous monastery was nothing but a black, detail-less silhouette. I had completely missed the shot because I did not understand how to manage my exposure.
Now try this instead, which is exactly how I fixed it on my next visit. I switched my camera to Manual mode, changed my file format to RAW, and mounted my camera on a tripod. I set my ISO to 100 for maximum image quality. I then used Exposure Compensation to slightly underexpose the image, ensuring the vibrant colors of the sunset sky were perfectly preserved. Back at my computer, because I shot in RAW, I was able to gently lift the shadows on the monastery and the cliffs. The final image was stunning, with rich details in both the brightest clouds and the darkest rocks. That is the power of mastering Meteora Landscape Photography 2026 techniques!
Step-by-Step Guide to Capturing the Perfect Shot
Now that you know the basics, let us walk through a step-by-step workflow to get you ready for your shoot.
Step 1: Arrive Early and Scout Your Location
Do not just show up five minutes before sunset. Arrive at least an hour early to find a safe spot on the rocky ledges and compose your shot using the Rule of Thirds. This gives you time to watch how the changing light interacts with the monastery walls.
Step 2: Dial in Your Base Settings
Set your camera to Aperture Priority mode or Manual mode. Set your aperture to f/8 or f/11. This is the sweet spot for most lenses, ensuring that your entire landscape remains sharp and in focus from front to back.
Step 3: Keep Your ISO Low and Use a Tripod
Keep your ISO at its base level (usually ISO 100) to avoid digital noise. Since a low ISO and a narrow aperture mean less light is entering the camera, your shutter speed will be slower. Use a sturdy tripod and a shutter release cable or a 2-second timer delay to prevent camera shake when you press the button.
Recommended Gear for Meteora
To get the most out of your trip, having the right gear is essential. While you do not need the most expensive camera on the market, certain tools will make your job much easier.
- A Sturdy Tripod: The wind can pick up quickly on the high cliffs of Meteora. A heavy, stable tripod is a must-have for sharp long exposures during sunrise and sunset.
- Wide-Angle and Telephoto Lenses: A wide-angle lens (like a 16-35mm) is perfect for capturing the vastness of the valley, while a telephoto lens (like a 70-200mm) allows you to zoom in and isolate individual monasteries against the cliffs.
- Neutral Density (ND) Filters: These are like sunglasses for your lens. They reduce the amount of light entering the camera, allowing you to use slower shutter speeds to capture motion blur in the moving clouds.
- Lens Cleaning Kit: The dust from the sandstone cliffs can easily get onto your glass, so keep a microfiber cloth handy.
Must-Have Camera Settings Cheat Sheet
When you are standing on the edge of a cliff and the light is changing fast, use this quick guide to set up your camera for spectacular Meteora Landscape Photography 2026 results.
- Image Format: RAW (for maximum editing flexibility in softwares like Adobe Lightroom).
- Focus Mode: Single-point Autofocus (aim at the monastery structure to ensure it is tack sharp).
- Aperture: f/8 to f/11 (to maximize your depth of field).
- ISO: 100 (to prevent grain and keep your images clean).
- White Balance: Daylight or Cloudy (depending on the weather, though you can easily adjust this later if you shoot in RAW).
Final Thoughts on Mastering the Landscape
Don't forget to enjoy the moment! Sometimes we get so caught up in adjusting our settings and looking through the viewfinder that we forget to appreciate the magic of where we are standing. Meteora is a deeply spiritual and historic place, and your photos will look much better if you take a moment to connect with the landscape before you start shooting.
If you want to research the latest camera body capabilities for handling these high-contrast scenes, check out the official specifications on the Sony Electronics or Canon Official websites. For comprehensive gear reviews and community discussions on the best lenses for travel, DPReview is an invaluable resource. Now, pack your bags, set your camera to RAW, and get ready to create some unforgettable Meteora Landscape Photography 2026 memories. You've got this!
Frequently Asked Questions
What makes Meteora a unique landscape photography destination in 2026?
Meteora's towering rock formations and ancient monasteries create dramatic scenes, especially during sunrise and sunset.
When is the best time of year to visit Meteora for photography?
Spring and autumn offer the most pleasant weather and vibrant lighting, while winter provides snow-capped landscapes.
What camera gear is recommended for landscape photography at Meteora?
A wide-angle lens for the vast rock formations and a telephoto lens for compressing distant monasteries against the hills.
Are there any special permits required to photograph the monasteries?
It is best to respect opening hours and obtain permission only for long-exposure or commercial shoots inside the monasteries.
What tips can you give for capturing the Meteora monasteries in the best light?
Arrive early for the golden hour after sunrise or stay late for twilight city lights from suitable key viewpoints above the monasteries themselves.

Matthias Weber digs into the craft of travel photography, from camera settings to editing. He explains the technical side in plain language so you can spend less time fiddling with dials and more time shooting.
💬 Comments (0)
No comments yet. Be the first!