Exposure Triangle for Travel Photography 2026
Master the exposure triangle for travel photography in 2026. Aperture, shutter speed, and ISO explained simply.
Mastering the exposure triangle is the single most important skill for travel photography in 2026, and I will show you how to use it to capture stunning images anywhere you go. Whether you are shooting the neon streets of Tokyo or the quiet beaches of Thailand, the exposure triangle is your secret weapon. I still remember my first trip to Santorini – I was so excited about the blue domes and sunset that I completely forgot to check my settings. The result? A series of blown-out skies that looked like white cloth instead of golden clouds. That failure taught me the hard way that understanding the exposure triangle is not optional; it is essential. But do not worry – by the end of this tutorial, your photos will look sharp, balanced, and full of life.
What Is the Exposure Triangle?
The exposure triangle is the relationship between three camera settings: aperture, shutter speed, and ISO. Think of it as a three-legged stool – if one leg is too short, the whole thing wobbles. Each setting controls how much light reaches your camera sensor, and together they determine whether your photo is too bright, too dark, or just right. Let me break each one down in simple terms.
Aperture – The Window of Light
Aperture is the opening in your lens that lets light in. It is measured in f-stops (like f/2.8, f/5.6, f/11). A lower f-number means a wider opening and more light, but also a shallow depth of field – that dreamy bokeh effect where the background blurs. A higher f-number means less light but more of the scene stays in focus. For travel portraits, I often use f/2.8 to isolate my subject. For landscapes, I go to f/11 to keep everything sharp.
Shutter Speed – Freeze or Blur
Shutter speed is how long the sensor is exposed to light. A fast speed like 1/1000 second freezes action – perfect for a bird in flight or a street dancer. A slow speed like 1/30 second lets more light in but can blur motion – great for silky waterfalls or intentional motion blur. The trick is to match your shutter speed to your subject and stability. Without a tripod, a good rule is to never go slower than 1/60 second unless you have steady hands or image stabilization.
ISO – Sensitivity to Light
ISO measures how sensitive your camera sensor is to light. A low ISO (100-200) gives clean, noise-free images but needs plenty of light. A high ISO (1600-6400) boosts brightness but introduces grain or noise. In 2026, modern cameras handle noise much better, but I still recommend keeping ISO as low as possible. Only raise it when aperture and shutter speed cannot give you enough light – for example, indoors or at night.
Putting It All Together – The Balancing Act
The real magic happens when you balance all three. Imagine you are shooting a street market in Marrakech. You want a fast shutter speed to freeze a merchant pouring tea, and a wide aperture for a soft background. But the light is low. You could raise ISO to compensate – but be careful not to introduce too much noise. First, let's look at how to prioritize. The secret is to decide what matters most for your shot. If you need maximum sharpness across the scene, set aperture first. If you need to stop motion, set shutter speed first. Then adjust the remaining two to get proper exposure.
Modern cameras also give you tools like exposure compensation – a dial that lets you brighten or darken the image without changing the triangle. And remember, shooting in RAW vs JPEG gives you way more flexibility. RAW files capture all the sensor data, so you can fix minor exposure errors in post-processing. JPEGs are compressed and lose that freedom. For travel, I always shoot RAW.
Step-by-Step Guide to Setting Your Exposure Triangle
Now try this simple process the next time you are out shooting:
- Choose your aperture based on depth of field. Portrait? f/2.8. Landscape? f/8-f/11.
- Set your shutter speed based on motion. Still life? 1/100 or higher if handheld. Moving subject? 1/500 or faster.
- Adjust ISO last. Look at your camera's light meter (the scale at the bottom of the viewfinder). If it shows overexposure (too bright), lower ISO. If underexposed (too dark), raise ISO until the meter hits zero.
- Review and refine. Take a test shot. Check the histogram – a graph of brightness. A good exposure has a bell curve that doesn't touch the far left or far right edges.
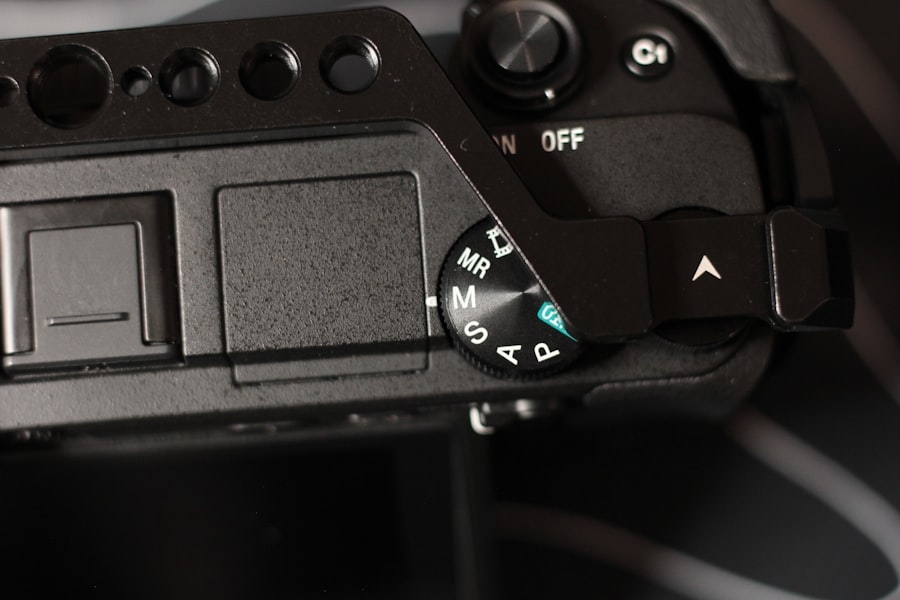
Don't forget to switch to aperture priority or shutter priority mode if you want the camera to handle the third setting automatically. But for full control, use Manual mode.
Real-World Scenario – My Santorini Mistake
Let me share that Santorini story properly. I was standing on a cliff in Oia, watching the sun dip into the Aegean Sea. I set my aperture to f/2.8 for a beautiful bokeh of the distant islands. I chose a shutter speed of 1/2000 second because I was excited and wanted to freeze the waves. But I left my ISO at 800 from a previous indoor shot. The result: the sky was completely white, no detail at all. I had overexposed because the combination of wide aperture and high ISO let in way too much light for that bright sunset. I fixed it by lowering ISO to 100 and changing shutter speed to 1/500. The next shot was perfect – the golden hour tones popped, the clouds had texture, and I could actually see the blue domes. That day I learned that the exposure triangle is a delicate balance, and you must check it every time the light changes.
Pro Tips for Travel Photography in 2026
Here are some practical settings and gear to make your life easier on the road.
- Recommended Settings for common travel scenarios:
– Daylight landscape: aperture f/8, shutter 1/250, ISO 100.
– Golden hour portrait: aperture f/2.8, shutter 1/500, ISO 200.
– Night cityscape: aperture f/11, shutter 10-30 seconds (use tripod), ISO 100.
– Action (sports, kids): aperture f/4, shutter 1/1000, ISO auto (up to 1600). - Must-have Gear for mastering exposure on the go:
– A camera with full manual controls (e.g., Sony A7 IV, Canon EOS R6, Nikon Z6 III).
– A sturdy travel tripod (carbon fiber, under 1.5 kg).
– A circular polarizer filter to manage reflections and boost contrast.
– Extra batteries – high ISO and long exposures drain power fast.
Golden Rule of the Exposure Triangle: It is always better to underexpose slightly than to overexpose. You can recover shadows in post, but blown highlights are gone forever. Check your histogram – if it touches the right edge, reduce exposure using a faster shutter, smaller aperture, or lower ISO.
If you want to go deeper, check out the official specs of the Sony A7 IV or read this comprehensive guide on DPReview's Exposure Triangle article. Also, Adobe's Lightroom tutorials can help you fine-tune exposure in RAW files – how to use the tone curve.
Conclusion – Go Out and Practice
The exposure triangle is not a theory – it is a daily practice. The more you shoot, the more intuitive it becomes. I promise that within a few weeks, you will look at a scene and instantly know what settings to dial in. Remember to shoot RAW, use the histogram, and never be afraid to experiment. In 2026, travel photography is more accessible than ever, but the fundamentals remain the same. Your camera is a tool; the exposure triangle is the skill that turns a snapshot into a story. Now get out there and capture the world the way you see it.
Frequently Asked Questions
What is the exposure triangle that every travel photographer needs to master in 2026?
The exposure triangle consists of aperture, shutter speed, and ISO, which together control how light enters your camera to create a well-exposed image.
How does aperture affect travel photos?
Aperture controls depth of field; in 2026, a wide aperture (low f-number) is often used for portraits with blurry backgrounds or bright interiors, while a narrow aperture keeps landscapes sharp front to back.
What shutter speed is ideal for handheld travel shots in 2026?
A general rule is to use a shutter speed at least as fast as the reciprocal of your lens's focal length to avoid blur, though modern image stabilization allows slower speeds.
How can I set ISO properly when traveling with shifting light?
Start with your camera's base ISO (typically 100-200) for bright scenes, and increase only when you need faster shutter speeds or smaller apertures to avoid grainy images.
What's a quick exposure check for travel photography in 2026?
Use your camera's histogram overlay instantly to see if highlights and shadows are balanced, pointing the camera at bright sky can confirm blown-out highlights.
💬 Comments (0)
No comments yet. Be the first!