Ronda bridge photography 2026: 5 Pro Tips
Our Ronda bridge photography 2026 guide reveals how to capture stunning shots of Puente Nuevo from the gorge below.
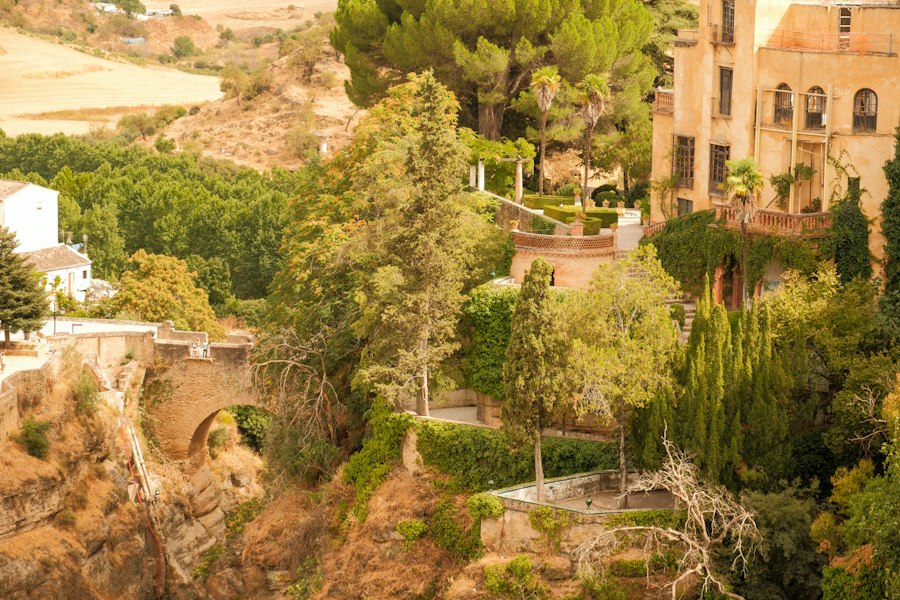
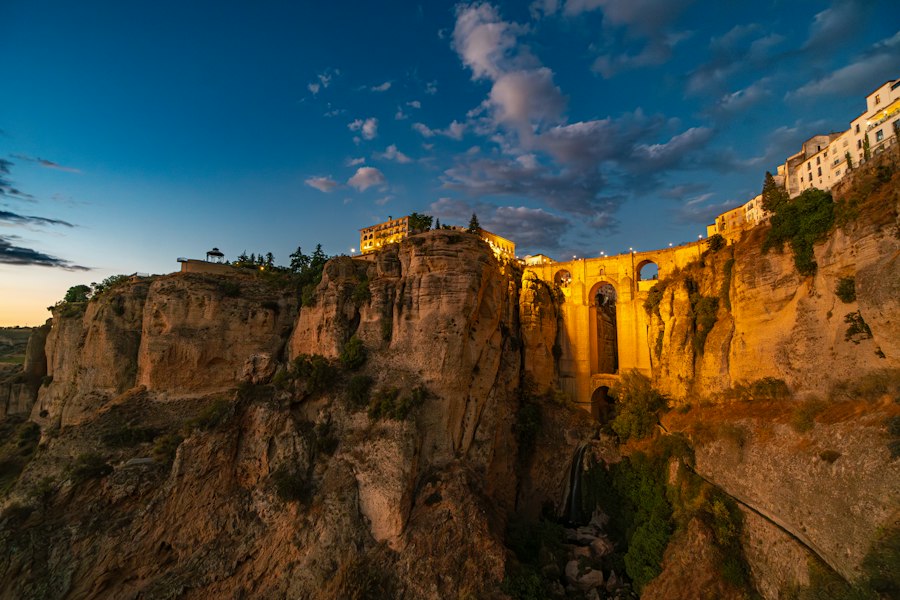
If you are planning a trip to southern Spain, mastering Ronda bridge photography 2026 is likely at the very top of your bucket list. The majestic Puente Nuevo, spanning the dramatic 120-meter-deep El Tajo gorge, is one of the most photographed landmarks in Europe. But here is the truth: because it is so famous, capturing a shot that actually stands out from the crowd requires more than just pointing your phone and clicking. In 2026, with travel returning to record levels, you need a solid game plan to beat the crowds and capture the dramatic Andalusian light.
As your photography coach, I am here to help you move past basic snapshots. Whether you are shooting on a professional mirrorless camera or a smartphone, I will show you how to transform your travel photos into portfolio-worthy art. Let us dive into five pro tips that will elevate your Ronda bridge photography 2026 adventure.
1. Master the Secret Viewpoints Before the Crowds Arrive
First, let us look at where you actually need to stand. Most tourists take their photos from the Plaza de Espana or the nearby Aldehuela viewpoint. While these spots are beautiful, they are often packed shoulder-to-shoulder, making it nearly impossible to set up a tripod or find a clean composition.
To get that iconic, towering view of the Puente Nuevo, you need to hike down into the gorge. The secret is the Camino de los Molinos trail. From this valley floor perspective, the bridge looms above you like a giant stone fortress. The scale is absolutely breathtaking. In 2026, local authorities have improved the safety rails along this path, making it easier than ever to carry your gear down for a sunrise session. By shooting from the valley, you can use the winding path or the Guadalevin River as a natural leading line, drawing your viewer's eye straight up to the historic architecture.
2. Choose Your Gear Wisely for High-Contrast Scenes
Ronda is a land of extreme light and deep shadows. The white-washed houses of the town reflect intense sunlight, while the deep chasm of the El Tajo gorge remains cast in dark shadow. This high-contrast environment will put your camera sensor to the test. To tackle this, you need the right tools.
Recommended Gear Checklist
- A Wide-Angle Lens: A focal length of 16mm to 24mm on a full-frame camera is essential to capture both the massive bridge and the deep gorge in a single frame.
- A Sturdy Tripod: Crucial for tack-sharp long exposures during the blue hour when the bridge lights turn on.
- Graduated Neutral Density (GND) Filter: This helps balance the bright sky with the dark, shadowed gorge.
- A Microfiber Cloth: The gorge can get windy, blowing dust or moisture onto your lens element.
If you are looking to upgrade your setup this year, check out the latest mirrorless bodies on the Sony Official Site or browse the advanced lens options on the Canon Official Site to find the perfect wide-angle glass for your journey.
The Golden Rule of Ronda Photography: Always shoot in RAW format rather than JPEG. A RAW file preserves all the uncompressed data captured by your sensor, giving you the power to recover dark shadows in the gorge and tone down bright highlights in the sky during post-processing.
3. Dial in Your Camera Settings Like a Pro
Now try this: let us move away from "Auto" mode and take control of your camera. To make your Ronda bridge photography 2026 images look professional, you need to understand how to balance your exposure. Let us break down the jargon into simple, actionable steps.
Step-by-Step Manual Settings Guide
- Select your ISO: Keep your ISO as low as possible, ideally ISO 100. This ensures your images are clean, crisp, and free of digital noise, especially in those dark shadow areas of the cliffside.
- Set your Aperture (f-stop): For deep landscapes where you want both the foreground rocks and the distant bridge in sharp focus, choose an aperture between f/8 and f/11. Avoid going up to f/22, as this can actually cause image softness due to lens diffraction.
- Adjust your Shutter Speed: If you are shooting hand-held during the day, keep your shutter speed above 1/125th of a second to prevent camera shake. If you are shooting at dusk on a tripod, let the shutter stay open for 5 to 10 seconds to create silky-smooth water in the river below.
- Use Exposure Compensation: If the bright sky is tricking your camera into making the bridge look too dark, use your Exposure Compensation dial (the +/- button) to manually brighten or darken the scene by a stop or two.
What about Bokeh? While a shallow depth of field (that beautiful, blurry background) is amazing for portraits, you generally want to avoid heavy bokeh for landscape shots of the bridge. You want the historic masonry and the rugged geological formations of Ronda to be sharp from edge to edge.
4. A Tale of Two Shoots: My Failed Attempt and the Fix
I want to share a quick story with you. The first time I attempted Ronda bridge photography 2026, I arrived at midday. The sun was directly overhead, casting harsh, ugly black shadows across the face of the Puente Nuevo. The white buildings at the top of the cliff were completely blown out, meaning they were so bright they lost all detail. My photos looked flat, lifeless, and amateur. I felt incredibly disappointed.
The next morning, I changed my strategy completely. I woke up at 6:00 AM, slipped down to the valley trail, and waited for the blue hour just before sunrise. The magic happened. The sky turned a deep indigo, the golden streetlights on
Shoot during golden hour shortly after sunrise or before sunset for warm light and fewer crowds. Midday sun creates harsh shadows on the gorge. The Mirador de Aldehuela and the path down into the gorge offer the most iconic angles. Arrive early to secure a spot without tourists blocking the view. A wide-angle lens (16-35mm) captures the bridge and gorge together, while a telephoto (70-200mm) compresses the dramatic cliffs. Bring both for flexibility. Use a graduated neutral-density filter or bracket multiple exposures and blend them later. Metering for the bright sky keeps highlights intact. Drone flights are largely restricted over the protected gorge and town center, so check local rules before flying. Many photographers rely on ground viewpoints instead.Frequently Asked Questions
What is the best time of day to photograph the Ronda bridge in 2026?
Where is the classic viewpoint for photographing the Puente Nuevo?
What lens should I use for Ronda bridge photography?
How do I avoid overexposing the sky when shooting the bridge?
Are there any restrictions for drone photography at the Ronda bridge in 2026?

Matthias Weber digs into the craft of travel photography, from camera settings to editing. He explains the technical side in plain language so you can spend less time fiddling with dials and more time shooting.
💬 Comments (0)
No comments yet. Be the first!