Lanzarote volcanic photography 2026 Guide
Master Lanzarote volcanic photography 2026 with our expert guide to capturing high-contrast lava fields.
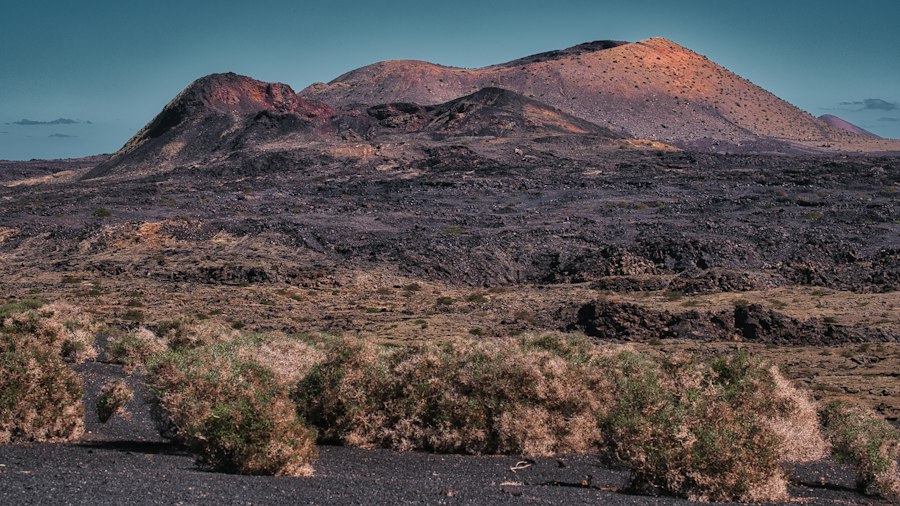
Mastering Lanzarote volcanic photography 2026 is one of the most rewarding challenges you will face as a landscape photographer this year.
I still remember my first trip to the island. I stood on the edge of the Timanfaya National Park, looking out over a vast sea of black lava rock and crimson craters. I pressed the shutter, confident I had captured a masterpiece. But when I looked at my LCD screen, the image was a flat, gray mess. The dark volcanic soil had fooled my camera meter, and the stunning textures of the earth were completely lost. I want to make sure you do not make those same mistakes. In this guide, I will coach you through the exact techniques, settings, and gear you need to capture the raw, otherworldly beauty of this unique Canary Island.
Why Lanzarote Volcanic Photography 2026 Requires a New Approach
The volcanic landscapes of Lanzarote are unlike anything else on Earth. The island is a canvas of dark basalt, bright green lagoons, and deep red volcanic cones. This extreme contrast is precisely why Lanzarote volcanic photography 2026 demands a solid understanding of your camera settings and composition.
First, let us look at the light. Because the ground is so dark, your camera automatic exposure system will often get confused. The camera thinks the scene is too dark and tries to brighten it up, which blows out your highlights and turns your beautiful, moody black lava into a pale gray. By learning to control your exposure manually, you can capture the true, dramatic spirit of this volcanic paradise.
Essential Camera Settings for the Volcanic Landscape
To get the sharpest, most detailed images of the rugged terrain, you must move away from automatic modes. Let us break down the jargon and look at the exact settings you should use on your camera.
RAW vs JPEG: The Ultimate Battle
The secret is to always shoot in RAW rather than JPEG. A JPEG file is compressed by your camera, meaning a lot of the detail in the shadows and highlights is permanently deleted. A RAW file, however, saves all the data captured by your sensor. When you are photographing dark volcanic rocks against a bright sky, you need every bit of dynamic range you can get. Shooting RAW allows you to pull details out of the dark shadows later during editing without losing quality.
Understanding ISO and Exposure Compensation
Now try this: keep your ISO as low as possible, ideally at ISO 100. ISO measures your camera sensor sensitivity to light. A high ISO makes the sensor more sensitive but introduces digital noise, which looks like ugly grain in your dark lava shadows. To keep your images clean and sharp, stick to low ISO values and use a tripod if the light starts to fade.
If you are shooting in a semi-automatic mode like Aperture Priority, don't forget to use Exposure Compensation. This is usually a button with a plus and minus symbol. Because the dark soil tricks your camera into overexposing the scene, you should set your Exposure Compensation to -0.7 or -1.0. This tells your camera to keep the shadows dark and rich, preserving the true color of the volcanic earth.
The Volcanic Golden Rule: Always expose for the highlights. It is much easier to recover shadow detail from dark volcanic rock in post-processing than it is to fix a sky that has been completely blown out to pure white.
Must-Have Gear and Recommended Settings
Having the right equipment will make your journey much easier. You do not need the most expensive camera on the market, but a few key accessories will elevate your Lanzarote volcanic photography 2026 results dramatically.
Recommended Gear List
- A Sturdy Tripod: The wind in Lanzarote can be incredibly strong, especially on crater rims. A heavy, stable tripod is essential for sharp long-exposure shots.
- Circular Polarizer Filter (CPL): This filter reduces glare from wet volcanic rocks and boosts the contrast between the blue sky and white clouds.
- A Wide-Angle Lens: A focal length between 16mm and 24mm on a full-frame camera will help you capture the vast scale of the craters.
- Lens Cleaning Kit: Volcanic dust is sharp and abrasive. Keep a blower brush handy to clean your lens without scratching the glass.
Recommended Camera Settings
- Image Format: RAW
- Shooting Mode: Manual (M) or Aperture Priority (A/Av)
- ISO: 100 (or lowest native setting)
- Aperture: f/8 to f/11 for maximum sharpness across the entire frame
- Focus Mode: Single-point Autofocus or Manual Focus
- White Balance: Daylight or Cloudy (to keep the warm tones of the red soil)
Step-by-Step Guide to Shooting a Volcanic Sunset
Now, let us walk through a real-world scenario. We are going to shoot the sunset over the dramatic lava fields of Los Hervideros, where the black cliffs meet the churning Atlantic Ocean. Follow these steps for the perfect shot.
Step 1: Arrive Early and Scout Your Composition
First, let us look at the landscape before the light gets good. Arrive at least one hour before sunset. Look for interesting foreground elements to guide the viewer eye. A classic composition tool is the Rule of Thirds. Imagine your frame divided into a grid of nine equal rectangles. Place the horizon along the bottom third line to give more space to a dramatic sky, or along the top third line to focus on the textures of the lava. Look for a winding crack in the lava to use as a leading line pointing toward the sunset.
Step 2: Set Up Your Tripod and Compose
Position your tripod firmly on the rock. Make sure it is stable because the volcanic stone can be uneven. Frame your shot using a wide-angle lens. If you have a subject close to your lens, like a beautiful volcanic wildflower, you can experiment with Bokeh. This is the soft, out-of-focus background blur. To get a smooth Bokeh, use a wider aperture like f/4. However, for a classic landscape where everything is sharp, stick to f/11.
Step 3: Dial in Your Settings and Capture
Set your camera to manual mode, ISO 100, and f/11. Take a test shot. Check your histogram, which is the little graph on your screen showing the exposure. If the graph is pushed too far to the right, your highlights are blown. If it is too far to the left, your shadows are too dark. Adjust your shutter speed until the graph is nicely balanced in the middle. Use a 2-second shutter delay so that your finger pressing the button does not shake the camera.
Before and After: The Power of Technique
To show you how much these steps matter, let us look at a quick comparison of what happens when you apply this coach-like advice to your Lanzarote volcanic photography 2026 adventure.
The Before Scenario: You arrive at a volcanic lookout at noon. You leave your camera on Auto, shooting in JPEG. The camera exposes for the dark black sand, making the sky completely white and washing out the rich red tones of the craters. The image looks flat, hazy, and lacks impact.
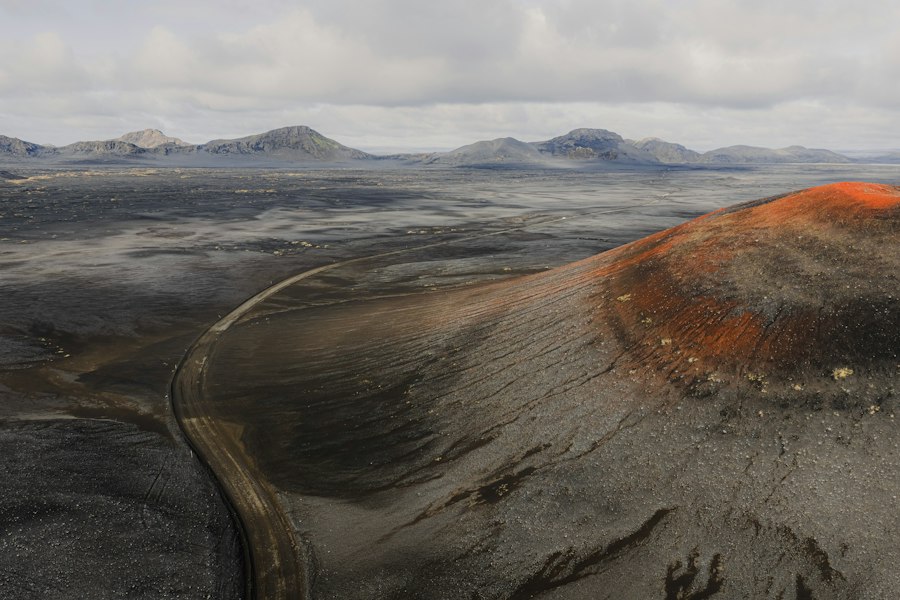
The After Scenario: You return to the same spot during the golden hour, just before sunset. You mount your camera on a tripod, shoot in RAW, set your ISO to 100, and use manual exposure to keep the highlights in the sky intact. You apply the Rule of Thirds, using a crack in the dark basalt as a leading line. The resulting image features deep, moody black textures, vibrant orange and red crater rims, and a rich, dramatic sky. It is a photograph worthy of a gallery wall.
Elevating Your Lanzarote Volcanic Photography 2026 Skills
The secret is patience. The weather in Lanzarote can change quickly, and the way the light interacts with the dark volcanic earth is constantly shifting. One minute the landscape looks dark and forbidding; the next, a burst of sunlight illuminates the minerals in the rock, making the hills glow with green, yellow, and red hues.
As you plan your journey, remember that Lanzarote volcanic photography 2026 is all about contrast and texture. Do not be afraid of the dark shadows. Embrace them. Use them to create mystery and depth in your compositions. By mastering your camera settings, shooting in RAW, and paying close attention to your exposure, you will return home with an incredible portfolio of images from this volcanic wonderland. Now get out there, explore the craters, and capture the magic!
Frequently Asked Questions
What is the best time of year for volcanic photography in Lanzarote in 2026?
The best months are typically October through April, when temperatures are mild and the light is softer. Avoid the peak summer haze if you want crisp, dramatic volcanic shots.
Which locations in Lanzarote are essential for volcanic photography?
Timanfaya National Park, El Golfo, and the lava fields of Cordillera de Fire are must-visit spots. These areas offer rich reds, blacks, and golden tones that are perfect for compelling compositions.
What camera gear do I need for photographing Lanzarote's volcanic landscapes?
A wide-angle lens, a sturdy tripod, and polarizing plus ND filters are ideal for the harsh and dynamic volcanic light. Bring spare batteries and sensor cleaning tools because dust from the lava fields can be invasive.
How do I protect my camera from volcanic dust and heat in Lanzarote?
Use sealed or weather-resistant camera bags and avoid changing lenses in windy, dusty areas. Clean your gear after each outing to prevent fine ash from damaging internal components.
When is the best light for volcanic photography in Lanzarote?
The golden hour shortly after sunrise and before sunset provides warm, directional light that emphasizes the texture of lava rock. Midday harsh light can work too, but use filters and shadows to capture dramatic black and red contrast.

Matthias Weber digs into the craft of travel photography, from camera settings to editing. He explains the technical side in plain language so you can spend less time fiddling with dials and more time shooting.
💬 Comments (0)
No comments yet. Be the first!