Halong Bay sunrise photography 2026 Guide
Master Halong Bay sunrise photography 2026 with our expert guide to capturing misty limestone karsts and golden water.
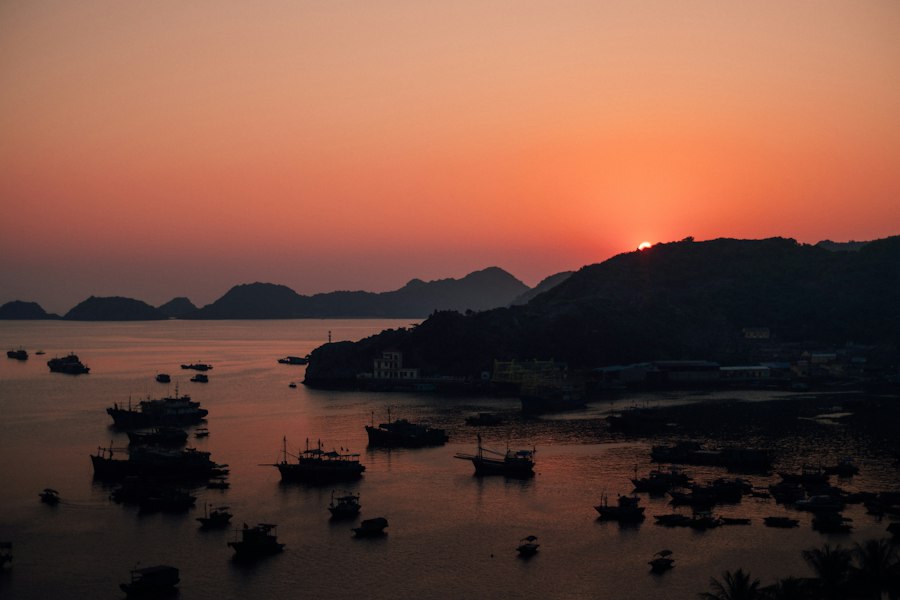
Mastering Halong Bay sunrise photography 2026 is the ultimate dream for landscape photographers visiting Vietnam this year. There is nothing quite like watching the morning mist rise off the emerald waters as thousands of limestone karsts emerge from the darkness. I still remember my very first trip to the bay years ago. I woke up at 5:00 AM, rushed to the deck of my cruise ship, and blindly pressed the shutter button. The result? A blurry, washed-out mess of grey tones where the beautiful limestone islands looked like dark blobs. I had made the classic mistake of letting my camera do all the thinking in a high-contrast environment. Today, I am going to share my personal secrets so you can avoid my past mistakes and capture breathtaking images on your next adventure.
Why Halong Bay Sunrise Photography 2026 is Different
The year 2026 brings new opportunities for travel photographers in northeastern Vietnam. With updated eco-tourism regulations in the bay, cruise itineraries have changed to allow ships to anchor in quieter, less-crowded waters overnight. This means your shots of the morning light will be cleaner, with fewer modern ships blocking your frame.
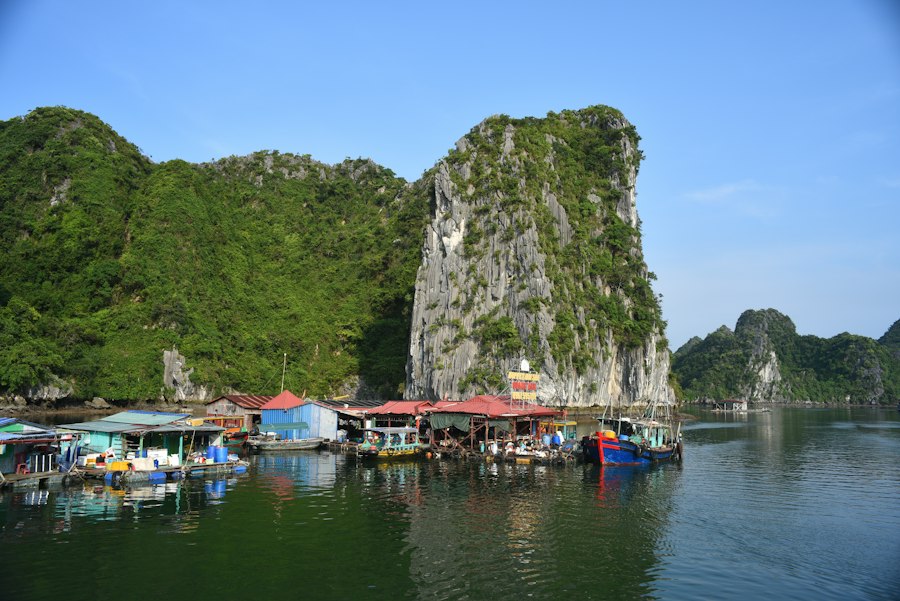
To capture the true mood of this UNESCO World Heritage site, you must learn to work with the unique coastal atmosphere. The morning air in Vietnam is often thick with humidity, which acts as a giant natural softbox. This softens the sunlight but can also trick your camera lens into losing contrast. Understanding how to control your camera settings manually is the key to making your images stand out on social media and in print portfolios this year.
Your Essential Gear Guide for the Perfect Shot
Before we discuss camera settings, let us look at the gear you need to pack in your bag. You do not need the most expensive camera on the market, but having the right tools will make your Halong Bay sunrise photography 2026 experience much smoother.
- A Camera with Manual Controls: Whether it is a mirrorless camera or a traditional DSLR, you need to be able to change your settings manually.
- A Versatile Zoom Lens: A 24-70mm lens is perfect for capturing both wide landscapes and zooming in on distant fishing boats.
- A Sturdy Tripod: Cruise ships vibrate when their generators are running. A sturdy travel tripod with rubber feet helps absorb these micro-vibrations.
- Lens Cleaning Cloths: The high humidity of the bay will cause your cold camera lens to fog up instantly when you step out of your air-conditioned cabin.
- Graduated Neutral Density (GND) Filter: This filter is dark at the top and clear at the bottom, which helps balance the bright sky with the dark water.
If you are looking to upgrade your gear before your trip, check out the official Sony Camera Specs page to see the latest mirrorless bodies that offer incredible low-light performance, or browse the DPReview website for deep dives into the best travel lenses for 2026.
The Golden Rule of Halong Bay Photography: Always shoot in RAW format rather than JPEG. A JPEG file discards valuable image data to save space. A RAW file saves every bit of light information captured by your camera sensor, giving you the power to rescue dark shadows and bright highlights when you edit your photos later in Adobe Lightroom.
Understanding Photography Jargon in Simple Terms
To get the most out of your Halong Bay sunrise photography 2026 session, we need to speak the same language. Let us break down four essential concepts that will transform your images from average snapshots into professional-grade art.
1. ISO and Noise
ISO is simply your camera sensor's sensitivity to light. A low ISO, like ISO 100, is best for bright daylight because it produces clean, sharp images. A high ISO, like ISO 3200, makes your sensor very sensitive to light, which is useful in the dark before the sun rises. However, high ISO values introduce "noise," which looks like ugly, grain-like speckles in your photos. The secret is to keep your ISO as low as possible by using a tripod to allow for longer shutter speeds.
2. The Rule of Thirds
Imagine your viewfinder is divided into a grid of nine equal rectangles by two vertical lines and two horizontal lines. The Rule of Thirds suggests placing the most important elements of your photo along these lines or at their intersections. Instead of putting the horizon right in the middle of your frame, place it along the bottom third line to highlight a dramatic sunrise sky, or along the top third line to focus on the beautiful reflections in the emerald water.
3. Exposure Compensation
Have you ever taken a photo of a bright white beach or a brilliant sunrise and noticed the final image looked dull and grey? Your camera's light meter is programmed to make everything average out to a neutral grey. When shooting a bright sunrise, your camera will often underexpose the scene. By using the Exposure Compensation button (the little +/- icon on your camera), you can manually tell your camera to make the image brighter (+) or darker (-) to match what your eyes actually see.
Step-by-Step Guide to Capturing the Sunrise
Now try this step-by-step workflow when you step onto the deck of your cruise ship in the early morning. This is how we bring all the elements together for successful Halong Bay sunrise photography 2026.
Step 1: Set Up Before Blue Hour
Do not wait for the sun to appear over the horizon. The best colors often happen during "Blue Hour," which is the period of twilight about 30 minutes before the official sunrise time. First, let's look at the horizon and find a strong composition. Set up your tripod and mount your camera. If you are stepping out of an air-conditioned cabin, wipe your lens dry and let it acclimate to the warm, humid air for five minutes so it stops fogging up.
Step 2: Choose Your Camera Settings
Switch your camera to Manual mode. Use these recommended settings as your starting point for early morning light:
- Image Format: RAW
- ISO: 100 or 200 (to keep your images clean and free of noise)
- Aperture: f/8 to f/11 (this is the "sweet spot" for most lenses, ensuring the islands in the front and the back are all sharp)
- Shutter Speed: Let the camera calculate this, or adjust it manually until the light meter reads zero. Before the sun rises, this might be a slow speed like 1/2 a second or even 2 seconds.
- White Balance: Cloudy or Daylight (this warms up the orange and pink tones of the sunrise)
Step 3: Focus on a Distant Karst
In low light, your camera's automatic focus can struggle and hunt back and forth. To fix this, use your camera's single-point autofocus and aim at the edge of a distant limestone karst where there is a sharp contrast between the dark rock and the bright sky. Once the camera locks focus, you can switch your lens to Manual Focus (MF) so the focus remains locked for your next shots.
Step 4: Use a Self-Timer to Avoid Shake
When you press the shutter button with your finger, you introduce a tiny vibration that can blur your photo, especially at slow shutter speeds. The secret is to set your camera's drive mode to a 2-second self-timer. When you press the button, the camera will wait two seconds before taking the photo, giving the vibrations time to die down completely.
Before & After: Fixing a Classic Sunrise Mistake
Let us look at a common scenario to show you how these tips work in real life. Imagine you are standing on the deck, and the sun is just peeking over the limestone cliffs. You take a photo on Auto mode.
The Before: The camera sees the bright sun and panics. It fast-forwards the shutter speed to protect the sky, leaving the rest of your photo incredibly dark. The limestone karsts are solid black silhouettes with zero detail, the water looks grey, and there is a strange lens flare cutting across the image. It looks cold and uninviting.
The After: You switch to Manual mode and use RAW format. You set your aperture to f/11 to create a beautiful "starburst" effect with the sun's rays. You adjust your Exposure Compensation to +0.7 to brighten up the dark shadows in the water. To add a sense of depth, you zoom in slightly to create a beautiful, soft background blur—often referred to by photographers as bokeh—on the distant mist. Back home, you import the RAW file into editing software, gently lift the shadows to reveal the green trees clinging to the cliffs, and boost the warm tones. Now, your photo looks warm, deep, and majestic.
Final Tips for Your 2026 Photography Adventure
Your Halong Bay sunrise photography 2026 journey is about more than just settings; it is about patience and observation. Don't forget to look behind you! Sometimes the most beautiful light is not the sun itself, but the warm pink glow reflecting off the clouds on the opposite side of the sky.
As you plan your travel schedule for 2026, remember that the weather in Halong Bay changes with the seasons. From December to March, you will often get moody, mysterious fog. From May to September, you will experience brighter, more colorful skies but higher heat. Whichever month you choose, your Halong Bay sunrise photography 2026 journey will be an unforgettable experience if you take control of your camera and practice these simple techniques. Happy shooting, and I cannot wait to see your beautiful images of Vietnam!
Frequently Asked Questions
What is the best time to capture the sunrise in Halong Bay in 2026?
The best time is from late spring to early autumn, with sunrise typically between 4:45 and 6:00 AM. Check local sunrise times for your exact date in 2026 to arrive at least an hour early.
Where are the top spots for sunrise photography in Halong Bay?
Popular spots include Ti Top Island, Sung Sot Cave entrance, and Luon Cave. For a unique view, join a cruise that anchors near Fighting Cocks Islet overnight.
What camera gear do I need for Halong Bay sunrise photography in 2026?
Bring a tripod, wide-angle lens, and filters like a graduated ND or polarizer. A telephoto lens is useful for compressing distant karsts and capturing boats.
How can I plan a sunrise photography trip to Halong Bay for 2026?
Book an overnight cruise or stay on Cat Ba Island to be on the water before dawn. Check the 2026 tidal calendar and weather forecasts to avoid rainy or hazy mornings.
What settings should I use for sunrise photos in Halong Bay?
Use manual mode with aperture f/8–f/16, ISO 100, and a shutter speed adjusted for the light. Bracket exposures to capture the dynamic range between the sky and limestone islands.

Camille Bernard shares travel photography tips for every kind of traveller, from phone snapshots to full kits. She breaks down light, composition and timing so you come home with photos that actually capture how a place felt.
💬 Comments (0)
No comments yet. Be the first!