5 Sunset Silhouette Photography Tips
Master sunset silhouette photography. Learn to capture stunning silhouettes with simple techniques on any camera for travel.
Mastering sunset silhouette photography is one of the quickest ways to add drama and emotion to your travel portfolio. I have been in your shoes, frustrated by muddy shadows and blown-out skies, but I promise you, with just a few tweaks, your photos will look like professional prints. By the end of 2026, I want you to be the go-to person for stunning silhouettes. Let's dive into my top 5 tips to transform your shots from flat to fantastic.
1. Expose for the Sky, Not the Ground
First, let's look at the biggest mistake I see beginners make in sunset silhouette photography. You point your camera at a beautiful sunset, but your subject ends up a dark, messy blob. Why? Because your camera's metering system is trying to expose the shadows instead of the vibrant sky.
The secret is Exposure Compensation. This feature lets you override your camera's automatic exposure settings. By dialing your exposure down by 1 or 2 stops (usually shown as EV -1 or EV -2 on your camera's screen), you force the camera to ignore the dark foreground and saturate the colors of the sky. Your subject will naturally fall into a clean, black shadow.
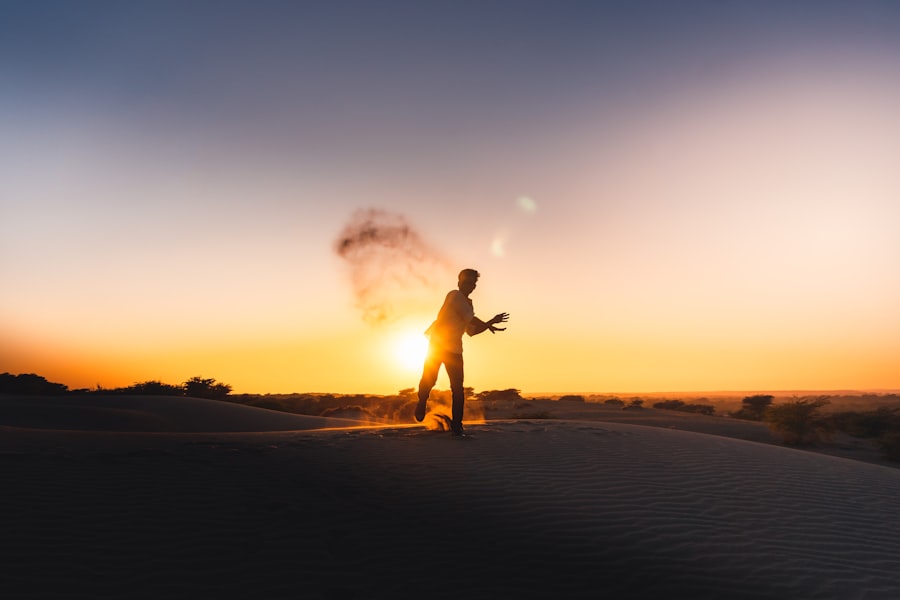
I remember standing on a beach in Thailand a few years ago, absolutely ready to give up. I had a beautiful palm tree in my frame, but it looked like a muddy green-brown lump against a boring, pale sky. I felt like packing my bags. Then I dialed in -1.5 EV. Instantly, the sky exploded in rich orange and deep red, and that palm tree transformed into a crisp, elegant, black silhouette. That was my "Aha!" moment. You can have that moment too.
Understanding Bokeh in Silhouette Work
Wait, doesn't a deep aperture kill bokeh? Yes, in the background. But you can create "Silhouette Bokeh." The secret is to have something close to the lens (like leaves or a grass stalk) while focusing on a distant subject. Because the foreground object is so close, it blurs completely, creating beautiful, soft orbs of light even at a deep aperture. Look for these opportunities in 2026 to add a dreamy layer to your shots.
2. Gear Up and Lock In Your Settings
You do not need a $5,000 camera for sunset silhouette photography, but knowing your tools helps tremendously. For a tack-sharp silhouette, you want a deep depth of field. This means the entire scene, from the foreground rocks to the distant sun, stays in focus.
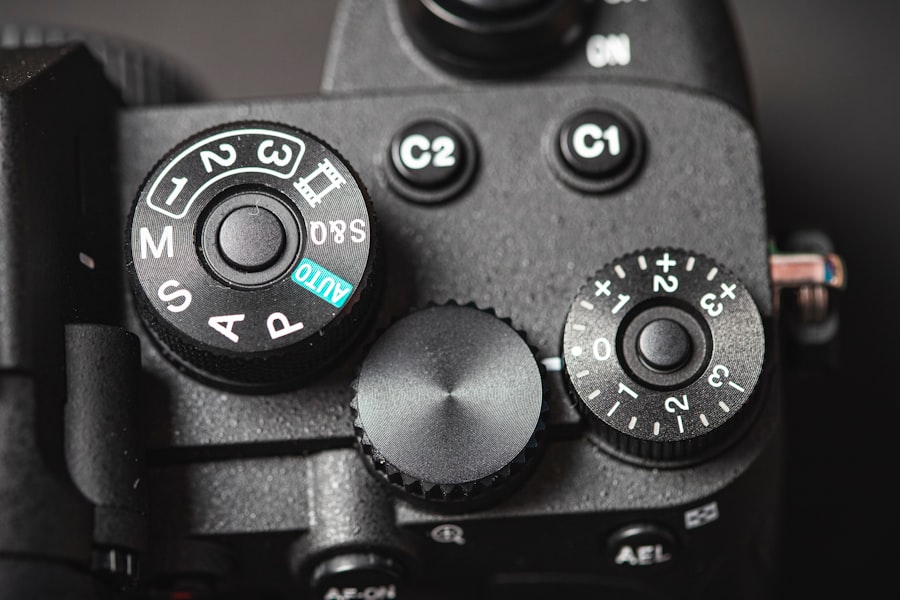
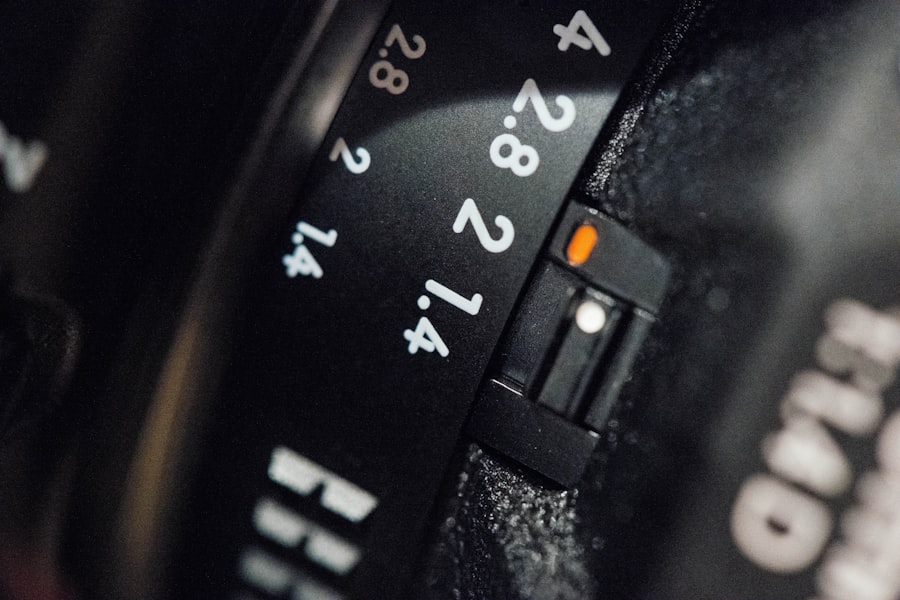
Now try this: Switch your camera to Aperture Priority (Av or A) mode and set your f-stop to f/8 or f/11. Pair this with a low ISO to keep the blacks clean and free of digital noise.
Recommended Settings for Sunset Silhouettes
- Aperture: f/8 to f/16 (ensures sharpness from front to back).
- ISO: 100 or 200 (keeps noise low for pure black shadows).
- Metering Mode: Spot or Center-weighted (meter off the bright sky next to the sun).
- Drive Mode: Continuous High-Speed (useful if your subject is moving or jumping).
- Sturdy Tripod: Essential for sharp shots in low light at low ISOs.
Don't forget to turn off your lens stabilization (IS/VR) if you are using a tripod. Believe it or not, stabilization systems can actually introduce tiny vibrations when the camera is perfectly still, ruining your sharpness.
3. Composition: The Rule of Thirds and Negative Space
Sunset silhouette photography relies heavily on shape. You are photographing a shadow, so that shadow needs to be interesting and well-placed. A boring shape in the center of the frame makes for a boring photo.
First, let's look at the Rule of Thirds. Imagine two horizontal and two vertical lines slicing your frame into nine equal boxes. Place your subject (the silhouette) on one of these lines, ideally where the lines intersect. Put the horizon on the top or bottom third line, never dead center.
The secret is negative space. Leave lots of empty, colorful sky around your subject. This emphasizes the contrast and the emotion of the scene. A tiny figure standing on a vast beach says a lot more than a huge, unrecognizable black blob filling the frame. Show us the sky; it is the star of the show, and your subject is the supporting actor.
4. Why RAW is Your Best Friend for Silhouettes
I used to shoot JPEG. In 2026, you might still be doing this out of habit. Let me tell you why you should stop. The problem is that JPEG compresses the data in the sky, leading to ugly banding and harsh color transitions from orange to red.
RAW files capture much more information. Mastering sunset silhouette photography requires the right file format. When you process a RAW silhouette in Lightroom or Capture One, you can easily recover details in the sky highlights without mangling the blacks. You can tweak the white balance to make the sunset warmer or cooler, and you will not lose image quality.
Golden Rule of Photography: "Expose for the highlights, develop for the shadows." In sunset silhouette photography, expose for the sky. A RAW file gives you the latitude to make the sky look exactly how you remember it, without any ugly digital artifacts.
5. Step-by-Step: Nailing Your First Silhouette in 2026
Let's put it all together. Here is a clear, actionable workflow for you to follow. Print this out or save it to your phone before your next shoot.
Step-by-Step Guide
- Step 1: Find a Subject. Look for distinct shapes. A lone tree, a person jumping, a boat, a crane, or a bridge. The clearer the outline, the better the sunset silhouette photography will be. Avoid subjects that are "blobby" or hard to identify.
- Step 2: Position Yourself. Put the sun directly behind your subject. If it is a person, tuck the sun behind their body. If it is a tree, hide the sun just behind the trunk or a branch.
- Step 3: Meter the Sky. Use Spot Metering. Point the center of your viewfinder at the brightest part of the sky (not the sun itself, just next to it). Lock the exposure (AE-Lock button) or dial in Exposure Compensation to -1 or -2 stops.
- Step 4: Focus. Autofocus usually struggles in low light. Focus on the edge of your subject where it meets the bright sky. That high contrast will give your lens an easy target. If the lens hunts, switch to manual focus and use live view to zoom in.
- Step 5: Shoot in Burst Mode. If a person is jumping or if there are waves crashing, fire off a burst of 3-5 frames. Capturing the peak of the action in a clean black shape is pure magic.
- Step 6: Review and Adjust. Check your histogram on the back of the camera. You want the data bunched up on the left side (shadows) and the right side (highlights). If there is a spike in the middle, you have a grey mess. In that case, dial in more negative Exposure Compensation.
Conclusion: Your 2026 Challenge
By practicing these 5 sunset silhouette photography tips, you will see a massive improvement in your travel photos. Your goal for 2026 is to step outside your comfort zone and actively look for strong shapes against colorful skies.
Remember, photography is about capturing a feeling. A great silhouette evokes mystery, scale, and beauty. Now get out there, chase those sunsets, and turn your subjects into art. For further reading on metering modes, check out Adobe's guide on Exposure Compensation. If you want to dive deep into the specs of a great camera for this, look at the Canon EOS R6 Mark II for its excellent dynamic range. See you at sunset!
Frequently Asked Questions
What is the best time of day for sunset silhouette photography?
The 'golden hour' just before sunset provides the best warm lighting.
How do I adjust camera settings for silhouette shots?
Set your camera to spot metering and expose for the bright sky, not the subject.
What elements make a strong silhouette subject?
Use simple, recognizable shapes like trees, people, or structures for dramatic silhouettes.
What lens is recommended for sunset silhouettes?
A telephoto lens helps compress the scene, while a wide-angle lens captures more sky.
How can I focus on the silhouette subject in low light?
Use manual focus or lock focus on an object of similar distance before recomposing.
💬 Comments (0)
No comments yet. Be the first!