Ultimate Guide to ISO for Travel Photography 2026
Master ISO for travel photography in 2026. Learn how to balance exposure, avoid noise, and capture stunning travel shots.
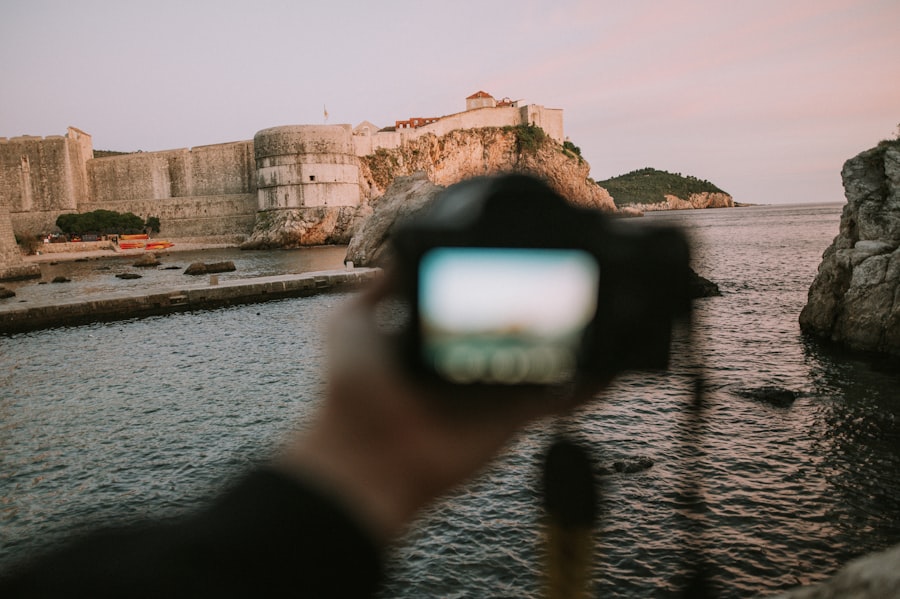
Mastering ISO for travel photography in 2026 is the single most important skill to unlock sharp, vibrant images in any lighting condition. Whether you are shooting a bustling night market in Bangkok or a misty mountain sunrise in Patagonia, understanding how ISO affects your camera’s sensor will save you from grainy, ruined shots. I will show you how to stop guessing and start controlling your ISO with confidence. Your photos will look clean, professional, and true to the scene – even when the light gets tricky.
What Is ISO and Why Does It Matter for Travel Photography?
Think of ISO as your camera’s sensitivity to light. A low number like 100 means the sensor is less sensitive – perfect for bright, sunny scenes. A high number like 3200 or 6400 boosts sensitivity so you can shoot indoors or at night without a flash. The trade-off? Higher ISO adds digital noise – those tiny specks that make your photo look like sandpaper. In 2026, modern cameras handle noise better than ever, but the principles remain the same. ISO for travel photography is your safety net when shutter speed or aperture can’t budge. First, let’s look at the three pillars of exposure: aperture, shutter speed, and ISO. You already know the Rule of Thirds for composition – now apply that same intentionality to exposure.
The secret is balancing these three so your image is neither too dark nor blown out. When I started, I would set my ISO to Auto and hope for the best. Often I ended up with noisy sunset portraits because the camera chose ISO 6400 unnecessarily. In 2026, many cameras have “ISO Auto” with a maximum limit – set it to 1600 to keep noise low, and your travel snaps will stay crisp.
The Personal Story That Changed My Approach to ISO
I will never forget a trip to Kyoto in the spring of 2026. I was photographing the lantern-lit alleys of Gion at dusk. My camera was on a tripod, but I had forgotten to lower the ISO from 3200 after shooting a fast-moving geisha procession earlier. The resulting images looked like a sandstorm – noise everywhere, detail lost in the shadows. I was devastated because the scene was magical, and I had ruined it.
That failure taught me the biggest lesson: ISO for travel photography demands vigilance. The fix? I switched to RAW vs JPEG (always shoot RAW in tricky light), dropped the ISO to 400, slowed my shutter speed to 1/15 second, and used a cable release. The before-and-after difference was night and day. The “before” was grainy, flat; the “after” was smooth, rich in bokeh from the wide aperture, and the lanterns glowed without noise. Now try this: whenever you enter a new location, start by checking your ISO. Make it a habit.
Recommended Settings for Common Travel Scenarios (2026 Edition)
- Golden hour landscapes: ISO 100–200, aperture f/8–f/11 for depth of field, shutter speed 1/60 to 1/250 depending on light. Use a polarizer to cut glare.
- Street photography at night: ISO 1600–3200 (most mirrorless cameras handle this well), aperture f/2.8 for bokeh and light gathering, shutter speed 1/125 to freeze motion.
- Indoor museums (no flash): ISO 800–1600, aperture f/4, shutter speed 1/30 to 1/60 – brace against a wall or use image stabilization.
- Action / wildlife: ISO 800–6400, aperture wide open, shutter speed 1/500 or faster. Accept a little noise to avoid blur.
Step-by-Step Guide: Setting ISO for Travel Photography in 2026
Step 1: Assess Your Light
Before you raise the camera, glance at the scene. Bright sun? Start at ISO 100. Overcast? ISO 400. Dim interior? Maybe ISO 1600. The secret is to start low and only go higher if your shutter speed drops below a safe handholding threshold (1/focal length rule).
Step 2: Choose Your Priority
Are you freezing action or creating bokeh? If capturing a dancer in a dim square, set shutter speed first, then aperture, then adjust ISO last. For a portrait with creamy background, set aperture wide (f/1.8), then adjust shutter, then ISO. ISO for travel photography is always the third lever – use it only when the other two are maxed.
Step 3: Use Exposure Compensation
Sometimes your camera’s meter gets fooled by a bright sky or dark alley. Dial in +0.7 or -0.7 exposure compensation to keep the scene natural. Check the histogram. If it’s clipped on the right, lower ISO or increase shutter speed. Don’t forget to check your settings after every major light change.
Step 4: Shoot RAW + Fine JPEG
RAW files give you massive latitude to reduce noise in post-processing. In Adobe Lightroom or your phone app, you can apply noise reduction without destroying details. JPEG is fine for quick social shares, but for keepsakes, RAW is king. In 2026, even smartphones offer RAW – use it.
ISO, Bokeh, and the Rule of Thirds: Unified Strategy
Bokeh – the creamy, out-of-focus background – depends on aperture, not ISO. But a high ISO can introduce noise into those smooth bokeh circles, ruining the effect. So keep ISO low when you want dreamy portraits. Combine that with the Rule of Thirds: place your subject on a third line, use a fast prime lens (e.g., 35mm f/1.8) at ISO 400, and your bokeh will be buttery smooth. ISO for travel photography interacts with every other setting. Treat it like a teammate, not an enemy.
Golden Rule of Travel ISO: “Never use the highest ISO your camera offers unless you are saving a shot in absolute darkness. Keep ISO under 1600 for daytime, under 3200 for night, and always test your camera’s noise ceiling before a big trip.” – Pro tip from an adventure photographer in 2026.
Must-Have Gear for Low-Light Travel Photography in 2026
- Fast prime lens: 24mm f/1.4 or 50mm f/1.8 – lets you use lower ISO in dim conditions.
- Mirrorless camera with IBIS: In-body image stabilization gains 2–4 stops, meaning you can shoot at ISO 800 instead of 3200.
- Small LED panel: A tiny video light adds fill without raising ISO.
- Portable tripod: Even a tabletop tripod lets you drop to ISO 100 and expose longer.
Final Tips and Expert Resources for 2026
Now try this: go outside at twilight and shoot the same scene at ISO 100, 400, 1600, and 6400. Zoom into the shadows on your computer and see the noise difference. That personal test will cement your understanding of ISO for travel photography. Remember, modern cameras like the Sony A7 V, Canon EOS R5 Mark II, or Nikon Z8 are incredible at high ISOs, but they are not magic. Read the official specs from Sony’s camera page to see how their dual-gain sensors work. Also check DPReview’s guide to ISO sensitivity for a deeper technical dive. In 2026, every travel photographer must own their ISO. You can do it.
Don’t forget to practice in your hometown before your next adventure. Master the numbers, and your travel photos will look like they were taken by a pro – because you will be one. Happy shooting from Visualtravelspots.com!
Frequently Asked Questions
What ISO setting should I use for daytime travel photos?
For bright daytime shots, keep ISO as low as possible—usually ISO 100 or 200—to minimize grain and maximize image quality.
How do I shoot indoor or nighttime scenes while traveling?
Raise the ISO to 800–3200 depending on light, but only as high as needed to keep shutter speed fast enough to avoid motion blur.
What's the best ISO for shooting moving subjects like street performers?
Use a higher ISO (e.g., 800–1600) to enable a faster shutter speed, freezing action even in moderate or low light.
How high can I push my camera's ISO without ruining image quality?
This depends on your camera sensor; up to ISO 3200 is clean on many modern cameras, but test your camera to find its limit.
Should I always use the lowest ISO, or are there exceptions?
Lowest ISO gives best quality, so use it in good light; raise ISO when you need a faster shutter or have no tripod in dim conditions.
💬 Comments (0)
No comments yet. Be the first!