Guide to Singapore drone photography 2026
Learn how to master Singapore drone photography 2026 to capture jaw-dropping aerial views of Marina Bay Sands safely.
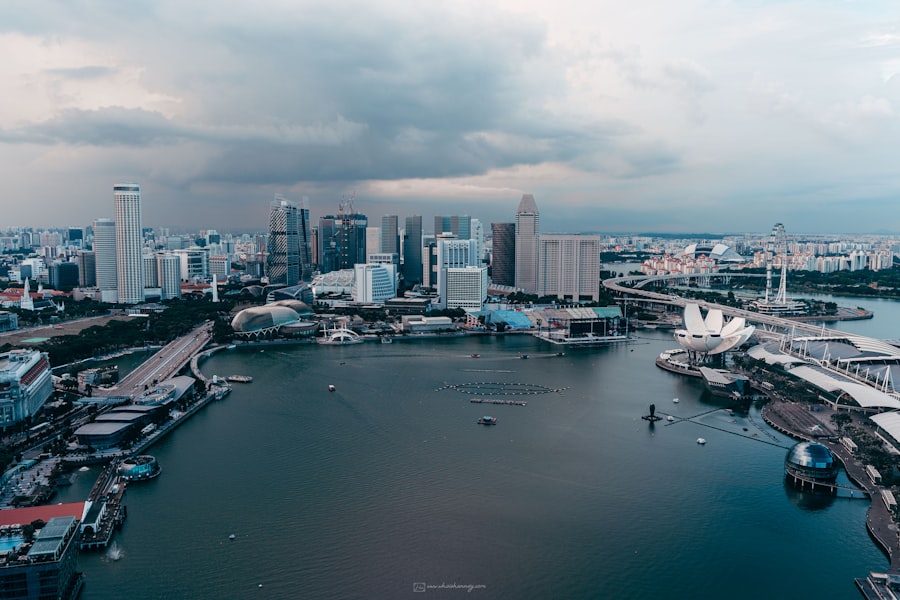
Mastering Singapore drone photography 2026 is one of the most rewarding challenges you can take on as a modern visual storyteller.
I still remember my first morning trying to capture the Singapore skyline from above. I launched my drone just as the sun began to peek over the Marina Bay Sands. The sky was a beautiful mix of orange and purple. But when I looked at my screen, the sky was completely white and washed out, while the futuristic buildings below were just dark, unrecognizable shapes. I had made the classic mistake of letting the automatic camera settings handle a high-contrast scene. My highlights were blown out, my shadows were muddy, and the shot was ruined.
How did I fix it? I switched my drone camera to manual mode, adjusted my exposure compensation down by one full stop, and started shooting in RAW format instead of JPEG. That simple shift saved my highlights and allowed me to bring back the beautiful shadow details in post-processing. Today, I am going to share those exact secrets with you so your own aerial shots of this futuristic city look absolutely breathtaking.
Understanding Your Drone Camera Settings for 2026
Before you launch your aircraft into the tropical sky, you need to understand how to control your camera. Aerial photography is no different from ground photography; you must master the exposure triangle. The secret is knowing how to balance these settings while your camera is suspended hundreds of feet in the air.
RAW vs JPEG: The Ultimate Choice
First, let's look at file formats. You should always set your drone to shoot in RAW rather than JPEG. A JPEG file is compressed by the drone computer, which throws away valuable color and light data. A RAW file, however, saves every bit of information your sensor captures. This gives you the ultimate flexibility when editing your photos in tools like Adobe Photoshop, allowing you to recover dark shadows and bright highlights without losing image quality.
ISO and Exposure Compensation
To keep your images looking crisp and clean, you want to keep your ISO as low as possible. ISO measures your camera sensor sensitivity to light. A high ISO (like 1600 or 3200) lets you shoot in low light, but it introduces digital noise, making your photos look grainy. For daytime Singapore drone photography 2026, lock your ISO at 100.
Now try this: use your Exposure Compensation dial. This handy tool tells your camera to make the image darker or brighter than what the automatic meter thinks is correct. In bright tropical environments like Singapore, dial your Exposure Compensation to -0.3 or -0.7. This protects your highlights from blowing out, ensuring you capture the rich textures of the cloud formations and reflective glass skyscrapers.
The Golden Rule of Drone Exposure: It is much easier to bring back details from dark shadows during editing than it is to fix bright, overexposed highlights that have turned completely white. When in doubt, underexpose your aerial shots slightly.
Must-Have Gear and Recommended Settings
To get the most out of your Singapore drone photography 2026 adventures, you need the right tools and a solid baseline of settings. Modern drone sensors have improved drastically, with many carrying large 1-inch or medium-format sensors similar to those discussed on DPReview. Here is what you need to pack in your gear bag.
Your Gear Checklist
- A drone with a high-resolution sensor: Look for a drone that offers adjustable aperture to control your depth of field.
- Neutral Density (ND) Filters: These act like sunglasses for your camera lens, allowing you to use slower shutter speeds even in midday light.
- High-speed MicroSD Cards: Ensure your card has a fast write speed to handle large RAW files without lagging.
- Extra Batteries: The Singapore heat can drain drone batteries faster than you expect.
Recommended Camera Settings
- Image Format: RAW (DNG)
- Aspect Ratio: 3:2 or 4:3 for maximum sensor coverage
- White Balance: Sunny or Custom (avoid Auto to keep color consistency across shots)
- ISO: 100 (manually locked)
- Aperture: f/4 to f/5.6 for the sharpest results across the entire frame
Step-by-Step Guide to Composition and Framing
Great gear is only half the battle. To make your Singapore drone photography 2026 images stand out on social media and in galleries, you must master aerial composition. The sky gives you a brand new perspective, but the basic rules of art still apply.
Step 1: Apply the Rule of Thirds
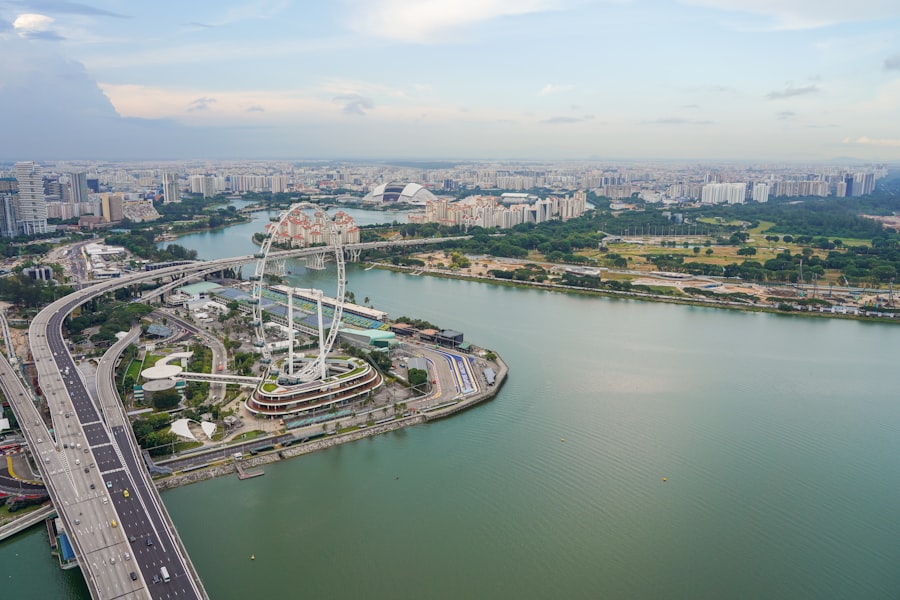
Turn on the grid lines on your controller screen. The Rule of Thirds divides your frame into nine equal rectangles. Place your main subject, like the Marina Bay Sands or a unique spiral bridge, at the intersection points of these lines. This draws the viewer eye naturally into the scene rather than placing the subject dead center.
Step 2: Look for Leading Lines
From the air, highways, rivers, and walking paths turn into graphic lines that guide the viewer eye through your photograph. Use the sweeping curves of the Singapore waterfront or the straight lines of the historic streets to lead the viewer toward your main point of interest. This creates a powerful sense of depth.
Step 3: Experiment with Depth of Field and Bokeh
While most drone shots aim to have everything in sharp focus, you can create a beautiful sense of depth by using a wider aperture like f/2.8. If you fly close to a tree branch or a building edge and focus on a subject in the distance, you can create a soft, blurry background or foreground. This blur, known as Bokeh, adds a cinematic quality to your urban landscapes.
Navigating the Skies Safely in 2026
As you plan your Singapore drone photography 2026 journey, safety and local regulations must be your top priority. Singapore is a bustling global hub with busy airspace, which means you must be a responsible pilot. Don't forget to check the local aviation authority maps before every single flight to ensure you are not in a no-fly zone.
The secret to great travel photography is patience and respect for the local environment. Keep your drone within visual line of sight at all times, respect the privacy of people living in high-rise apartments, and avoid flying over crowded public areas. By keeping your flights safe and legal, you help preserve the hobby for photographers around the world.
Elevate Your Vision Today
Your journey into Singapore drone photography 2026 is all about seeing the world from a fresh angle. By switching to RAW, mastering your exposure compensation, and using leading lines to guide your viewer, your aerial photos will look professional, artistic, and truly unforgettable. Now get out there, charge your batteries, and capture the magic of this modern wonderland from the clouds!
Frequently Asked Questions
What are the key regulatory changes for drone photography in Singapore in 2026?
In 2026, Singapore introduced stricter altitude limits (max 60m) and mandatory remote ID for all drones over 250g. Pilots must also pass an updated online safety quiz before flying.
Which locations in Singapore are best for drone photography in 2026?
Popular spots include Marina Bay, Gardens by the Bay, and the Southern Islands, but always check real-time drone restrictions via the OneMap portal.
Do I need a license to fly a drone for photography in Singapore in 2026?
Yes, all drones over 250g require a basic UA license, and commercial photographers need an advanced license with additional insurance coverage.
What are the best times of day for drone photography in Singapore?
Early morning (7-9 AM) and late afternoon (5-7 PM) offer softer light and fewer crowds; avoid midday when harsh sun creates shadows and heat haze.
Are there any no-fly zones or restricted areas for drones in Singapore in 2026?
Yes, areas around airports, military bases, and the Istana are restricted, and new in 2026, some parks have implemented geofencing to protect bird sanctuaries.
Camille Bernard shares travel photography tips for every kind of traveller, from phone snapshots to full kits. She breaks down light, composition and timing so you come home with photos that actually capture how a place felt.
💬 Comments (0)
No comments yet. Be the first!