Maldives aerial photography 2026: Pro Tips
Learn how to shoot stunning overwater reefs with this Maldives aerial photography 2026 guide for travel photographers.
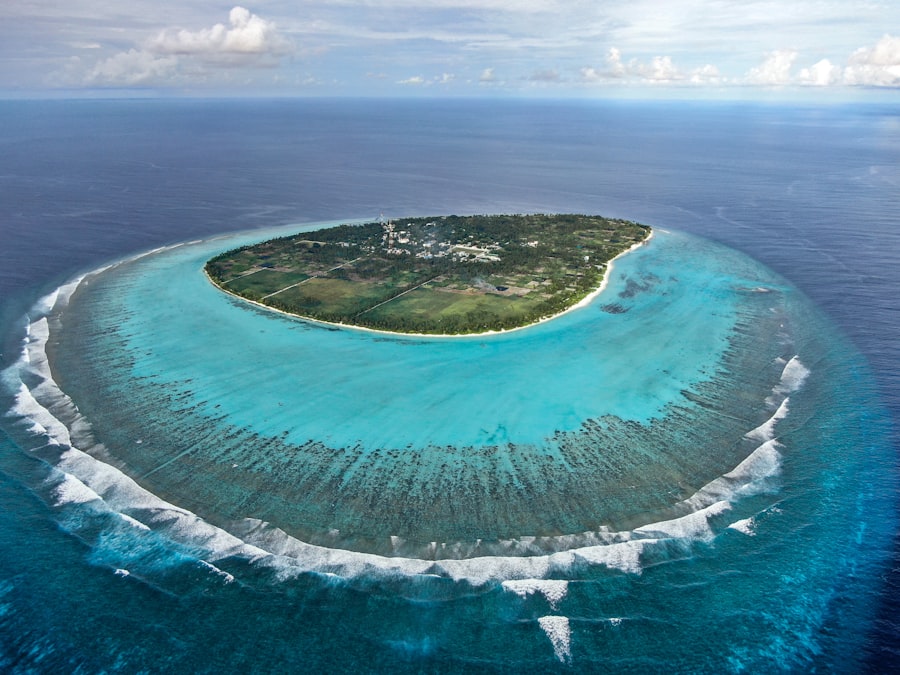
Maldives aerial photography 2026 is the ultimate dream for many travel photographers, offering a mesmerizing canvas of turquoise lagoons, deep blue ocean trenches, and perfect ring-shaped coral reefs from above.
As your photography coach, I am absolutely thrilled to guide you through this bucket-list adventure. Capturing these islands from the air requires more than just pointing and shooting; it demands an understanding of light, altitude, and camera settings. Whether you are leaning out of a twin-otter seaplane window or launching the latest drone, I will show you how to transform simple snapshots into breathtaking gallery-worthy art. Let us make sure your portfolio stands out in 2026.
The Magic of Height: Choosing Your Aerial Platform
Before we dive into camera settings, we need to talk about how you will get into the air. In 2026, the two primary methods for capturing these stunning vistas are commercial seaplane transfers and drone photography. Each offers a completely unique perspective of the archipelago.
Seaplanes fly at altitudes between 1,000 and 3,000 feet, giving you a massive, sweeping view of entire atolls. The challenge here is shooting through thick, sometimes scratched acrylic windows. On the other hand, drones allow you to fly lower, between 100 and 400 feet, which is perfect for capturing the intricate, abstract textures of the shallow reefs and sandbanks. Whichever platform you choose, mastering the art of Maldives aerial photography 2026 will require quick thinking and precise gear preparation.
Essential Gear for the Ultimate Island Perspective
To capture the vibrant gradients of the Indian Ocean, you need the right tools. Your camera sensor is going to be flooded with intense, reflected tropical light, so preparation is key.
Must-Have Aerial Gear List
- A High-Resolution Camera Body: Mirrorless systems like the Sony A7R series or Canon EOS R5 are perfect for cropping in on tiny overwater villas. Refer to the official Sony electronics specifications for details on their latest high-megapixel sensors.
- A Circular Polarizing Filter (CPL): This is your absolute most important tool. A CPL cuts through the glare on the water surface, revealing the brilliant coral structures underneath.
- A Versatile Zoom Lens: A 24-70mm f/2.8 lens is the sweet spot. It allows you to shoot wide reef landscapes and quickly zoom in on a solitary dhoni boat.
- Lens Hood: Essential for blocking cabin window reflections when shooting from a seaplane.
The secret is to avoid using telephoto lenses longer than 100mm from a seaplane, as the engine vibrations will introduce motion blur to your images, even at fast shutter speeds.
Pro Photography Cheat Sheet: When shooting from a seaplane window, never press your camera lens directly against the glass. The intense vibration of the twin-propeller aircraft will shake your camera, resulting in blurry photos. Instead, hold your lens just a millimeter away from the window and use a rubber lens hood to block out interior cabin reflections.
Understanding the Photography Jargon: Made Easy
Let us break down some essential terms so you can confidently adjust your settings on the fly. Do not let the terminology intimidate you; it is simpler than it looks!
First, let us look at ISO, which measures your camera sensor's sensitivity to light. In the bright Maldives sun, you will want to keep this at its lowest native value (usually ISO 100) to ensure the cleanest images with zero digital noise. Next is Bokeh, which refers to the soft, out-of-focus background blur created by wide apertures like f/1.8 or f/2.8. While gorgeous for portraits, you actually want to avoid bokeh in your aerial landscapes. We want the entire reef in sharp focus, so we use narrower apertures like f/5.6 or f/8.
We also have the Rule of Thirds, a compositional guideline where you divide your frame into a 3x3 grid. Instead of placing the horizon directly in the middle, try placing it on the upper third gridline to emphasize the vibrant patterns of the water. To control your exposure, you will use Exposure Compensation. Because the white sandbanks are so bright, they can trick your camera into underexposing the image. By dialing your exposure compensation to +0.3 or +0.7, your whites will stay brilliantly bright.
Finally, there is the debate of RAW vs JPEG. Always shoot in RAW! A JPEG file compresses your image and discards valuable color data. A RAW file saves all the uncompressed information captured by your sensor. When you open your files in post-processing programs, as explained in Adobe tutorials, you will have the dynamic range needed to pull rich turquoises and deep blues out of the shadows and highlights.
Step-by-Step: Setting Up Your Camera for Aerial Success
Now try this exact setup sequence the next time you step onto a seaplane dock or prepare to launch your drone for some stunning Maldives aerial photography 2026.
The Aerial Camera Setup Workflow
- Switch to Manual or Shutter Priority Mode: Speed is your best friend when traveling at 150 miles per hour. Set your shutter speed to at least 1/1000th of a second to freeze aircraft movement.
- Set Your Aperture: Select an aperture of f/5.6 or f/8. This is the "sweet spot" for most lenses, ensuring corner-to-corner sharpness across the entire reef system.
- Lock Your ISO: Set your ISO manually to 100 or 200. Do not use Auto-ISO, as the camera might unnecessarily raise the sensitivity when passing over dark ocean trenches.
- Adjust Your Polarizer: Look through your viewfinder and slowly rotate your circular polarizing filter. You will suddenly see the surface glare disappear, revealing the glowing turquoise reef underneath. Lock your hand position once you hit that sweet spot.
- Enable Continuous Shooting: Set your drive mode to high-speed burst. When passing over an atoll, hold down the shutter to capture a sequence of frames. This increases your chances of getting a perfectly sharp shot between plane vibrations.
A Story of Failure: How I Saved a Muddy Reef Photo
I will never forget my first attempt at Maldives aerial photography 2026 style imaging back when I was a beginner. I was sitting in a seaplane, looking down at a heart-shaped reef that looked absolutely glowing to my naked eye. I pointed my camera, clicked the shutter on Auto mode, and expected magic.
When I got to my resort and opened the JPEG files on my laptop, I was devastated. The photo looked dull, grey, and muddy. The bright white sand had fooled my camera's light meter into underexposing the shot. Even worse, because I did not use a polarizing filter, the surface of the water was reflecting the bright white tropical clouds, completely hiding the colorful coral reef below.
Here is how I fixed that mistake forever: I switched my camera to shoot in RAW, bought a high-quality polarizing filter, and learned to manually adjust my exposure compensation. On my next flight, I dialed in +0.7 exposure compensation to keep the sand white, rotated my polarizer to cut the cloud reflections, and captured a brilliant, glowing turquoise paradise. Your photos will look just as spectacular if you learn from my early mistakes!
Advanced Composition Tips for 2026
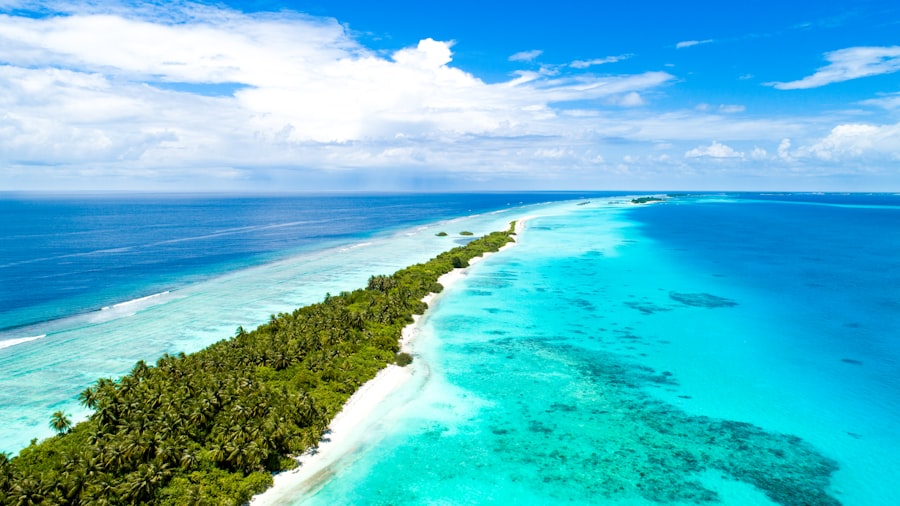
To truly master Maldives aerial photography 2026, you must look beyond basic postcard shots. The secret is to look for abstract patterns, scale, and contrasting colors. The deep indigo of the open ocean meeting the shallow neon-turquoise of the lagoon creates a natural, dramatic line of contrast. Try positioning this dividing line diagonally across your frame to create a dynamic sense of movement.
Don't forget to look for elements that add scale to your images. A tiny luxury yacht, a lone paddleboarder, or a line of overwater bungalows can give the viewer a sense of just how vast and magnificent these natural formations are. Keep your composition clean, remove distracting elements from the edges of your frame, and let the natural geometry of the Maldives do the talking.
Recommended Settings for Aerial Landscapes
- Camera Mode: Shutter Priority (Tv or S) or Manual (M)
- Shutter Speed: 1/1000s to 1/2000s (Crucial for eliminating vibration)
- Aperture: f/5.6 to f/8 (For maximum edge-to-edge sharpness)
- ISO: 100 to 200 (To prevent digital noise in bright skies)
- Focus Mode: Continuous AF (AF-C or Al Servo) with a single point targeting the reef
- White Balance: Daylight or 5500K (Keeps the warm tropical tones consistent)
Your Turn to Fly
With these professional tips in your creative toolkit, you are fully prepared to conquer Maldives aerial photography 2026. Remember to keep your shutter speeds high, utilize your polarizing filter to cut through that ocean glare, and always shoot in RAW to unlock the full potential of your camera's sensor during editing. Pack your gear, book that window seat, and get ready to capture the tropical sky-high masterpiece of your dreams!
Frequently Asked Questions
What is the best time of year for aerial photography in the Maldives in 2026?
The dry season from November to April offers the clearest skies and calmest waters, making it ideal for capturing vibrant blues and sharp details.
Which drone regulations should I be aware of when flying in the Maldives?
You must register your drone with the Maldives Civil Aviation Authority and obtain a permit, and always respect no-fly zones near airports and resorts.
What camera settings work best for shooting over the ocean?
Use a low ISO, fast shutter speed, and a polarizing filter to reduce glare, while shooting in RAW gives you flexibility to enhance colors later.
How can I capture the famous overwater bungalows and sandbanks effectively?
Fly at a higher altitude (around 100–150m) to include both the bungalow rows and the surrounding turquoise sandbanks for a more dramatic composition.
Are there any special tips for shooting at sunrise or sunset during aerial tours?
Arrive early to set up, adjust exposure for the bright sky, and shoot towards the sun to create golden silhouettes of islands and boats.

Camille Bernard shares travel photography tips for every kind of traveller, from phone snapshots to full kits. She breaks down light, composition and timing so you come home with photos that actually capture how a place felt.
💬 Comments (0)
No comments yet. Be the first!