Guide to Jaipur palace photography 2026
Learn how to master your Jaipur palace photography 2026 shots with expert tips on symmetry, framing, and golden hour lighting.
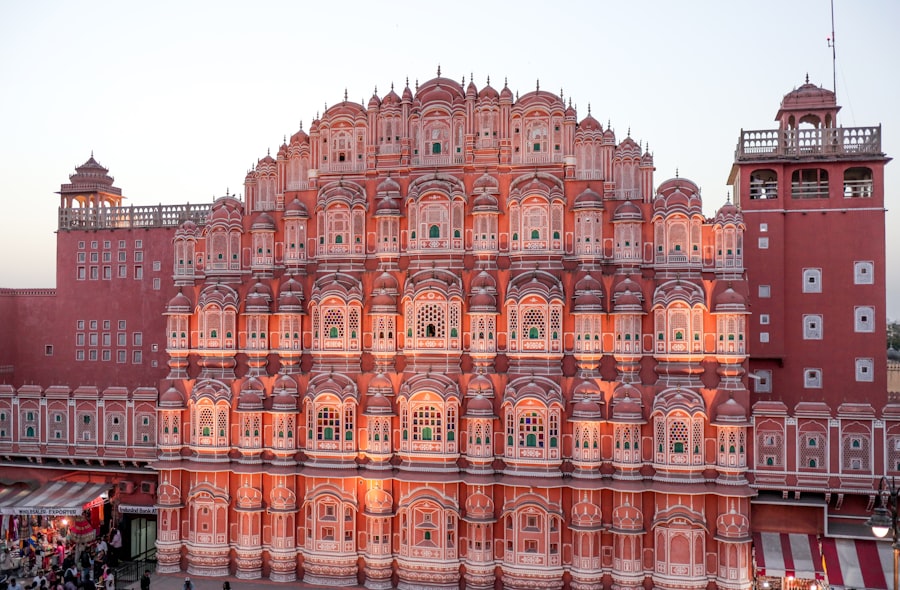
If you want to master Jaipur palace photography 2026, you need to understand how the incredible desert light interacts with centuries-old pink sandstone. As a travel photographer, I have spent years capturing the royal structures of Rajasthan, and I am going to coach you through every step of the process. Your photos will look like they belong in a luxury travel magazine by the time you finish this guide. Whether you are aiming to shoot the iconic Hawa Mahal, the grand City Palace, or the towering Amber Fort, I will show you how to navigate the crowds and capture the magic of these historic sites in 2026.
The Royal Canvas: Understanding Jaipur Palace Light and Color
First, let let us look at what makes this city so unique. Jaipur is known as the Pink City, but that pink is actually a warm, terracotta-orange hue. This color reacts beautifully to different times of day, changing from a soft pastel in the morning to a fiery red at sunset. To capture these shifts, you must master your camera settings and understand how to work with intense Indian sunlight.
When you shoot under the bright Rajasthan sun, your camera sensor can easily get overwhelmed. The secret is knowing how to balance your highlights and shadows. Many beginner photographers end up with blown-out white skies or completely black shadow areas. I want you to avoid this common mistake by learning to read the light just like a professional.
The Magic of Golden Hour in Rajasthan
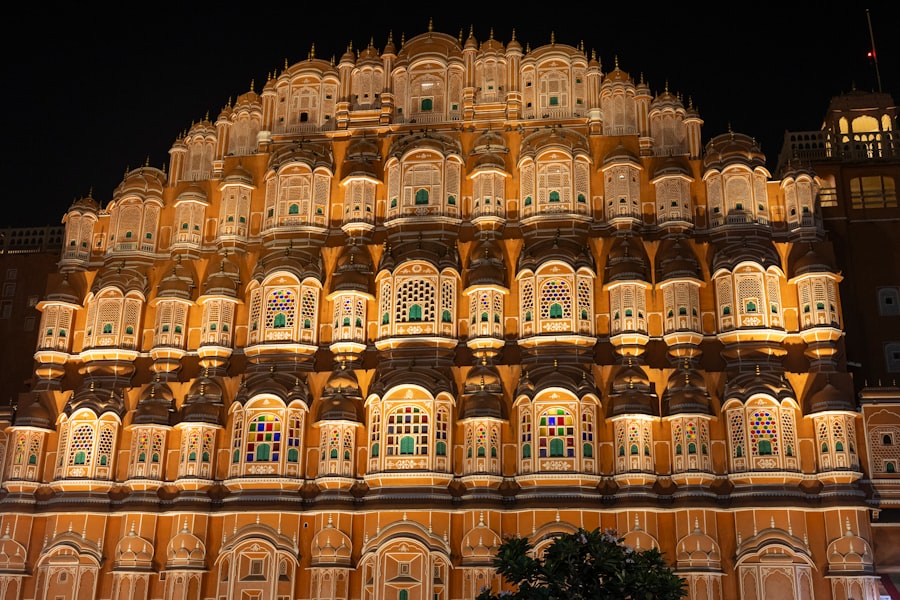
The hour just after sunrise and the hour just before sunset are your best friends for your Jaipur palace photography 2026 journey. During these times, the sun is low on the horizon, casting long, dramatic shadows that show off the intricate stone carvings. The warm light matches the terracotta walls, making them glow from within. If you shoot at noon, the harsh overhead light will create deep, unflattering shadows under arches and balconies.
My Favorite Failed Photo and How I Fixed It
Let me share a quick story from my first trip to the City Palace. I was standing in front of the famous Peacock Gate, absolutely amazed by the colors. I wanted to capture a tourist walking through the archway. I set my camera to automatic mode and pressed the shutter. The result? A terrible, blurry photo where the colorful peacock feathers were completely dark, and the background sky was a blinding white mess.
I realized I had made two classic mistakes. I did not control my exposure, and I let the camera make all the decisions. To fix this, I switched my camera to Manual mode. I adjusted my Exposure Compensation to -1.0 to protect the bright highlights of the courtyard. I bumped up my ISO slightly to keep my shutter speed fast enough to freeze the motion of the walking tourist. Finally, I switched my file format from JPEG to RAW. By shooting in RAW, I preserved all the hidden detail in the dark shadows and bright highlights, which I easily recovered later using editing tools. Now try this yourself when you face high-contrast scenes!
The Golden Rule of Palace Photography: Always expose for the highlights. It is much easier to bring back details from dark shadows during editing than it is to fix a completely white, overexposed sky. When in doubt, dial your exposure compensation down!
Must-Have Gear and Recommended Settings
Before you pack your bags for India, we need to talk about your gear. You do not need the most expensive camera on the market, but you do need the right tools to handle the unique architecture of Jaipur.
Recommended Gear for 2026
- A Wide-Angle Lens: A focal length between 16mm and 24mm on a full-frame sensor is essential for capturing massive courtyards and towering palace facades.
- A Fast Prime Lens: A 35mm or 50mm lens with a wide aperture like f/1.8 will help you create a beautiful creamy background blur, also known as Bokeh, which isolates your subjects from busy crowds.
- A Circular Polarizer Filter: This filter screws onto your lens to cut down on glare from polished marble floors and makes the blue sky pop against the pink buildings.
- A Lightweight Travel Tripod: While tripods are restricted inside some paid areas, they are crucial for sunrise shots outside the palaces.
Recommended Camera Settings
Now, let us set up your camera for success. Use these baseline settings as your starting point when practicing your Jaipur palace photography 2026 techniques:
- File Format: RAW (This gives you maximum data for editing, unlike JPEG which compresses your images).
- Shooting Mode: Aperture Priority (A or Av) or Manual (M).
- ISO: 100 or 200 to keep your images clean and free of digital noise. Increase to 800+ only when shooting in dark palace corridors.
- Aperture: f/8 to f/11 for sharp landscape and architectural shots; f/1.8 to f/2.8 for portraits with soft Bokeh backgrounds.
- Focus Mode: Single-point AF to ensure your camera focuses exactly on the architectural detail you want.
Step-by-Step Guide to Shooting Jaipur Palaces
Now that you have your gear ready, let us walk through the exact steps to capture stunning images at these royal sites. This step-by-step workflow will ensure you do not miss a single shot during your Jaipur palace photography 2026 tour.
Step 1: Arrive Before the Gates Open
Beat the crowds by arriving at least 30 minutes before opening time. This is especially important for popular spots like the Hawa Mahal or Amber Fort. The morning light is soft, the air is relatively cool, and you will have a few precious minutes of empty courtyards before the tour groups arrive.
Step 2: Compose Using the Rule of Thirds
Do not just place every door or archway right in the middle of your frame. Use the Rule of Thirds by imagining your screen divided into a 3x3 grid. Place your main subject, like a beautiful doorway or a passing local, along one of those grid lines or at their intersections. This creates a much more dynamic and interesting composition.
Step 3: Hunt for Leading Lines and Symmetry
Mughal and Rajput architecture is famous for its perfect symmetry. Stand dead-center in front of archways and use the geometric lines of the tiled floors to lead the viewer's eyes directly into your photo. Look up at the ceilings too; the dome interiors offer incredible patterns.
Step 4: Capture the Scale with a Human Element
Palaces are massive, and sometimes a photo of just a stone wall can look flat. Wait for a person wearing colorful clothing, like a traditional red or yellow saree, to walk into your frame. This adds a sense of scale, showing just how grand the buildings are, while adding a beautiful splash of contrasting color.
Advanced Tips for Your Jaipur Palace Photography 2026 Journey
To truly elevate your Jaipur palace photography 2026 portfolio, you need to go beyond the standard tourist snapshots. Let us look at some advanced creative techniques that will make your work stand out on social media and travel websites.
First, play with reflections. Many of the palaces feature water channels, fountains, or polished marble floors. Get your camera down low, almost touching the wet ground or water surface, to capture a perfect mirror image of the palace gates. Second, do not forget to look through things. Use the intricate stone screens, known as jali work, to frame your subject. By focusing on a person or courtyard in the distance while keeping the stone screen close to your lens, you can create a beautiful depth-of-field effect with soft foreground blur.
If you want to read more about the technical side of camera sensors and dynamic range, check out the deep-dive guides on DPReview. For those looking to perfect their RAW editing workflow to bring those vibrant Rajasthan colors to life, the official tutorials on Adobe Tutorials offer great step-by-step editing guides.
As you plan your travel schedule, keep practicing these techniques at home so they become second nature. Your Jaipur palace photography 2026 adventure is going to be an unforgettable experience, and with these skills, you will bring home breathtaking images that capture the true spirit of royalty. Now get your camera ready, pack your favorite lenses, and go create some magic!
Frequently Asked Questions
What are the best times of day for Jaipur palace photography in 2026?
The golden hours just after sunrise and before sunset offer the most flattering light, and early mornings also help avoid crowds. Aim for 7-9 AM or 4-6 PM during cooler months.
Do I need a special permit to photograph inside Jaipur's palaces in 2026?
Most palaces allow personal photography with your entry ticket, but professional shoots or tripods require an additional photography permit, which you can purchase at the ticket counter. Verify specific palace rules online before your visit.
What camera gear is recommended for capturing palace interiors and exteriors?
A wide-angle lens (16-35mm) is essential for grand halls and courtyards, plus a fast prime lens (35mm or 50mm) for low-light indoor shots. Bring a tripod for long exposures, but note some palaces may restrict its use indoors.
Are there any locations within the palaces that are off-limits for photo taking in 2026?
Some areas like royal residences or places of worship remain off-limits, and photography of certain artifacts may be banned to protect them. Look for 'no photography' signs or ask palace staff for guidance.
What are some top secrets for unique Jaipur palace photos that avoid typical tourist shots?
Explore less-crowded upper floors or side corridors for abstract details like arches, jharokhas, and reflective marble patterns. Use a polarizing filter to enrich colors and replicate the manual skills of 19th-century palace photographers.

Camille Bernard shares travel photography tips for every kind of traveller, from phone snapshots to full kits. She breaks down light, composition and timing so you come home with photos that actually capture how a place felt.
💬 Comments (0)
No comments yet. Be the first!