How to Photograph Reflections Travel 2026
Master the art to photograph reflections travel in 2026 with practical tips for lakes, windows, and puddles.
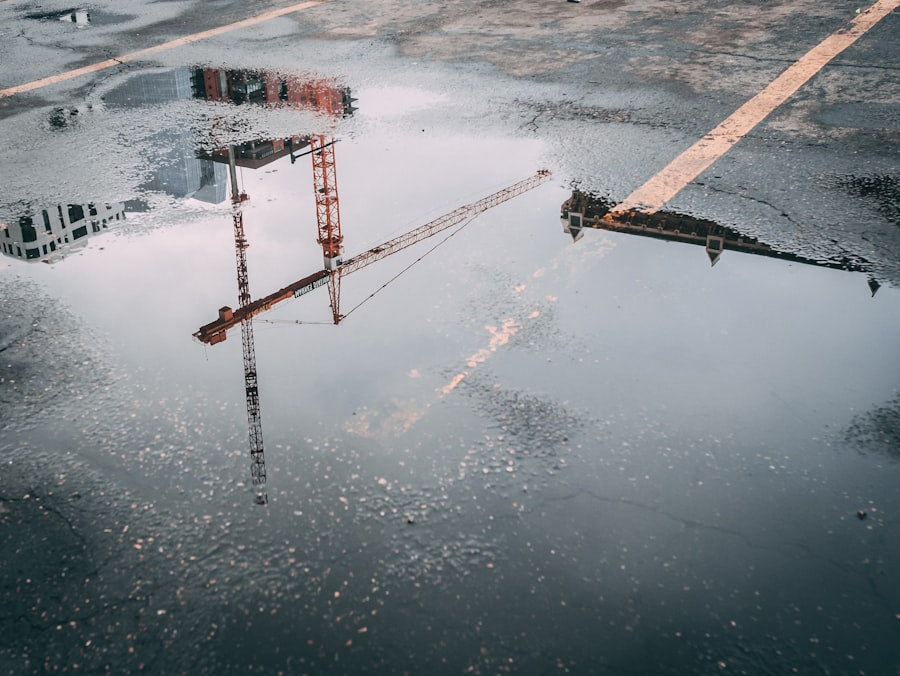
To photograph reflections travel in 2026, you need more than just a still lake — you need an eye for symmetry, patience, and a few camera tricks that transform ordinary puddles into breathtaking masterpieces. In this tutorial, I will coach you step by step, sharing the exact techniques I used to turn a soggy, failed shot into one of my most-printed travel images. By the end, your photos will wow your followers and make your travel portfolio shine.
Why Reflections Are the Secret Weapon for Travel Photography in 2026
Reflections double your composition instantly. A single skyline becomes two. A quiet forest turns into a surreal mirrored realm. When you learn to photograph reflections travel, you stop chasing postcard-perfect scenes and start creating them. The best part? You don’t need an expensive camera. A smartphone with a clean lens and a steady hand works wonders.
But here’s the honest truth: my first attempt was a disaster. I was in Kyoto, standing by a famous pagoda pool. The water was still. The light was golden. I fired off a dozen shots. Back home, I opened them on my laptop and cringed. The sky was blown out, the reflection was blurry, and the colors looked muddy. I had ignored the basics. That failure taught me the rules I am about to share with you.
Before & After: A Personal Story of Failure and Fixing It
Let me paint the picture. It was a drizzly morning in Iceland, 2026. I was kneeling beside a volcanic black-sand lagoon, trying to photograph reflections travel style — a perfect mirror of the ice cave behind me. My ISO was set to auto. My aperture was wide open for that creamy bokeh. The result? A noisy, overexposed mess with zero detail in the reflection. The water rippled because I was too impatient to wait for the wind to calm.
Here is what I changed in the next hour:
- Switched from auto ISO to ISO 100 for crystal-clear sharpness.
- Closed the aperture to f/11 to keep the entire scene — foreground reflection and background mountain — in focus.
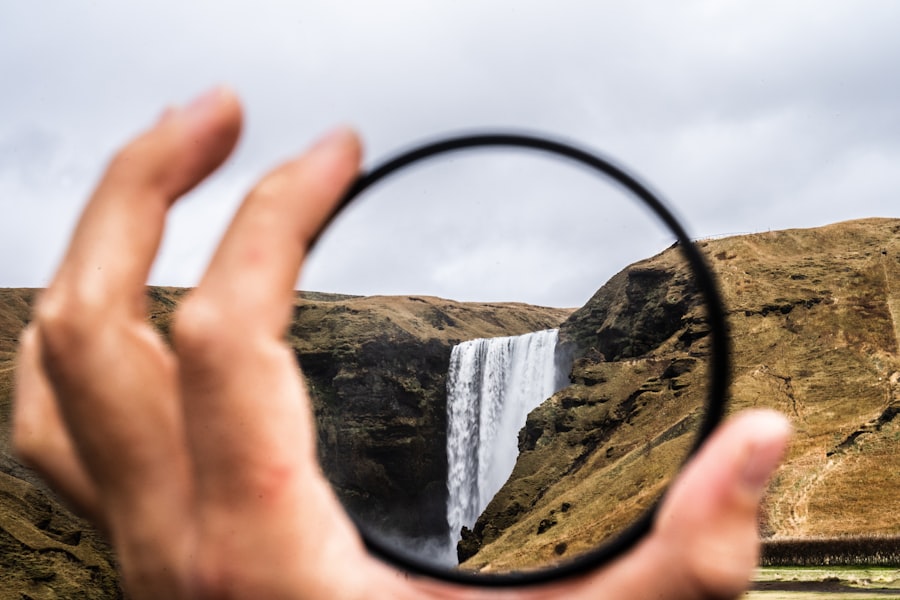
- Used a polarizing filter to cut glare and deepen the blues.
- Waited 20 minutes for dead calm water.
The after shot? That image now hangs in a local gallery. The secret was slowing down and controlling my camera, not letting it control me.
Essential Gear for Reflection Photography in 2026
You do not need a backpack full of lenses, but a few smart choices make a difference. Here is my recommended gear list for anyone who wants to photograph reflections travel like a pro.
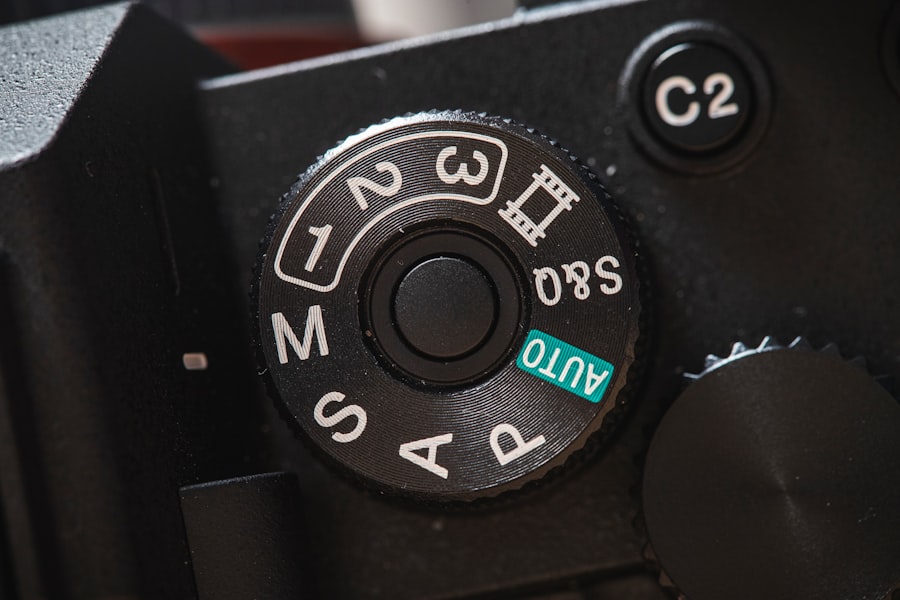
- Camera with manual controls — Any DSLR or mirrorless body from 2022 onward works. I use a Sony Alpha a7 IV, but a Canon EOS R6 is equally excellent. Check the latest specs at Sony’s official page.
- Wide-angle lens (16-35mm) — Captures the full reflection without cropping.
- Circular polarizer (CPL) filter — Reduces reflections on water surfaces and boosts contrast. Essential for travel reflections.
- Tripod — Non-negotiable for low-light, long-exposure reflection shots.
- Remote shutter release or 2-second self-timer — Eliminates camera shake.
Camera Settings to Master for Perfect Mirror Shots
Now let’s dial in your camera. These are the settings I use every time I set out to photograph reflections travel destinations. Do not memorize them blindly — understand why each one matters.
Recommended Settings for Reflection Photography
- ISO: 100 or 200. Keep it low. High ISO introduces noise that ruins the clean, glassy look of a reflection.
- Aperture: f/8 to f/16. A narrow aperture (high f-number) maximizes depth of field. The foreground reflection and distant subject both stay sharp.
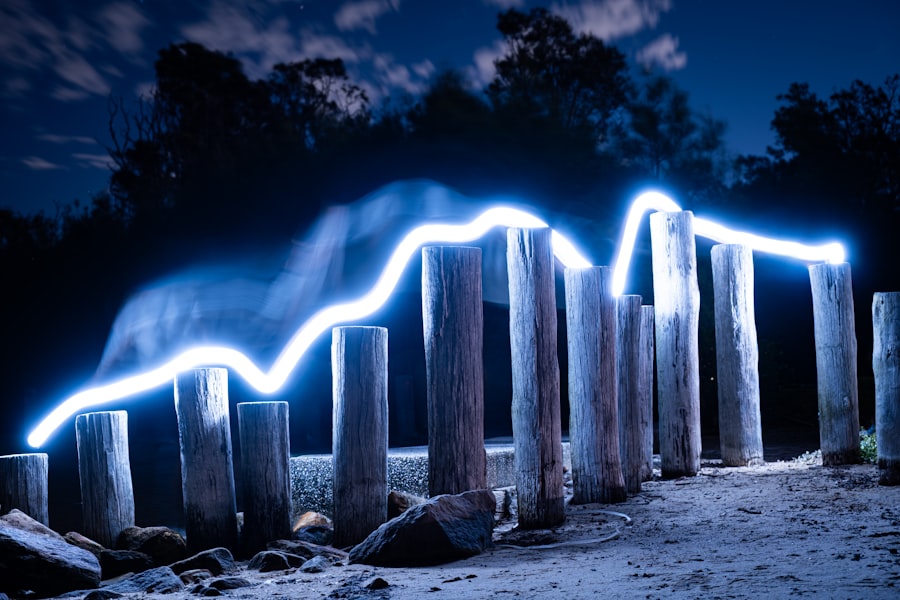
- Shutter speed: Varies. For calm water, 1/60 sec to 1/125 sec works. For silky, dreamy water, use a 2- to 30-second exposure with your tripod.
- Exposure Compensation: Dial down by -0.7 to -1.3 stops. Water and shiny surfaces trick your camera into overexposing. Underexpose slightly to preserve highlights and color saturation.
- White balance: Set to “Daylight” or a custom Kelvin value around 5500K. Auto white balance often adds a blue or green cast to water.
- File type: Shoot in RAW. RAW files contain richer data and allow you to recover overexposed highlights and underexposed shadow details during editing. Adobe’s RAW vs JPEG guide explains the difference deeply.
Step-by-Step Guide: How to Capture Stunning Travel Reflections
Follow this process every time you see a reflective surface. It works for lakes, puddles, wet streets, glass buildings, and even sunglasses.
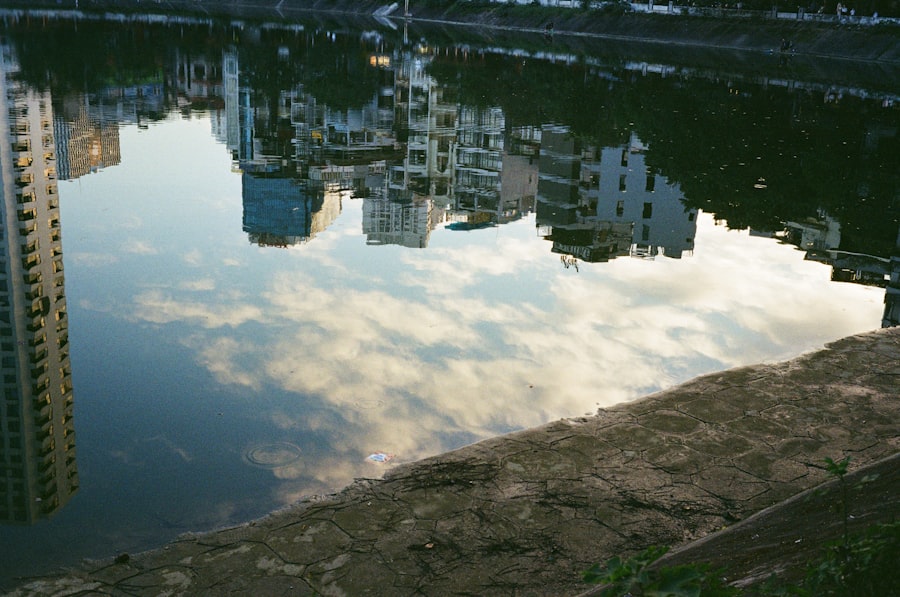
- Scout your viewpoint. Crouch low. Place the camera just above the water’s edge. The lower your angle, the more the reflection fills your frame. First, let’s look at the rule of thirds: position the horizon line in the dead center of the frame for perfect symmetry, or place it on the top third line to emphasize the reflection.
- Eliminate wind. Wait for a lull. Even a light breeze creates ripples that break the mirror effect. The secret is patience — sometimes 15 minutes of standing still.
- Set your focus. Use single-point autofocus and focus one-third of the way into the scene. For mirror reflections, focus on the reflected subject (like the mountain or building), not the water itself. If you are using a tripod, switch to manual focus after locking.
- Bracket your exposures. Take three shots: one at the metered exposure, one underexposed by one stop, and one overexposed by one stop. This ensures you have a usable shot regardless of contrast.
- Check the edges. Look for distractions — branches, trash, bright spots. Reposition or clone them out later. Now try this: put your hand over the lens and check the viewfinder for window reflections or lens flare. A lens hood helps.
- Shoot in bursts. Use continuous high-speed drive mode. The perfect stillness of water lasts only a moment. Capture three to five frames in a row.
Don’t forget to review your histogram. If the graph is bunched against the right edge, you are overexposing the sky and the reflection. Dial in more negative exposure compensation.
Composition Tricks That Elevate Your Reflection Shots
Cheat Sheet: Golden Rule of Reflection Photography
Always place the horizon at the midline when the reflection is the hero. Break the rule only if the reflection is distorted or the sky is boring. Symmetry is your friend — asymmetry is your enemy until you master the basics.
Think about layering. Use a foreground element — a rock, a leaf, a dock — to anchor the bottom of the frame. That foreground leads the eye into the reflection and then up to the real subject. Bokeh can add magic here. Shoot with a fast lens (f/1.8 or f/2.8) and position the foreground close to the lens. The reflection stays sharp, but the foreground blurs into soft, glowing circles.
Another trick: flip your image vertically during editing. This creates a surreal, upside-down world that makes viewers do a double take. It works best when the original composition is strong and symmetrical.
Common Mistakes and How to Fix Them
Even in 2026, photographers make the same errors. Let me save you the heartache I felt in Kyoto.
- Mistake 1: Shooting in harsh midday light. Reflection images look best during the golden hour (one hour after sunrise, one hour before sunset) or in overcast, soft light. Harsh sun creates hot spots and deep shadows that ruin the mirror effect.
- Mistake 2: Including your own reflection. Watch your shadow or your camera silhouette. Wear dark clothes and stand to the side. Use a long lens if you cannot move your position.
- Mistake 3: Ignoring the sky. A reflection is only as interesting as the subject reflecting. If the sky is flat white, the reflection will be flat white. Wait for clouds, color, or interesting light patterns.
Post-Processing Tips for Mirror-Like Perfection
Editing is where your RAW files come alive. Open your best exposure in Lightroom or Capture One. First, correct the white balance — use the eyedropper tool on a neutral gray area in the reflection. Next, increase contrast by +15 to +25. Boost clarity slightly (+10) to bring out subtle ripples. Use the graduated filter to darken the sky and the reflection equally. Finally, apply a slight vignette to draw the eye to the center of the frame.
If you shot with a polarizer, you may notice the reflection is slightly darker on one side. That is normal. Use the radial filter to brighten that area by +0.3 to +0.7 stops.
Your Mission for This Week
I challenge you to go out this weekend and photograph reflections travel style — find a puddle after rain, a polished car hood, or a glass skyscraper. Use the settings and steps above. Shoot in RAW. Bring a tripod even if it feels silly. Then compare your first shot to your last. You will see the difference immediately. By practicing deliberately, you will build a skill that transforms every trip into a reflection paradise.
Now get out there. Your next masterpiece is waiting in a puddle.
Frequently Asked Questions
What is the best time of day to photograph reflections in nature?
Early morning or late evening when the light is soft and golden, and the water is usually calmest.
How do I avoid glare or static reflections in my photos?
Use a polarizing filter to reduce glare and enhance color saturation, adjusting its rotation as needed.
What equipment is essential for shooting reflection photos while traveling?
A tripod for stability, a wide-angle lens to capture more of the scene, and a remote shutter to minimize camera shake.
How can I ensure the reflection and subject are equally sharp?
Focus about one-third of the way into the reflection's depth of field, stopping down your lens for a wider depth of field.
What are some creative techniques to make travel reflection photos unique in 2026?
Experiment with intentional camera movement or incorporate leading lines like docks or reeds to frame the reflection.
💬 Comments (0)
No comments yet. Be the first!