How to Master Histogram Travel Photography in 2026
Learn how to read and use the histogram to get perfect exposure in your travel photos. This histogram travel photography guide shows easy steps for camera or phone.
Mastering histogram travel photography in 2026: Your Step-by-Step Guide to Perfect Exposure
Mastering histogram travel photography in 2026 is the single most impactful skill you can learn to dramatically improve your images. If you have ever felt frustrated by washed-out skies or crushed shadows during your trips, you are not alone. I remember standing on a cliff in Cinque Terre, Italy, in 2024, convinced I had captured the perfect sunset. Back at the hotel, the sky looked white, the village was too dark, and I had no data to recover. The problem? I was trusting my camera's tiny LCD screen instead of using the histogram. Once I learned how to read that graph, my travel photography transformed completely. This guide will show you how to use the histogram for travel photography in 2026, turning failed shots into portfolio-worthy images.
Why Histograms Matter for Travel Photography
A histogram is simply a bar chart that shows the brightness levels in your photo. The left side represents shadows, the middle is midtones, and the right side shows highlights. When you look at your camera screen under bright sunlight, it is nearly impossible to judge exposure accurately. The histogram gives you the truth, regardless of the lighting conditions. The secret is that a histogram never lies. It tells you exactly if your image is underexposed, overexposed, or perfectly balanced.
Think about the last time you photographed a whitewashed building in Greece or a snowy mountain peak. Those scenes trick your camera's meter. The camera sees white and tries to make it gray, so your image turns out too dark. Using the histogram for travel photography in 2026 lets you correct that instantly. You can apply Exposure Compensation to fix it before you miss the moment. I now use the histogram on every single travel shoot, and I recommend you do the same.
The Shadow and Highlight Clipping Warning
Most modern cameras, including Sony A7R V, Canon R5, and Nikon Z8, offer a "blinkies" warning. This feature flashes overexposed areas on your screen while you review the image. However, the blinkies only show JPEG preview data. If you shoot in RAW, like I always do, the actual file might still contain recoverable details. The histogram tells you the truth about the RAW data. When you see spikes touching the left or right edge of the graph, those pixels are clipped. They will be pure black or pure white with no detail. Your goal is to keep the histogram within the boundaries, just like a surfer staying inside the wave.
Cheat Sheet: Your histogram should never touch the right edge for highlight detail or the left edge for shadow detail. If it does, adjust Exposure Compensation by 1/3 stop increments until the graph fits comfortably between the two walls. This is the golden rule of exposure.
Reading Your Histogram: The Basics
A perfect histogram in travel photography does not always look like a bell curve. A snowy landscape will naturally be skewed to the right. A night market scene will shift left. What matters is that no data is clipped. Let us break down the three common shapes:
- Left-heavy histogram: Your image is underexposed. The shadows are blocked and contain no detail. Increase your Exposure Compensation or open your aperture to let in more light.
- Right-heavy histogram: Your image is overexposed. Highlights are blown out. Reduce Exposure Compensation or use a faster shutter speed to tone down the brightness.
- Mountain in the middle: This is ideal for general scenes. The exposure is balanced, and you have plenty of room to edit in post-processing.
Common Errors and How to Fix Them
I once shot a sunrise at Angkor Wat, Cambodia. My camera meter saw all the dark stone and bright sky and tried to average them. The result was a histogram with a huge spike on the left and another on the right, like two skyscrapers. The sky was gone, and the temple entrance was pure black. I fixed this by using Exposure Compensation at -0.7 to protect the sky, then I underexposed the foreground intentionally. Later, I used Lightroom to brighten the shadows without clipping them. This technique only works if you shot in RAW. JPEG files would have destroyed those details forever.
Now try this: Find a high-contrast scene, like a bright sky with a dark foreground. Set your camera to Aperture Priority mode. Use the Adobe histogram tutorial as a reference to understand the graph. Adjust the Exposure Compensation dial while watching the histogram move. Stop when the graph is centered and no spikes touch the edges.
Step-by-Step Guide: Recommended Settings for Histogram Travel Photography
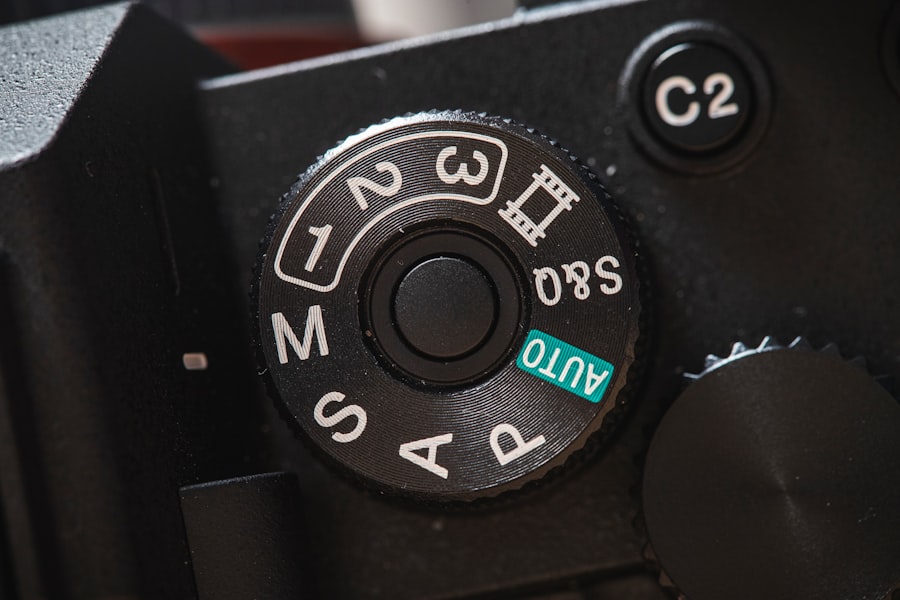
Here is a precise workflow you can apply on any trip in 2026. This step-by-step guide assumes you have a camera that can display a live histogram while shooting, such as the Sony A7 IV, Canon EOS R6 Mark II, or Nikon Z6 III.
- Set your camera to Aperture Priority (A or Av) mode. This gives you control over depth of field while the camera manages shutter speed. For travel work, I often use f/8 for maximum sharpness from foreground to background.
- Enable the live histogram and highlight alerts. In your camera's menu, look for "Display options" and turn on the histogram overlay. Also turn on "Zebra" (Sony) or "Highlight alert" (Canon/Nikon).
- Compose your shot using the Rule of Thirds. Place your main subject on one of the intersecting grid lines. Do not worry about exposure yet.
- Half-press the shutter to meter the scene. Look at the live histogram. Is it touching the right side? If yes, turn the Exposure Compensation dial to a negative number (-1/3, -2/3, or -1) until the graph shifts left and no longer clips.
- If the graph touches the left side, dial positive Exposure Compensation to brighten the shadows. This is the most critical step for histogram travel photography.
- Take a test shot. Review the histogram on your playback screen. If it looks safe, take the full shot. If not, repeat step 4.
- Shoot in RAW. Always. This gives you up to two stops of recovery latitude in highlights and shadows. DPReview has an excellent deep dive on histograms that explains why RAW is superior for exposure.
Must-have Gear for Histogram Travel Photography
To practice histogram travel photography effectively, you do not need a lot of expensive equipment. However, these items will make your life easier and your images sharper:
- A camera with a live histogram overlay. I recommend the Sony A7C II for its compact size and excellent histogram display.
- A fast memory card. Shooting in RAW fills your buffer quickly. A UHS-II card ensures continuous shooting without delays.
- A lightweight tripod. For bracketing high-contrast scenes, a tripod lets you blend multiple exposures perfectly.
- A circular polarizer filter. This reduces reflections and saturates colors, making it easier to keep your histogram balanced.
- A lens with a manual aperture ring. This makes adjusting exposure in bright sunlight faster, so you can watch the histogram change in real time.
Putting the Histogram to Work in 2026
Once you start using the histogram regularly, you will notice that your post-processing time shrinks dramatically. You will no longer have to fix bad exposures in Lightroom. Your travel photos will have vibrant colors, rich shadows, and bright highlights with detail. The Bokeh effect, created by wide apertures like f/1.8, will look more pleasing when the overall exposure is correct. The ISO value will stay low because you are exposing properly rather than pushing shadows in editing.
Let me share a personal victory. In 2025, I photographed the Taj Mahal at sunrise. The fog, the white marble, and the orange sky created a nightmare for my camera meter. Instead of guessing, I checked the histogram. The graph showed a narrow spike in the midtones and a gap on the left and right. I knew that meant I had not captured the full dynamic range. So I took three bracketed shots: one at -1 exposure compensation, one at 0, and one at +1. I merged them later using HDR software. The final image had detail in the sky, the marble, and the reflection in the water. That shot hangs on my wall today.
Don't forget to practice histogram travel photography in ordinary settings first. Photograph your coffee cup in morning light. Watch how the histogram moves when you change the aperture. Learn the pattern for a cloudy day versus a sunny day. By the time you travel to a bucket-list destination, you will be able to nail exposure without thinking.
Final Thoughts: Make the Histogram Your Best Friend
In 2026, cameras are smarter than ever, but they still cannot read your mind. The histogram is your most honest teacher. It will show you exactly when you are losing data, and it will guide you to a perfectly exposed image every time. Whether you are shooting portraits with creamy Bokeh in a bustling market, or landscapes with dramatic skylines, the histogram ensures your vision translates into the file. Stop relying on automatic modes and start commanding your camera. You will see the difference the moment you open your images on a computer.
Remember, the rule is simple: protect your highlights, expose for the brightest part of the scene, and use the histogram to confirm your settings. If you follow this guide, your travel photos in 2026 will not just be snapshots. They will be professional-quality images that you are proud to share. Now get out there and start shooting with confidence.
Frequently Asked Questions
What is a histogram in travel photography?
A histogram is a graph showing the distribution of tones in your photo, from shadows to highlights.
Why should travelers use the histogram?
It helps you avoid overexposed or underexposed images, ensuring balanced photos even in challenging natural light.
How do I read a histogram?
The left side represents shadows, the middle shows midtones, and the right side indicates highlights.
What does a 'perfect' histogram look like?
There's no perfect shape, but aim for a bell curve without clipping at the edges.
Can I fix exposure in post-processing?
Yes, but histogram guidance during shooting reduces recovery work and yields better quality images.
💬 Comments (0)
No comments yet. Be the first!