Great Barrier Reef aerial photography 2026 Guide
Discover pro settings for Great Barrier Reef aerial photography 2026 to capture stunning ocean hues from a helicopter.
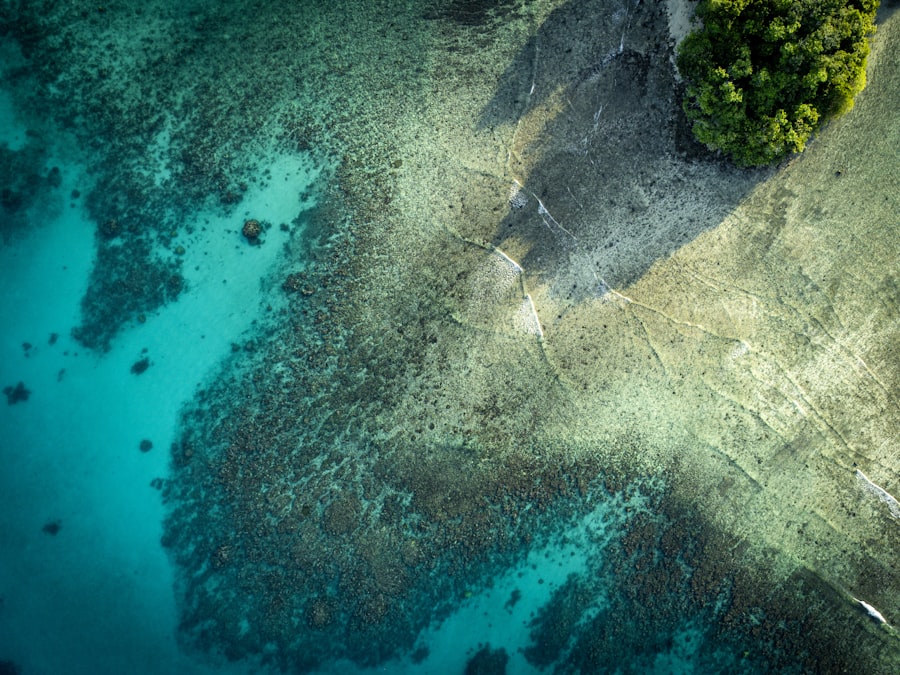
Mastering Great Barrier Reef aerial photography 2026 is the ultimate dream for landscape and travel photographers looking to capture the breathtaking beauty of Australia from above. Imagine looking down from a helicopter or a high-wing scenic plane, watching the deep blue of the Pacific Ocean instantly transition into brilliant turquoises, glowing greens, and intricate coral patterns. But let us be honest: shooting through a scratched airplane window while moving at 100 knots is not as easy as it looks. In this comprehensive 2026 guide, I will show you how to overcome these challenges so your aerial shots look absolutely spectacular.
Why Aerial Photography Over the Reef is Unique in 2026
The Great Barrier Reef is massive, stretching over 2,300 kilometers. From the ground or even from a boat, you only see a tiny fraction of its scale. When you get up in the air, the perspective changes entirely. You can see the grand design of the coral formations, the deep channels carved by ocean currents, and the shifting sandbanks of places like Michaelmas Cay or the famous Heart Reef.
With modern high-resolution camera sensors available in 2026, we have more power than ever to capture fine details. However, more megapixels also mean that any camera shake or optical distortion will be magnified. That is why understanding the fundamentals of flight photography is absolutely critical before you board your scenic flight.
The Gear You Need for Great Barrier Reef Aerial Photography 2026
You do not need to spend ten thousand dollars on specialized gear, but you do need the right tools for the job. The secret is keeping your setup light, versatile, and secure inside the cabin.
Must-Have Aerial Gear Checklist
- A High-Resolution Camera Body: Mirrorless cameras are perfect for this. I highly recommend checking out the latest sensor technology on the Sony Alpha series or the Canon EOS R system for their incredible autofocus speeds.
- A Versatile Zoom Lens: A 24-70mm f/2.8 or a 24-105mm f/4 lens is the sweet spot. This allows you to shoot wide reef landscapes and zoom in quickly on interesting sand patterns.
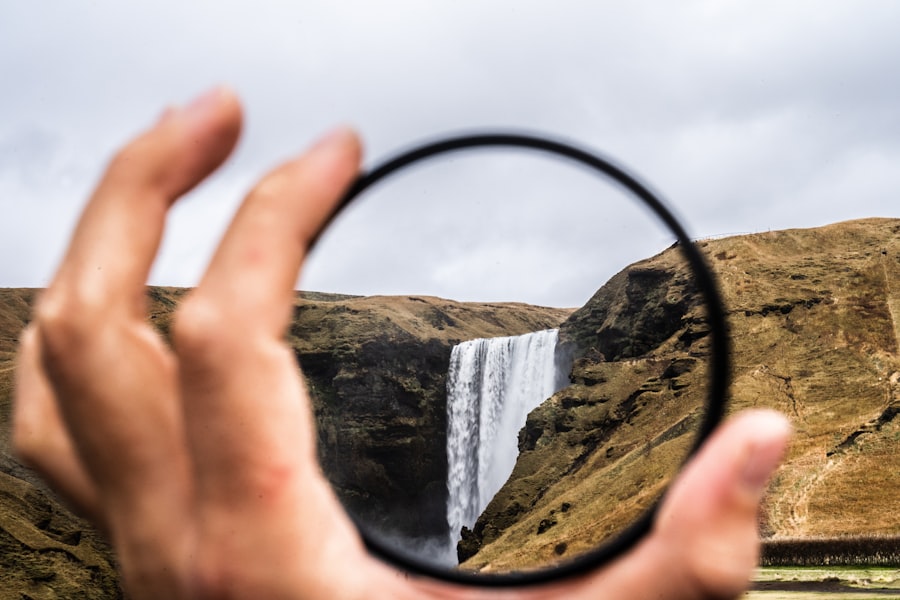
- A Circular Polarizer (CPL): This is your absolute best friend. A polarizer cuts through the glare on the water surface, revealing the brilliant colors of the coral reefs underneath.
- A Lens Hood: Use a rubber lens hood if possible. This allows you to press the hood gently against the window glass to eliminate cabin reflections without damaging the plane window.
The Golden Rule of Aerial Shooting: Never let your camera body or lens physically touch the glass of the window. The vibrations of the plane engine will travel directly through the glass into your camera, resulting in blurry photos even at fast shutter speeds.
Understanding the Photography Jargon (Simplified!)
Before we jump into the settings, let us quickly demystify a few key photography terms you need to know for your Great Barrier Reef aerial photography 2026 adventure.
First, let us look at ISO. This is your camera sensor's sensitivity to light. On a bright sunny day over the reef, you want to keep your ISO as low as possible (like ISO 100 or 200) to avoid digital noise and keep your images crisp.
Next is Bokeh. You might love that soft, blurry background look in portrait photography, but for aerial shoots, we want the exact opposite. We want the entire reef in sharp focus from edge to edge. To achieve this, we avoid shooting wide open at f/1.8 and instead use a middle-ground aperture like f/5.6 or f/8.
Then we have the Rule of Thirds. This is a classic composition guide where you divide your frame into a 3x3 grid. Instead of putting the horizon right in the middle, place it on the upper third line, leaving the bottom two-thirds filled with the vibrant patterns of the reef.
Now try this: use Exposure Compensation. Because the bright white sand keys and reflective water can trick your camera's light meter, your photos might end up looking too dark. Adjusting your exposure compensation dial to +0.3 or +0.7 will bring those bright turquoises back to life.
Finally, always shoot in RAW vs JPEG. JPEGs are processed and compressed by your camera, discarding valuable color data. RAW files capture all the raw data from your sensor, giving you maximum flexibility to adjust shadows and highlights in post-production. You can learn more about managing these files on the Adobe Lightroom tutorials page.
Step-by-Step Guide to Setting Up Your Camera
Let us walk through the exact steps to configure your camera before the pilot starts the engine. Do not try to change these settings mid-flight when you are distracted by the views!
Your Step-by-Step Aerial Setup
- Switch to Manual Mode (M) or Shutter Priority Mode (Tv/S): You need total control over your shutter speed. Set your shutter speed to at least 1/1000s or 1/1600s to freeze the motion of the plane.
- Set Your Aperture: Choose f/5.6 or f/8. This ensures your lens is operating at its sharpest sweet spot and gives you enough depth of field.
- Set Auto ISO with a Limit: Let your camera manage the ISO, but cap the maximum limit at ISO 1600 so your images do not get grainy if a cloud passes by.
- Choose Continuous Autofocus (AF-C or Servo): The distance between you and the reef is constantly changing. Continuous autofocus will keep tracking the reef surface perfectly.
- Enable High-Speed Continuous Shooting: Set your drive mode to burst. When you fly over a spectacular reef formation, hold down the shutter button to take 3 to 5 quick frames. This increases your chances of getting one perfectly sharp shot.
My Flight Failure: A Quick Story
A few years ago, I booked my first flight for some Great Barrier Reef aerial photography 2026 style testing. I was so excited that I forgot the basics. I had my camera set to Aperture Priority at f/2.8, and I did not pay attention to my shutter speed, which dropped to 1/200s. To make matters worse, I was shooting in JPEG and forgot my polarizer.
When I got back to my hotel room, I was devastated. The photos were hazy, filled with cabin reflections, and slightly blurry because of the plane's vibration. The stunning turquoise water looked like a dull gray-blue.
I fixed this on my next flight by switching to RAW, locking my shutter speed at a fast 1/1500s, using a rubber lens hood pressed near the window, and twisting my circular polarizer until the surface reflections vanished. The difference was night and day! Your photos will look just as stunning if you learn from my early mistakes.
Recommended Settings for Aerial Reef Shots
Keep this quick reference guide handy on your phone when you are boarding your flight.
- File Format: RAW (Uncompressed)
- Shutter Speed: 1/1000s to 1/2000s (Crucial to combat plane vibrations)
- Aperture: f/5.6 or f/8 (For maximum lens sharpness)
- ISO: 100 to 400 (Keep it low for clean images)
- Focus Mode: Continuous AF with a single point or zone
- White Balance: Daylight or Auto
Final Tips for Your 2026 Aerial Adventure
Don't forget to wear dark clothing for your flight. Brightly colored shirts will reflect off the inside of the plane window, creating annoying ghosts in your images. A black long-sleeve shirt is the secret uniform of professional aerial photographers.
Now you are fully prepared to capture stunning Great Barrier Reef aerial photography 2026. Take a deep breath, enjoy the incredible view, keep your shutter speed fast, and let your creativity fly high over one of the natural wonders of the world!
Frequently Asked Questions
What is the best time of year for aerial photography of the Great Barrier Reef in 2026?
The dry season, from May to October, offers the clearest skies and calmer waters, making it ideal for aerial shots. Avoid the wet season's cyclone risk and poor visibility.
Do I need a permit to fly a drone over the Great Barrier Reef in 2026?
Yes, you need a CASA-approved drone permit and must respect restricted airspace zones around the reef. Always check local regulations and Marine Park rules for no-fly areas.
What camera settings work best for capturing reef colors from the air?
Use a fast shutter speed (1/1000s or higher) to freeze motion, and set your aperture to f/8 for sharp focus across the scene. A polarizing filter helps reduce glare and boost underwater color contrast.
Which reef locations offer the most dramatic aerial views in 2026?
Heart Reef, Whitehaven Beach, and the Outer Barrier's ribbon reefs provide iconic patterns and contrasting sands. For depth, try the Sudbury Reef system for its turquoise lagoons.
What safety gear and precautions are essential for aerial trips in reef conditions?
Carry at least two spare batteries and a sunshade for your camera screen to combat glare. Always monitor weather patterns, carry a marine VHF radio, and never fly too close to the water to avoid spray damage.

Camille Bernard shares travel photography tips for every kind of traveller, from phone snapshots to full kits. She breaks down light, composition and timing so you come home with photos that actually capture how a place felt.
💬 Comments (0)
No comments yet. Be the first!