Frame Within Frame Photography Guide
Master frame within frame photography to add depth and focus to your travel images. This tutorial shows you how to use natural frames like windows, arches, and foliage for compelling compositions.

Mastering frame within frame photography is one of the fastest ways to add depth, mystery, and professional polish to your travel shots. If your photos have felt flat or uninteresting lately, this composition technique will transform them. In 2026, I’m still using this trick on every trip, and I’ll show you exactly how you can do the same.
Frame within frame photography means using an element in your foreground — like a window, an archway, or even tree branches — to create a natural border around your main subject. Your photos will instantly look more intentional, and viewers will feel like they are peeking into a secret world. Let’s dive into how you can start using it today.
Why Frame Within Frame Photography Works
Human eyes are naturally drawn to boundaries. When you place a dark doorframe or a silhouetted arch around your subject, you create a visual path. The viewer’s gaze follows the edges and lands exactly where you want it. This technique also adds layers: the foreground frame, the midground subject, and the background environment all work together. Your photos will look more three-dimensional, even on a flat screen.
The secret is that you don’t need expensive gear. You can practice frame within frame photography with your smartphone or a basic kit lens. I’ve used it with a $400 camera and gotten gallery-worthy results. What matters is your eye, not your wallet.
My “Failed” Shot and How I Fixed It
Let me share a personal story. In early 2026, I was photographing a beautiful old cathedral in Lisbon. The light was perfect, the architecture was stunning. I took about 20 photos from the center of the plaza, standing in the open. Every shot looked like a boring postcard. Flat. No depth.
Then I noticed a crumbling stone archway about 30 feet to my left. I kneeled down, positioned the arch in the foreground, and recomposed so the cathedral filled the center of the arch. One click. The result? The arch created a dark, textured frame, and the cathedral suddenly felt massive and sacred. Frame within frame photography saved my entire shoot that day. Now I never walk past a potential frame without stopping.
Finding Your Frames: 3 Easy Places to Look
First, let’s look at where you can find natural frames. They are everywhere once you train your eye. Here are three reliable sources:
- Architecture: Doorways, windows, hallways, bridges, arches, staircases. These are the most obvious and powerful frames. In 2026, look for modern geometric buildings too — a square skylight or a circular hole in a wall works just as well as a medieval archway.
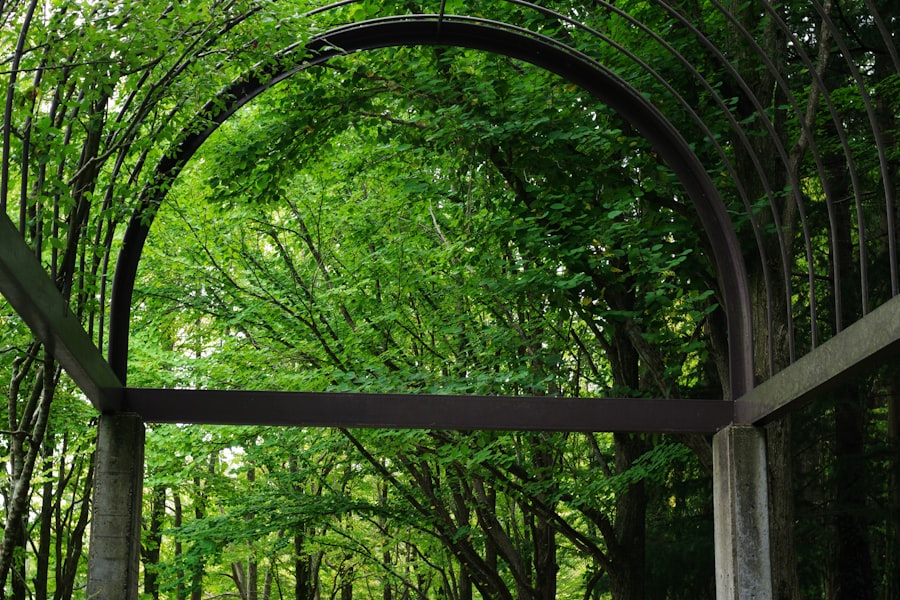
- Nature: Overhanging tree branches, caves, rock formations, tall grass, or even leaves held close to the lens. A palm frond in the foreground can turn a boring beach scene into a tropical fantasy.
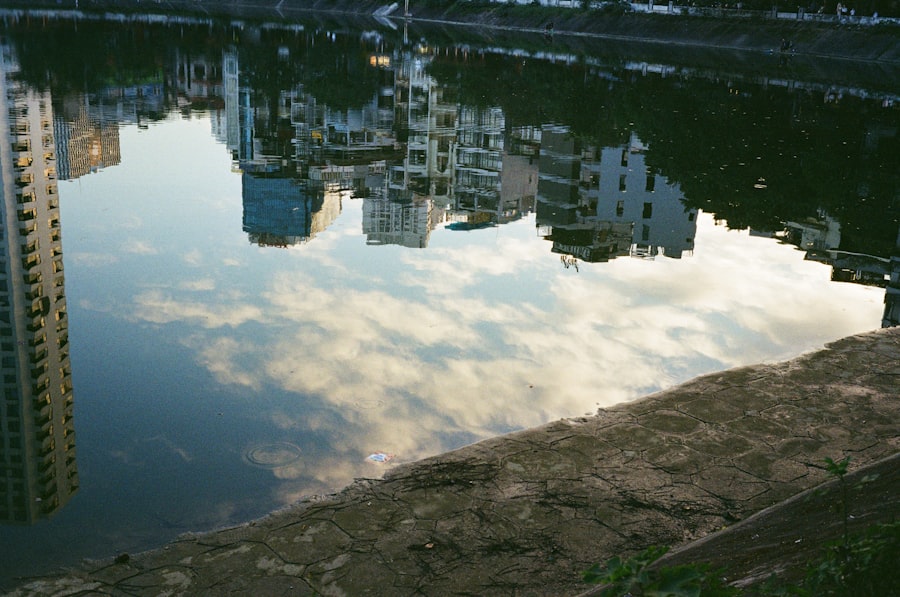
- Reflections and Objects: Mirrors, puddles, glass windows, or even the rim of a coffee cup. Place your subject inside the reflected area, and you have a double frame within frame photography effect.
Step-by-Step Guide to Frame Within Frame Photography
Now try this simple three-step process the next time you are on location. I use this every time I travel, and it never fails.
Step 1: Identify Your Frame
Scan your environment. Look for anything that creates a border. The frame does not have to be perfect — slightly crooked branches or a busy window frame can add character. Avoid frames that are too bright or distracting; a dark silhouette works best.
Step 2: Compose Your Subject Inside the Frame
Position yourself so the frame fills the edges of your camera’s viewfinder. Use the Rule of Thirds: place your main subject off-center, about one-third from the edge of the inner frame. This creates tension and movement. If your camera has a grid overlay, turn it on.
Step 3: Control Your Exposure and Focus
Here is where camera jargon becomes your friend. Your camera will want to expose for the bright frame or the bright subject, but you need to balance both. Use exposure compensation if the frame is too dark — dial it up by +0.7 or +1.0 stops. For focus, use single-point autofocus and lock it on your main subject, not the frame. If the frame is blurry (called bokeh), that actually looks great. A soft, out-of-focus foreground frame adds dreamy depth.
Recommended Settings for Frame Within Frame Photography
- ISO: Keep it low. ISO 100–400 is ideal. If you are indoors or in low light, push to ISO 800 or 1600, but no higher unless your camera handles noise well (newer Sony or Nikon models in 2026 are excellent at higher ISOs).
- Aperture: For maximum depth of field (everything sharp), use f/8 to f/11. For a soft, blurry frame and sharp subject, use f/2.8 to f/4. This bokeh effect makes your frame within frame photography pop.
- Shooting Format: Always shoot RAW. JPEG compresses and discards data. With RAW, you can recover shadows in the dark frame and adjust highlights on the bright subject later in Adobe Lightroom. If you’re new to RAW, check out Adobe’s beginner guide to RAW vs JPEG — it’s worth your time.
- Focal Length: Use a wide-angle lens (24mm–35mm) to capture the entire frame and still have room for your subject. A zoom lens works too — just step back until the frame fills the edges.
The Golden Rule of Frame Within Frame Photography: The frame should never distract from the subject. If your foreground is too bright, too sharp, or too busy, it becomes the story — not your intended focus. When in doubt, underexpose the frame by half a stop, or wait for clouds to soften the light. A dark, simple frame always wins.
Other Types of Frames You Might Overlook
Frame within frame photography isn’t limited to physical objects. Think about these creative options for your next shoot in 2026:
People as Frames: Shoot through someone’s arm, between two friends walking, or through the gap in a crowd. This adds a candid, documentary feel. Your subject becomes part of the environment, and the blurred silhouettes of people create a natural border.
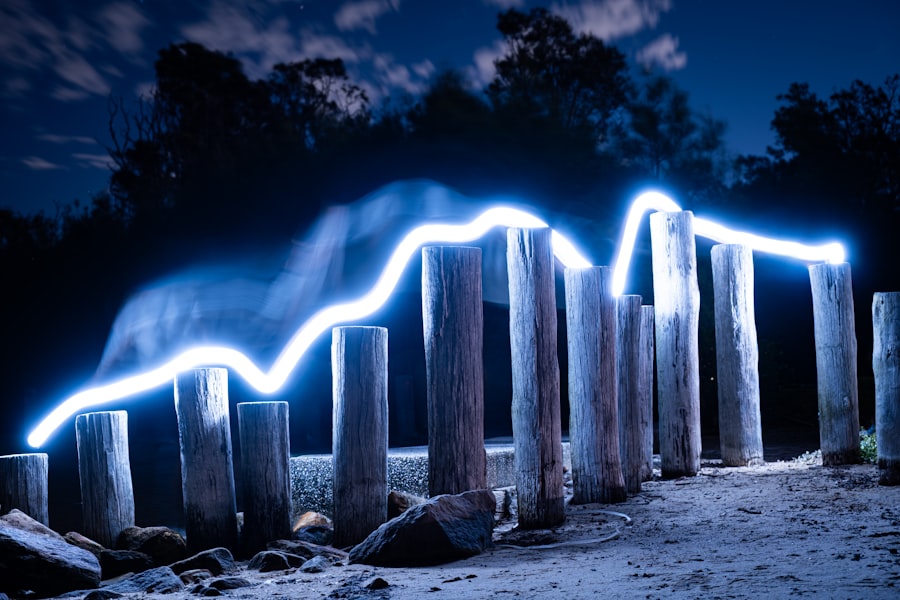
Color or Light Frames: A patch of shadow that surrounds a lit subject. Or a circle of sunlight on the ground. Position your subject inside that circle, and the contrast becomes your frame. This works beautifully in forests or city plazas with sharp light.
Reflective Surfaces: A puddle after rain can frame a reflection of a building. Combine that with a real archway above the puddle — and suddenly you have a frame within a frame within a frame. It’s addictive once you start.
Don’t Forget to Practice with Your Gear
Don’t forget to experiment with different lenses. A 50mm prime lens at f/1.8 will give you a gorgeous blurry frame, while a 24mm wide-angle at f/11 will keep everything crisp. Both are valid for frame within frame photography. Try both on the same subject and compare.
If you want official specs on how aperture affects depth of field, check out Canon’s depth-of-field tutorial — it explains the relationship between f-stops, focal length, and distance clearly. Also, Nikon’s guide to exposure compensation is excellent for learning how to control brightness when your frame and subject differ in light.
Let’s recap: find a frame, compose your subject inside it, control your exposure, and choose the right aperture. That’s all you need to master frame within frame photography. Your travel album will go from flat snapshots to layered, storytelling images. I’ve used this technique in 2026 across ten different countries, and it never fails to impress. Now go out and practice — your photos will thank you.
💬 Comments (0)
No comments yet. Be the first!