Best Mont Saint-Michel Photo Spots
Master the tides in 2026 with our curated guide to the best Mont Saint-Michel photo spots for landscape photographers.
Best Mont Saint-Michel Photo Spots: A Visual Guide to the Wonder of the West
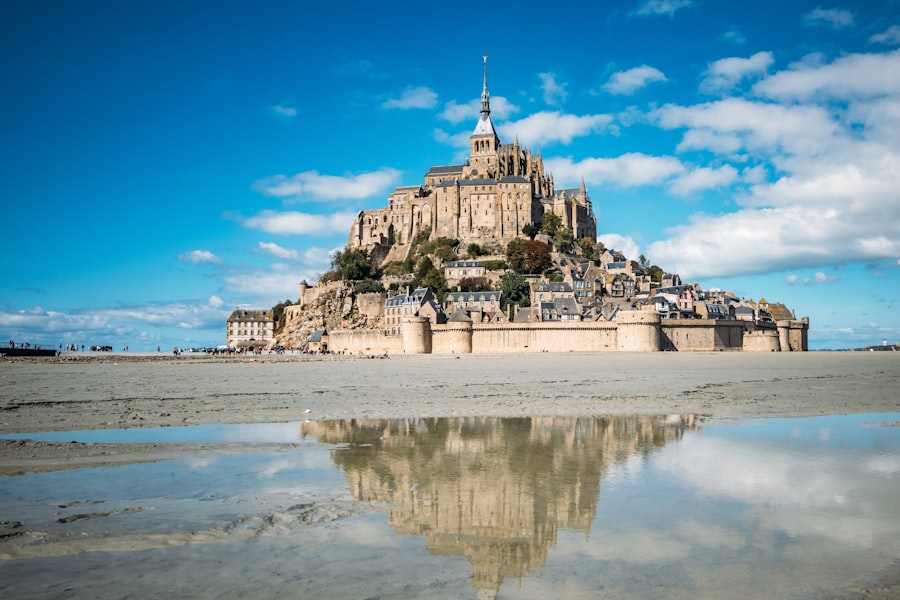
Finding the ultimate Mont Saint-Michel photo spots is a dream come true for travel photographers, visual creators, and anyone who appreciates medieval architecture rising dramatically from the sea. Located on the border of Normandy and Brittany in France, this UNESCO World Heritage site is one of the most iconic landmarks in Europe. The way the tide sweeps across the bay, coupled with the changing Atlantic weather, means that the island fortress looks completely different from one hour to the next. In this comprehensive guide, we will explore the absolute best vantage points, compositions, and timing to capture the sheer magic of this historic wonder.
1. The Wooden Footbridge: Your First Look
As you approach the tidal island, the long, curving wooden footbridge serves as both your pathway and your first major photographic opportunity. Designed by architect Dietmar Feichtinger, this bridge was created to allow the waters of the Couesnon River and the sea to flow freely around the mount, restoring its maritime character. It offers an unobstructed, sweeping view of the entire bay.
Composition and Leading Lines on the Bridge
To capture a truly dynamic shot, use the gentle curve of the wooden footbridge as a leading line. Position your tripod on the left or right side of the walkway, using the handrails to draw the eyes of your viewers directly toward the towering abbey. By utilizing a wide-angle lens, such as a 16-35mm, you can capture the vastness of the surrounding salt marshes alongside the modern elegance of the wooden pathway.
Best Lighting and Vibe
This spot is particularly magical during the blue hour, just after sunset. As the sky transitions into deep shades of indigo, the artificial lights of the abbey turn on, casting a golden glow over the granite walls. The contrast between the cool blue of the sky and the warm amber lights creates a cozy, mysterious vibe that is perfect for long-exposure photography.
Pro Photography Tips: Use a neutral density filter during the daytime to blur the movement of the tourists walking along the bridge. Set your aperture to f/8 or f/11 for maximum sharpness across the entire frame, and keep your ISO at 100 to avoid digital noise.
2. The Salt Marshes: Frame with Nature
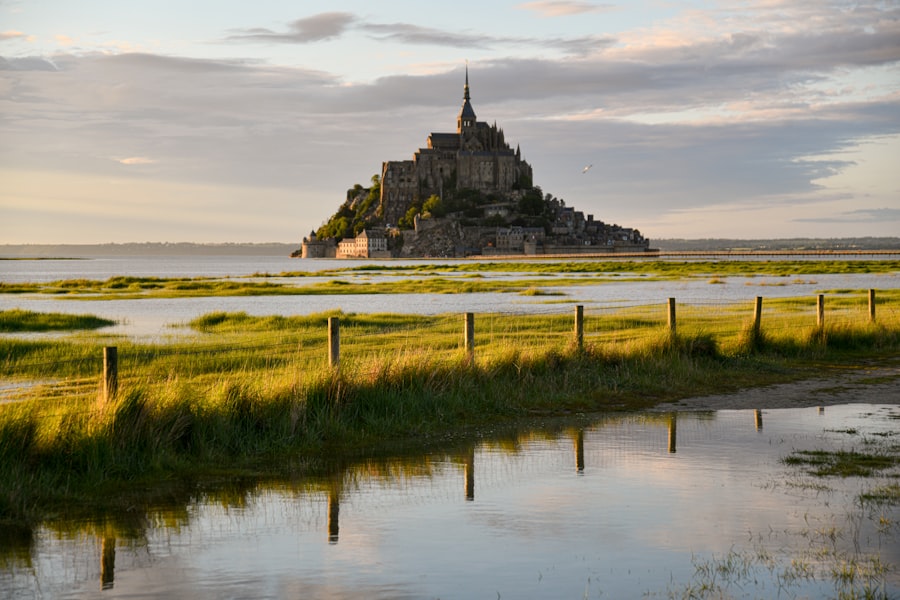
The vast grassy fields surrounding the bay, known as the herbu, are home to the famous local sheep that graze on the salty vegetation. These marshes offer some of the most rustic and natural perspectives of the monument, far away from the crowds of the main bridge.
Getting to the salt marshes requires a short walk from the main visitor parking lots near La Caserne. Follow the dirt paths heading west toward the riverbanks, keeping an eye out for patches of tidal water that pool in the grass during high tides. This area is highly recommended by travel experts on platforms like Lonely Planet for those seeking a peaceful, authentic countryside experience.
- The Subject: Look for the local black-faced sheep grazing in the foreground to add a sense of life and scale to your landscape images.
- The Reflection: After a high tide or heavy rain, look for small puddles in the marshland. Get your camera as close to the ground as possible to capture a perfect mirror reflection of the abbey.
- The Equipment: A telephoto lens, such as a 70-200mm, is essential here. It allows you to compress the distance between the sheep in the foreground and the distant abbey, making the fortress appear massive.
3. Inside the Ramparts: Medieval Streets and Stone Gateways
Once you cross the drawbridge and enter the historic village, you are transported back to the Middle Ages. The narrow, winding stone alleys, steep staircases, and historic timber-framed houses offer endless opportunities to capture the historic charm of the island from within.
Chasing Light in the Grande Rue
The main street, Grande Rue, is incredibly narrow and gets crowded very quickly during the day. To capture its true essence, you must explore it at sunrise. The morning sun filters slowly through the gaps in the high stone buildings, creating dramatic shafts of light and deep shadows. Look for hanging wrought-iron signs, old wooden doors, and stone archways to frame your shots.
The Rampart Walkways
For a different perspective, climb up to the outer defensive walls. Walking along the ramparts allows you to shoot downward onto the slate roofs of the village houses while keeping the vast, empty bay in the background. This high angle provides a wonderful sense of isolation and security, highlighting why this fortress was never conquered during the Hundred Years War.
4. The Abbey Cloister: A Sanctuary of Peace
At the very top of the island sits the magnificent benedictine abbey. The crown jewel of the interior is undoubtedly the Cloister, a peaceful courtyard suspended between heaven and earth. This space was designed in the thirteenth century as a place of meditation and prayer for the monks.
Symmetry and Framing in the Courtyard
The Cloister features double rows of delicately carved granite columns that are slightly offset from one another, creating a fascinating optical illusion as you walk around the gallery. Use these colonnades to frame the central garden or to capture the dramatic views of the bay through the open arches on the western side. This is one of the most elegant Mont Saint-Michel photo spots for lovers of symmetry and architectural detail.
Pro Photography Tips: To capture the full grandeur of the Cloister without distorting the straight vertical lines of the columns, use a tilt-shift lens or shoot a multi-shot panorama with your camera mounted vertically on a tripod.
Managing the Interior Lighting
The contrast between the shady galleries and the bright central garden can be challenging for your camera sensor. To overcome this, shoot in RAW format and bracket your exposures (taking one dark, one medium, and one bright photo). You can later merge these images in editing software to preserve the rich details in both the dark stone carvings and the bright sky.
5. The Barracks and Dam Area: The Perfect Reflection
Located near the tourist village of La Caserne, the Couesnon River Dam plays a vital role in clearing the sediment from around the mount. Beyond its engineering purpose, the dam area has become one of the most famous vantage points for photographers looking to capture the iconic reflection of the island in calm waters.
To reach this spot, simply follow the pedestrian path from the visitor center toward the dam. For more detailed logistics on visiting the region, checking transit schedules on TripAdvisor can help you plan your arrival perfectly around the tides.
How to Capture the Perfect Reflection
The key to a flawless reflection shot is timing your visit with high tide and low wind. When the wind is still, the water behind the dam becomes a giant mirror. Position your camera low to the concrete edges of the dam to maximize the reflective surface in your composition.
- Aperture: Keep your aperture around f/8 to f/11 to ensure both the dam in the foreground and the abbey in the distance remain sharp.
- Shutter Speed: If there are slight ripples on the water, use a long exposure of 5 to 10 seconds with a neutral density filter to smooth out the surface into a glassy finish.
- Color Balance: The warm tones of the illuminated abbey reflecting in the cool, blue water during twilight create a visually striking color contrast.
6. Walking the Tidal Flats: A Wild Adventure
For the truly adventurous photographer, walking out onto the wet sand of the bay during low tide offers some of the most unique and expansive perspectives of the mount. From this low vantage point, the fortress looks like a massive stone ship stranded in a desert of shimmering wet sand.
The vast expanses of wet sand create natural mirrors that reflect the dramatic Norman skies. Look for small channels of water running through the sand to use as winding leading lines that guide the viewer’s eye toward the towering spire of Saint Michael at the top of the abbey.
Safety First on the Bay
While the tidal flats are incredibly beautiful, they can also be highly dangerous due to the speed of the incoming tide and areas of quicksand. It is strongly recommended to explore the bay with an experienced local guide. Always check the official tide tables before heading out, and never walk too far from the safety of the main bridge alone.
- Protect Your Gear: Saltwater and fine sand can easily damage your camera and lenses. Avoid changing lenses while out on the flats, and carry a microfiber cloth to wipe away any sea spray.
- Angles: Use a very low camera angle to emphasize the texture of the wet sand patterns in the foreground.
- Timing: Late afternoon is perfect for this location, as the low sun casts long shadows and highlights the golden textures of the sand dunes.
Capturing the magic of these incredible Mont Saint-Michel photo spots requires patience, preparation, and an eye for detail. Whether you are framing the abbey through the historic columns of the Cloister, capturing the reflection from the river dam, or photographing the grazing sheep on the salt marshes, this medieval wonder promises to deliver stunning visual stories that will elevate your photography portfolio.
Frequently Asked Questions
What is the best time of day to photograph Mont Saint-Michel?
The best times are sunrise and sunset, when the golden light blankets the abbey and surrounding bay.
Where is the most iconic spot to capture the abbey?
From the causeway or nearby shoreline, you can photograph the island centered against the sky and water.
Can you photograph Mont Saint-Michel from the bay floor at low tide?
Yes, allowed with a guide—this perspective reveals reflecting puddles and adds a unique foreground.
Which location offers the best silhouette shot?
The eastern side at sunset creates a dramatic dark silhouette against warm colors.
What is the classic panoramic viewpoint?
From the point of view on the D275 road, looking across the salt marshes for a postcard-perfect vista.

Sophie Lefebvre writes about the most photogenic places to visit, pairing stunning locations with the practical details of getting there. She helps travellers find the views worth planning a whole trip around.
💬 Comments (0)
No comments yet. Be the first!