Top 10 Tokyo Neon Streets Photography Spots 2026
Discover Tokyo's most stunning neon streets for photography in 2026. From Shinjuku to Golden Gai, capture iconic lightscapes.
Top 10 Tokyo Neon Streets Photography Spots 2026
If you are searching for the ultimate Tokyo neon streets photography guide for 2026, you have landed in the right place. Tokyo at night is not just a city; it is a living, breathing canvas of electric color, kinetic energy, and surreal light. Every alley tells a story, every sign competes for your attention, and every reflection on a wet sidewalk creates a mirror into another world. This guide is for you if you want to capture that magic with your camera. I have walked these streets hundreds of times, tested every lens, and dialed in the exact camera settings so you can skip the guesswork. From the towering billboards of Shinjuku to the narrow, smoke-filled alleys of Omoide Yokocho, this post covers the absolute best locations for Tokyo neon streets photography in 2026. Get ready to fill your memory cards with images that burn with color.
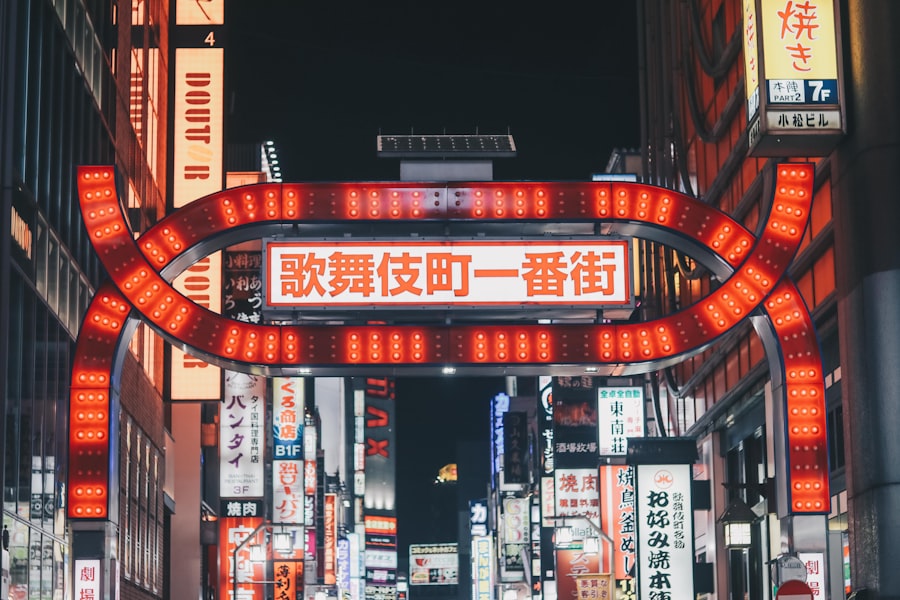
1. Shinjuku - The Electric Heartbeat of Tokyo
Shinjuku is the undisputed king of neon. The moment you step out of the west exit of Shinjuku Station and look up, you are hit by a vertical wall of glowing signs, digital screens, and flashing advertisements. This is where your Tokyo neon streets photography journey should begin. The sheer density of light sources here is overwhelming in the best way possible. The streets are crowded until well past midnight, and the energy is contagious. The lighting here is a chaotic mix of warm yellows, cool blues, electric reds, and stark whites. To capture it all, you need to slow down and let your eyes adjust.
Best Camera Settings for Shinjuku Neon
Start with a wide-angle lens, something between 16mm and 24mm for full-frame cameras. Set your aperture to f/8 for deep depth of field so that both the foreground signs and the distant billboards stay sharp. Your ISO should sit between 800 and 1600, depending on how much ambient light there is. For shutter speed, aim for 1/30 to 1/60 of a second. If you have a tripod, use it and drop your shutter to 1/4 of a second for those silky smooth light trails from the traffic. The vibe in Shinjuku is pure electricity. You can feel it in your chest. Every corner you turn presents a new composition.
Walking Directions and the Best Angles
Exit Shinjuku Station from the east side and walk toward the famous Godzilla head on top of the Toho Cinema building. But do not just point your camera at Godzilla. Instead, turn left and walk into the narrow side streets behind the cinema. These alleys are filled with tiny restaurants, izakayas, and vertical neon signs that hang so low you can almost touch them. For the classic shot of the giant crosswalk in front of the station, stand on the pedestrian bridge that connects the east and west exits. Shoot down at an angle to capture the flow of people and the sea of signs. The best time is civil twilight, about 30 minutes after sunset, when the sky retains a deep blue that contrasts perfectly with the warm neon glow. This is a must-visit spot for any Tokyo neon streets photography itinerary.
Pro Photography Tips: Use a polarizing filter to cut through the glass reflections on storefronts. This will make the neon colors pop more and give you cleaner, more saturated images. Also, shoot in RAW so you can recover highlight detail from the brightest signs and bring out shadow detail in the alleys.
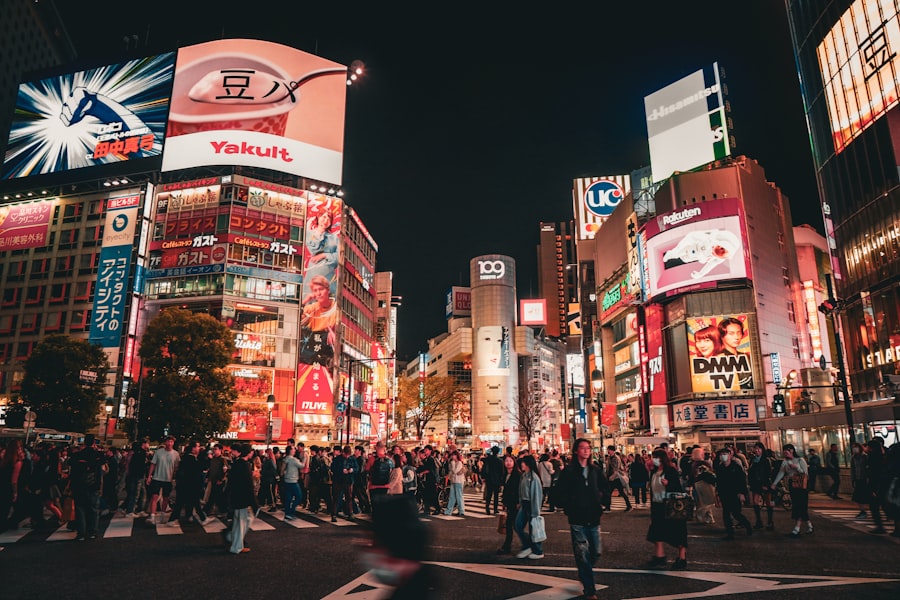
2. Shibuya - The Crossing of a Thousand Lights
Shibuya is iconic for a reason. The scramble crossing is famous, but the real magic for Tokyo neon streets photography happens after dark when the giant screens on the Tsutaya building and the 109 building light up the entire intersection. The lighting here is massive, almost theatrical. It paints the faces of the crowd in shifting colors. You want to capture that moment when the crosswalk signals turn green and a wave of people surges forward, surrounded by towering video screens.
Framing the Chaos at the Scramble
For the best framing, head to the second-floor window of the Starbucks across from the station. Yes, it is crowded, but if you arrive 20 minutes before sunset, you can claim a spot. Use a 24-70mm lens and frame the crosswalk from above. This gives you a perfect diagonal line of people cutting through the neon-lit buildings. Alternatively, stand at ground level on the center island of the crossing and shoot upward with a wide lens to capture the scale of the screens above you. The vibe here is fast, loud, and exhilarating. You can feel the city breathing.
Vibe and Lighting Tips for Shibuya
The key to great composition in Shibuya is to look for symmetry. The buildings on either side of the crossing are not perfectly aligned, but the screens create a sense of visual balance. Wait for a moment when the colors on the screens shift to complementary tones. For example, if the left screen is blue, wait for the right screen to turn orange. This creates a color contrast that makes your image instantly more dynamic. For the best results, set your white balance to around 5500K to keep the neon colors natural. Shibuya is also a fantastic place to practice panning shots of the crowd. Use a shutter speed of 1/15 of a second and follow a single person with your camera while keeping them sharp against a blurred background of neon. This is advanced Tokyo neon streets photography, but the results are stunning.
3. Akihabara - The Electric Town of Endless Neon
Akihabara is a sensory overload in the best way. This district is dedicated to electronics, anime, and gaming, and the neon reflects that culture perfectly. The main street, Chuo Dori, is lined with massive stores like Yodobashi Camera and Radio Kaikan, each covered in colorful signage. But the real treasures are in the side streets. Turn off the main road and walk into the alleys lined with tiny arcades, gacha stores, and themed cafes. The lighting here is a mix of fluorescent tubes, LED strips, and old-school neon tubes that buzz with a warm, nostalgic hum.
Composition in the Gaming District
For composition, look for vertical lines. The buildings in Akihabara are tall and narrow, and the signs run vertically, creating strong leading lines that draw the eye upward. Frame your shot with a building on each side and the sky at the top. The neon colors here are often primary: bright red, electric blue, and vivid yellow. Use a fast prime lens like a 35mm f/1.8 to shoot handheld in the narrow alleys where a tripod would be impractical. The vibe is playful, geeky, and endlessly colorful. You will find yourself stopping every few meters to compose another shot. Akihabara is an essential stop on any Tokyo neon streets photography tour because it offers a completely different palette than Shinjuku or Shibuya.
Pro Photography Tips: In Akihabara, shoot during the "blue hour" (the 20 minutes after sunset) when the sky is a deep indigo. This creates a beautiful complementary color scheme with the warm neon lights. Also, look for puddles on the ground after a rain shower. The reflections of the neon signs on wet asphalt create a mirror image that doubles the visual impact of your photo.
4. Ginza - High-End Neon and Mirror Reflections
Ginza is where Tokyo puts on its most elegant neon display. Unlike the chaotic energy of Shinjuku or the playful vibe of
💬 Comments (0)
No comments yet. Be the first!