6 Best Yokohama Night Photography Spots
Discover the best Yokohama night photography spots in 2026, from futuristic harbor lights to glowing neon streets.
6 Best Yokohama Night Photography Spots
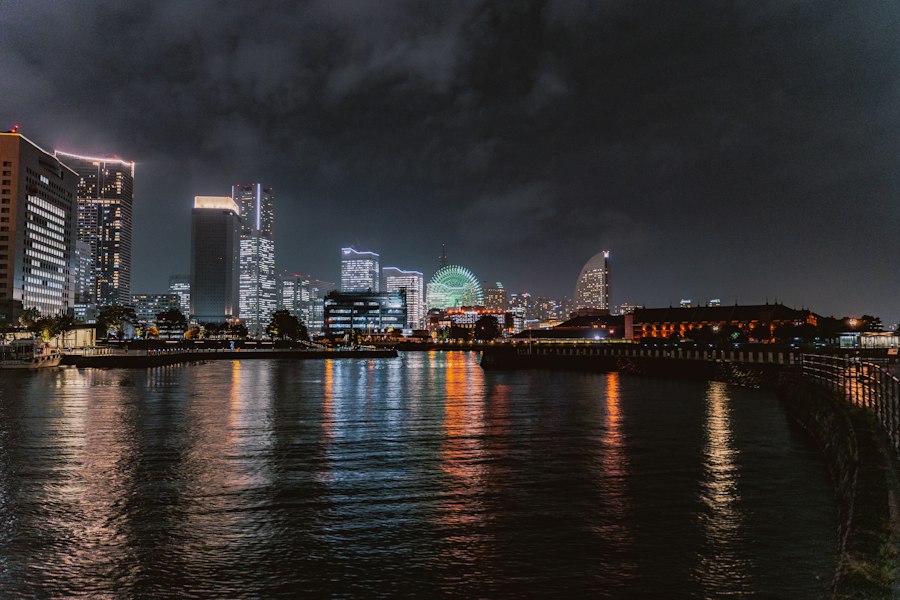
If you are looking to capture the ultimate futuristic cityscape, finding the absolute best Yokohama night photography spots should be at the very top of your Japan itinerary. As Japan second largest city, Yokohama transforms after dark into a glittering playground of neon lights, historic brick buildings, and dramatic harbor reflections. The coastal breeze, the hum of the giant Ferris wheel, and the sleek architectural lines create an electric atmosphere that is a dream come true for any visual storyteller.
Whether you are an amateur shutterbug armed with a smartphone or a seasoned pro carrying a heavy tripod and a bag of prime lenses, this port city offers unparalleled visual drama. In this comprehensive guide, we will explore the six most spectacular locations to capture Yokohama glowing skyline, complete with exact compositions, camera settings, and insider tips to elevate your portfolio.
1. Minato Mirai 21 and the Cosmoworld Ferris Wheel
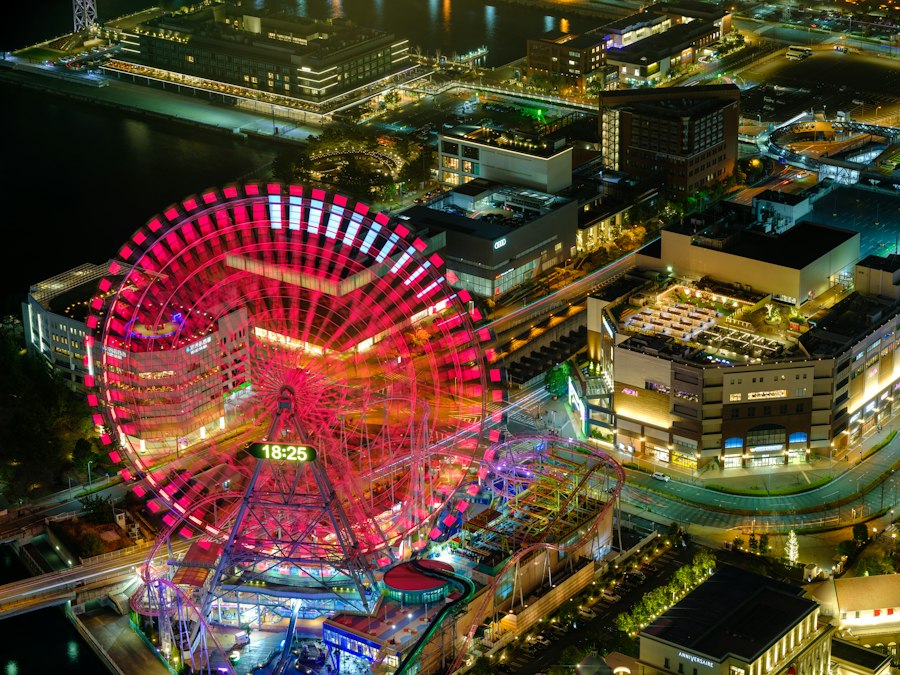
Minato Mirai 21, which translates to harbor of the future, is the crown jewel of Yokohama. This seaside urban area is characterized by high-rise towers, shopping complexes, and the iconic Cosmo Clock 21 Ferris wheel. Once the site of a major shipyard, this district was systematically developed starting in the 1980s to become a model of modern urban design. Today, it stands as one of the most famous Yokohama night photography spots for capturing that classic Japanese cyberpunk aesthetic.
The Iconic Ferris Wheel Framing
The Cosmo Clock 21 is not just any Ferris wheel; it actually serves as a giant digital clock and light show. To capture its massive scale, head to the pedestrian bridges near the Queen Towers. By using a wide-angle lens, you can position the wheel on the right third of your frame, allowing the glowing pedestrian pathways to lead the viewer eye through the shot. The reflection of the neon lights on the canal water adds a layer of depth that makes the image pop.
Long Exposure Techniques for Light Trails
To get those smooth, milky water reflections and beautiful light trails from the rotating wheel, you will need a sturdy tripod. Set your camera to Manual mode and try these settings as a baseline:
- Aperture: f/8 to f/11 (to keep the entire cityscape sharp and create starburst effects on the streetlights).
- ISO: 100 or 200 (to minimize digital noise in the dark sky).
- Shutter Speed: 10 to 15 seconds (perfect for capturing at least one full color transition of the Ferris wheel).
Pro Photography Tips: Use a 2-second shutter delay or a remote shutter release. Even the slightest vibration from pressing the shutter button can introduce camera shake and ruin a tack-sharp long exposure.
2. Osanbashi Pier
For the ultimate panoramic view of the entire Yokohama skyline, there is no better vantage point than Osanbashi Pier. Officially known as the Osanbashi Yokohama International Passenger Terminal, this is the oldest pier in the city, dating back to the late 19th century. However, its modern reconstruction is a marvel of contemporary architecture, featuring sweeping wooden decks, grassy lawns, and wave-like structures that mimic the natural movement of the sea.
Symmetry and Leading Lines
The architectural design of the pier itself offers incredible leading lines. Use the wooden floorboards and the metallic railings to guide your viewer eyes directly toward the three iconic towers of Yokohama: the King (Kanagawa Prefectural Government), the Queen (Yokohama Customs), and the Jack (Yokohama Port Opening Memorial Hall). The contrast between the organic wooden texture of the pier and the cold, glass-and-steel skyscrapers in the distance creates a compelling visual narrative.
Capturing the Harbor Vibe
The vibe at Osanbashi Pier is romantic and serene. Couples often gather here to watch the harbor lights, which provides a great opportunity for silhouette photography. Frame a couple sitting on the wooden steps against the brightly lit background of the Landmark Tower and the Cosmo Clock. This adds a human element to your landscape shots, making them feel more intimate and alive.
3. Yokohama Red Brick Warehouse (Akarenga Soko)
If you want to step back in time and capture a mix of European charm and Japanese history, the Yokohama Red Brick Warehouse is a must-visit. Originally built in the early 1900s as customs houses, these historic buildings survived both the Great Kanto Earthquake of 1923 and the air raids of World War II. Today, they have been beautifully restored into a bustling cultural and shopping complex.
When looking for high-quality Yokohama night photography spots, the warm, amber glow of the floodlights illuminating the red bricks offers a stark, beautiful contrast to the cool blue tones of the night sky. For more travel planning ideas in this historic area, you can check out reviews and visitor photos on TripAdvisor.
Warm and Cool Color Contrast
The key to photographing the Red Brick Warehouse at night is mastering white balance. If you leave your camera on Auto White Balance, it may try to neutralize the warm orange glow of the bricks. Instead, manually set your white balance to Tungsten or Kelvin scale around 3200K. This will preserve the deep blue of the twilight hour while making the warm golden lights on the brick facade stand out dramatically.
Composition and Reflections
During the rainy season, or right after a sudden downpour, the brick plazas between the two main buildings transform into giant mirrors. Get your camera as close to the wet ground as possible. Use a wide-angle lens and tilt your camera slightly upward to capture a perfect symmetrical reflection of the illuminated warehouses in the puddles.
4. Yokohama Landmark Tower Sky Garden
For those who want to capture a bird eye view of the metropolis, the Sky Garden observatory on the 69th floor of the Yokohama Landmark Tower is the place to be. Standing at 273 meters high, it was once the tallest building in Japan. The ultra-fast elevator whisks you to the top in just 40 seconds, opening up to a 360-degree panoramic view of the entire Kanto region, including Mount Fuji on a clear day.
Beating the Window Reflections
Shooting through glass at night presents a major challenge: interior glare. The bright lights from the indoor shops and displays will reflect on the glass windows, ruining your shot. To combat this, bring a dark cloth, a jacket, or a specialized silicone lens hood that presses directly against the window pane. This seals out any stray interior light, allowing your camera to capture only the glittering grid of the city below.
High-Altitude Framing and Angles
From this height, the streets below look like glowing arteries of light. Look for interesting street intersections where traffic forms bright yellow and red patterns. Use a telephoto lens (around 85mm to 200mm) to isolate specific sections of the city, such as the glowing curves of the highway interchanges or the miniature-looking Ferris wheel spinning far below.
Pro Photography Tips: Tripods are generally not allowed in the Sky Garden observatory to keep the pathways clear for other visitors. Instead, use a flexible tabletop tripod or a lens beanbag, and rest your camera directly on the window ledge for stability during longer exposures.
5. Kishamichi Promenade
Kishamichi Promenade is a historic boardwalk that stretches across the harbor, utilizing the old railway tracks of the harbor national railway line built in 1911. Walking along this wooden path feels like traveling through time, with the historic iron bridges framing the ultra-modern skyline of Minato Mirai. This is one of the most popular Yokohama night photography spots for photographers who love combining historical elements with futuristic cityscapes.
Using Historic Bridges as Frames
The old truss bridges along the promenade are painted in a striking vintage green. At night, they are subtly lit from below. Position your tripod right at the entrance of one of these bridges, using the iron beams as a natural frame. This technique, known as framing within a frame, directs the viewer eye through the historic structure and right toward the glowing Landmark Tower in the background.
- Composition Tip: Keep your camera level to prevent vertical lines from converging.
- Focal Length: A mid-range zoom (24-70mm) works best here to balance the bridge details with the distant skyline.
- Vibe: The promenade is quiet and reflective, making it perfect for capturing a peaceful, nostalgic mood.
6. Shinko Pier and the Hammerhead Crane
For a unique industrial aesthetic, head over to Shinko Pier to photograph the historic Hammerhead Crane. Installed in 1914, this was Japan first dedicated cargo handling crane. It survived the Great Kanto Earthquake and remained operational for over half a century. Now, it stands as a preserved monument, beautifully illuminated at night against the backdrop of the modern passenger ship terminal.
This spot offers a gritty, industrial contrast to the sleek, polished look of Minato Mirai. To explore more about the historical significance of this area and find walking maps, you can visit the official travel guides on Lonely Planet.
Industrial Angles and Composition
The Hammerhead Crane has a very distinct, geometric shape. To capture its raw power, shoot from a low angle looking up. This makes the steel structure appear massive and dominant. Frame the crane on one side of the image, allowing the modern lights of the cruise terminal to occupy the opposite side, creating a dialogue between Yokohama industrial past and its maritime present.
Camera Settings for Crisp Details
Because the crane is made of dark steel, you will need to balance your exposure carefully so you don not lose detail in the shadows. Shoot in RAW format to give yourself the maximum dynamic range during post-processing. A moderate exposure of 4 to 8 seconds at f/8 will keep the metal textures sharp while ensuring the highlighted areas around the crane are not overexposed.
Frequently Asked Questions
What is the best time to photograph Yokohama's night skyline?
The best time is during blue hour, just after sunset, when the sky retains color and city lights are vivid. Avoid complete darkness to keep details in both sky and buildings.
Do I need a tripod for night photography in Yokohama?
Yes, a tripod is essential to avoid blur from slow shutter speeds. It also lets you use low ISO settings for cleaner images.
Which Yokohama spot offers the best view of the Bay Bridge?
The Osanbashi Pier area provides a classic view of the Bay Bridge with the skyline behind it. Another great option is the大さん橋 terminal for unobstructed angles.
Are there any free night photography spots in Yokohama?
Yes, the Minato Mirai waterfront and Yamashita Park are free and popular for night shots. The Rinko Park area also offers free access to iconic views.
How can I avoid crowds when shooting Yokohama at night?
Visit on weekday evenings or late at night after 10 PM to avoid crowds. Popular spots like the Cup Noodles Museum area are quieter then.

Oliver Janssen scouts the best photography spots in every destination, from sunrise viewpoints to overlooked angles on famous landmarks. He shares exactly where to stand and when to be there for the shot.
💬 Comments (0)
No comments yet. Be the first!