Top 10 Recoleta Cemetery Photo Spots
Discover the most photogenic mausoleums and statues at Buenos Aires' Recoleta Cemetery in this curated photo guide.
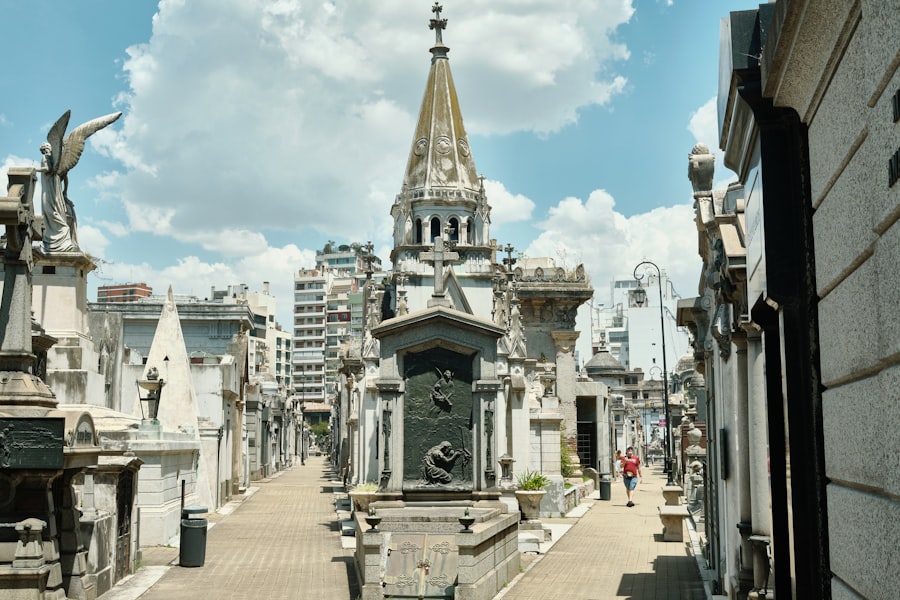
If you are searching for the best Recoleta Cemetery photo spots, you have come to the right place. Nestled in the heart of Buenos Aires, this sprawling necropolis is a photographer's dream, blending eerie beauty with architectural grandeur. Every corner offers a new composition, from weathered angel statues to ornate mausoleums. In this guide, I will take you through ten must-capture locations, sharing exact directions, lighting tips, and the best camera settings for each. Grab your lens and get ready to fill your memory card with hauntingly beautiful frames.
1. The Grand Entrance – Your First Frame
Before you even step inside, the entrance sets the tone. The massive neoclassical gate, flanked by Doric columns, is one of the most recognized Recoleta Cemetery photo spots. The vibe here is formal and imposing. To capture it well, arrive early (around 8:00 AM) when the golden hour light streams through the ironwork, casting long shadows on the cobblestones.
Spot 1: The Archway from Below
Lie on your back or use a wide-angle lens (16-24mm) to emphasize the towering scale. Frame the top of the arch against a blue sky. Composition tip: include a person walking through to add a sense of scale. Camera settings: aperture f/8 for sharpness from foreground to sky, ISO 100, shutter speed 1/125 sec. Avoid midday harsh light – the arch becomes a silhouette without detail.
Pro Photography Tips: Use a polarizing filter to reduce glare off the white marble. Shoot in RAW to recover shadows in the dark tunnel beneath the arch.
2. The Main Alley – A Symphony of Marble
Step inside and follow the main tree-lined avenue. This is the central artery of the cemetery, and it offers endless photo opportunities. The alley is flanked by towering mausoleums in art nouveau, baroque, and Greek revival styles. The best time is late afternoon when the dappled light filters through the leaves, creating a natural spotlight on the facades.
Spot 2: The Central Crossroads
At the intersection of the main alley and two side lanes, the view opens up to a large cross-shaped plaza. Use a 35mm lens to capture the symmetry. Stand exactly in the center and shoot towards any of the four arms. The leading lines of the pathways draw the eye deep into the scene. Angle your camera slightly upward to include the overhanging branches – they create a natural frame.
- Best lighting: Soft overcast days or 4:00 PM to 5:30 PM.
- Recommended aperture: f/5.6 to keep the foreground and background in focus.
- Pro tip: Bracket your exposures (HDR) to preserve highlights in the white stones.
3. Eva Peron's Mausoleum – The Iconic Shot
No list of Recoleta Cemetery photo spots would be complete without the final resting place of Eva Peron. Located deep in the family Duarte vault, it is a small, unassuming marker compared to the surrounding tombs. The vibe here is reverent, often crowded. To get a clean shot, visit on a weekday morning between 10:00 AM and 11:00 AM.
Spot 3: The Bronze Plaque
The polished bronze plaque with "Evita" engraved is the focal point. Use a macro lens (90mm or higher) to capture the texture and reflection. Lighting: use a reflector or wait for a cloud to soften the sun – direct sunlight creates harsh glare. Composition: frame the plaque with the wrought-iron gate behind it. Include a few flowers left by visitors to tell a story. Camera settings: aperture f/2.8 for a shallow depth of field, ISO 200, shutter speed 1/250 sec.
Pro Photography Tips: Do not use flash – it will ruin the mood and create unflattering reflections. Instead, push your ISO to 400 or 800 if needed.
4. The Alley of the Cats – Whimsy and Decay
Head to the northern section, near the chapel ruins. This narrow walkway is lined with cat sculptures – some playful, some mournful. It is one of the most unique shooting spots in the entire cemetery. The vibe is quirky and melancholic. Look for the black cat statue with green patina eyes – it photographs beautifully against the peeling plaster walls.
Spot 4: The Black Cat on the Pedestal
Kneel down to the cat's eye level. Use a 50mm lens at f/2.8 to blur the background of crumbling tombs. Lighting: side light from the late morning sun creates texture on the cat's fur. Composition: include the mossy cracks in the wall behind for contrast. Direction: from the central plaza, take the left path, then the second right – you will see the cats about 50 meters down.
- Camera settings: aperture priority, EV -0.3 to avoid overexposing the white stone.
- Best time: 10:00 AM to 12:00 PM for side lighting.
- Tip: Use a low ISO (100) and a tripod if you want to capture fine details of the patina.
5. The Dome and Skyline – Above the Graves
Near the back wall of the cemetery, a small staircase leads to a balcony that offers a bird's-eye view of the mausoleums and the Buenos Aires skyline beyond. This is a fantastic way to capture the scale of the necropolis. The dome of the chapel and the distant obelisk make powerful silhouettes at sunset.
Spot 5: The Balcony Overlook
Climb the rusted iron staircase (watch your step) to a narrow platform. Use an ultra-wide lens (14mm) to capture the full sweep. Composition: place the dome on the right third, with rows of tombstones leading into the distance. Lighting: golden hour is perfect – the warm light paints the roofs and highlights the ornate cupolas. Camera settings: f/11 for maximum depth of field, ISO 100, shutter speed 1/60 sec (use a tripod).
If you want a more dynamic frame, wait for clouds to pass over the sun, creating moving shadows across the cemetery. The vibe is peaceful, almost meditative – the perfect counterpoint to the crowded entrance.
6. Art Deco and Gothic Tombs – The Architectural Details
The cemetery is a museum of architectural styles. Two particular sections – the Greek-inspired mausoleums near the east wall and the Gothic tombs along the west path – are a feast for detail photographers. These are among the most underrated Recoleta Cemetery photo spots for close-up work.
Spot 6: The Gothic Crucifixion
On the west side, a tall Gothic mausoleum features a life-sized crucifixion scene in white marble. Stand directly in front and use a telephoto lens (85-135mm) to compress the perspective. The intricate folds of the robe and the facial expression of Christ are stunning. Lighting: early morning light wraps around the statue from the left. Use spot metering on the face to avoid blowing out the white stone. Composition: frame the statue within the pointed arch of the tomb – a natural picture frame.
- Recommended aperture: f/4 to isolate the statue from the background.
- ISO 200, shutter speed 1/200 sec.
- Tip: Shoot in black and white mode in-camera (or convert later) – the high contrast marble looks timeless.
Spot 7: The Greek Column Detail
Near the east wall, look for a broken column topped with an urn. This is a classic symbol of life cut short. Use a macro lens to capture the fluting of the column and the ivy that has grown over it. The lighting is best in the late afternoon when the sun rakes across the surface, emphasizing every groove. Vibe: melancholic but beautiful. Composition: place the column on the left third, with the urn off-center to the right.
7. The Chapel Ruins – Texture and Light
Tucked away in the southeastern corner, the abandoned chapel is a goldmine for texture photography. The roof is partially collapsed, allowing shafts of light to pierce through the dust. This is one of the most atmospheric photo opportunities in the cemetery. The vibe is haunting and ethereal.
Spot 8: The Sunbeam and the Altar
Enter through the broken doorway (it is open to visitors). Wait for a beam of sunlight to hit the remaining altar stone. Use a 24-70mm lens at 35mm. Set your white balance to "shade" to warm up the cool stone tones. Aperture f/5.6, ISO 400 (since the chapel is dim), shutter speed 1/30 sec. Use a tripod or brace your camera on a column. Composition: include the fallen wooden beam in the foreground to add depth.
Pro Photography Tips: Use a small flashlight to paint light on the altar if the sunbeam is too weak. A 2-second exposure with light painting can create a magical effect.
8. The Iron Cross and the Ivy – Nature Reclaimed
On the northern boundary wall, a large iron cross is nearly swallowed by climbing ivy. This spot is easy to miss – it sits behind a large mausoleum. The contrast between the cold metal and the green leaves is striking. It is a perfect spot for a portrait or a detail shot.
Spot 9: The Mass of Green and Metal
Use a 100mm macro lens to focus on the ivy leaves intertwining with the cross. Lighting: open shade (avoid direct sun) – the diffused light brings out the green saturation. Camera settings: f/4 to blur the background ivy, ISO 200, shutter speed 1/160 sec. For a wider shot, step back to 50mm to include the surrounding tombstones. The vibe is quiet, with a feeling of nature slowly reclaiming man's monuments.
9. The Angel of Sadness – Emotion in Stone
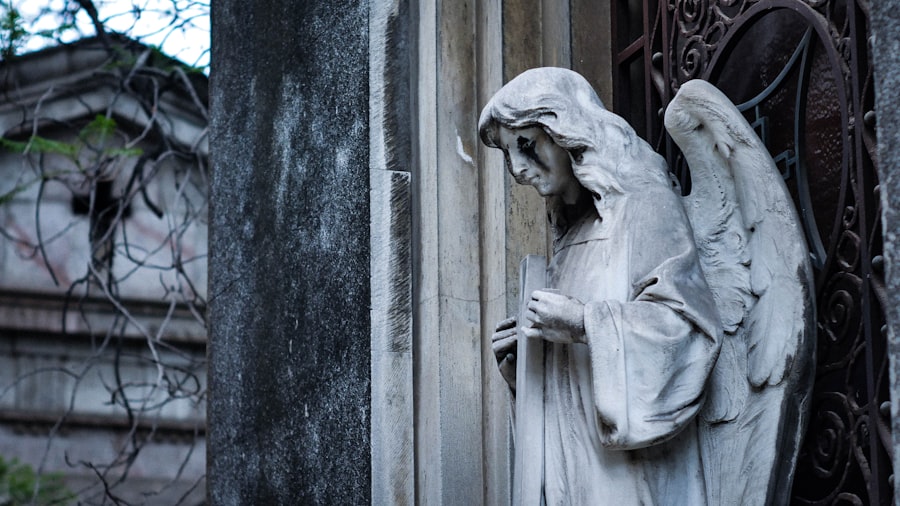
Close to the main entrance, on the left, a weeping angel stands over a small family vault. This is one of the most photographed statues in the cemetery, and for good reason. The expression of grief is palpable. This is a classic Recoleta Cemetery photo spot for emotional storytelling.
Spot 10: The Tear-Filled Eye
Get as close as you can (without touching the statue) and use a 135mm lens to capture the angel's face. Focus on the tear carved into the cheek. The best lighting is a soft, overcast sky – it eliminates harsh shadows on the face. If the sun is out, use the shadow of a nearby tree to soften the light. Composition: include the wing behind the face to create a diagonal line. Camera settings: aperture f/2.8, ISO 100, shutter speed 1/250 sec. Shoot a burst of frames to ensure sharpness – even slight wind can move leaves and cause blur.
- Bonus: Use a low angle to make the angel look larger than life.
- Vibe: solemn, respectful. Keep your distance to honor the space.
- External reference: Lonely Planet's guide to Buenos Aires highlights this statue as one of the top ten cemetery attractions.
10. Final Practical Tips for Your Recoleta Cemetery Photo Walk
To make the most of your visit, plan at least two hours. The cemetery opens at 7:00 AM and closes at 5:30 PM. Weekdays are less crowded. Bring water, a wide lens, a telephoto, and a macro lens if you have one. A tripod is allowed but be respectful of visitors. For more inspiration, check TripAdvisor reviews of Recoleta Cemetery – many photographers share their favorite angles. Remember, the best Recoleta Cemetery photo spots are not just about the monument – they are about the light, the shadows, and the stories etched in stone. Now go out and capture them.
Frequently Asked Questions
What makes Recoleta Cemetery a top spot for photography?
Recoleta Cemetery's stunning architecture, intricate mausoleums, and rich history create an unparalleled backdrop for both portrait and street photography.
When is the best time to take photos at Recoleta Cemetery?
Early morning or late afternoon provides the best natural light, casting dramatic shadows and highlighting the ornate details.
Are there any photography restrictions in the cemetery?
Photography is generally allowed for personal use, but flash and tripods may be restricted; check the official guidelines before your visit.
What are some must-photograph spots in the cemetery?
Notable spots include Eva Perón's tomb, the wandering cat statues, and the picturesque central dome areas.
How can I avoid crowds in my photos?
Visit on weekday mornings or during less popular hours, and wait for brief moments between tourist groups.
💬 Comments (0)
No comments yet. Be the first!